User Manual
Quick Start: Create a Video in 5 Minutes
💡 For first-time users. Follow the steps in order to produce your first short video.
Here is the overall workflow. Follow these 4 steps to make a video:
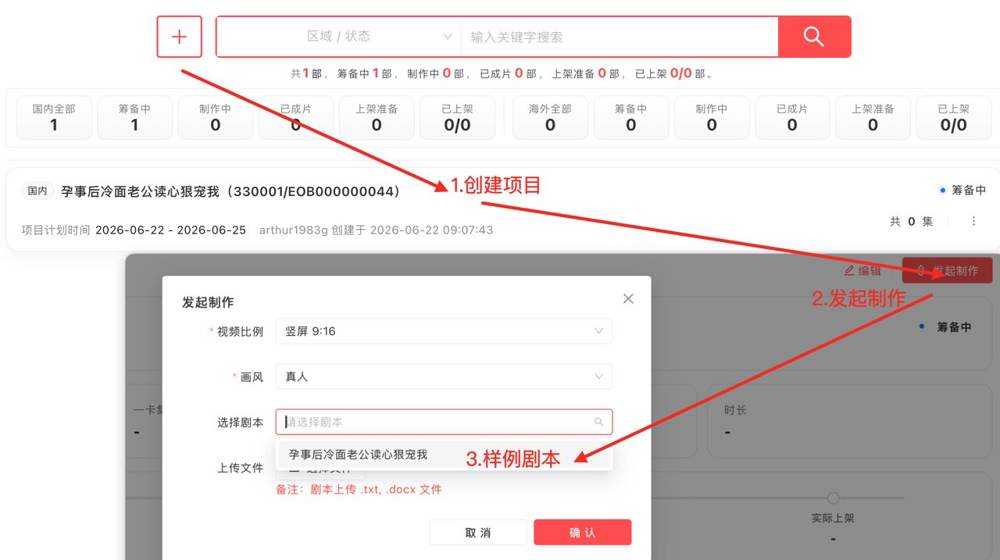
Step 1: Create a Project
Click 【+ New】 at the top → fill in the project info → click 【Save】 and the project is created.
Step 2: Import Script
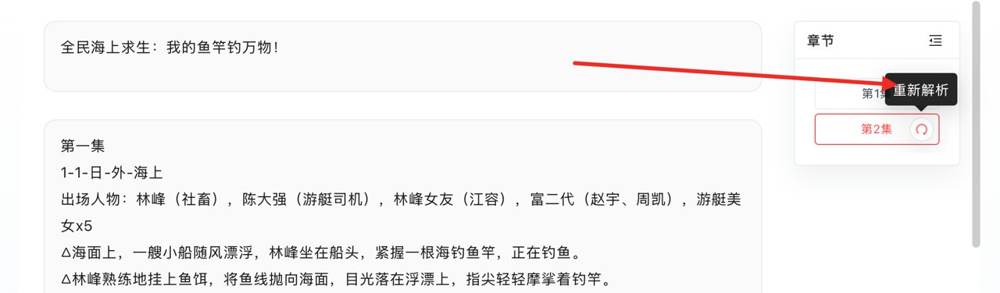
Enter the project → click 【Script Content】 → the system automatically validates the format → if it fails, you can manually edit and fix it.
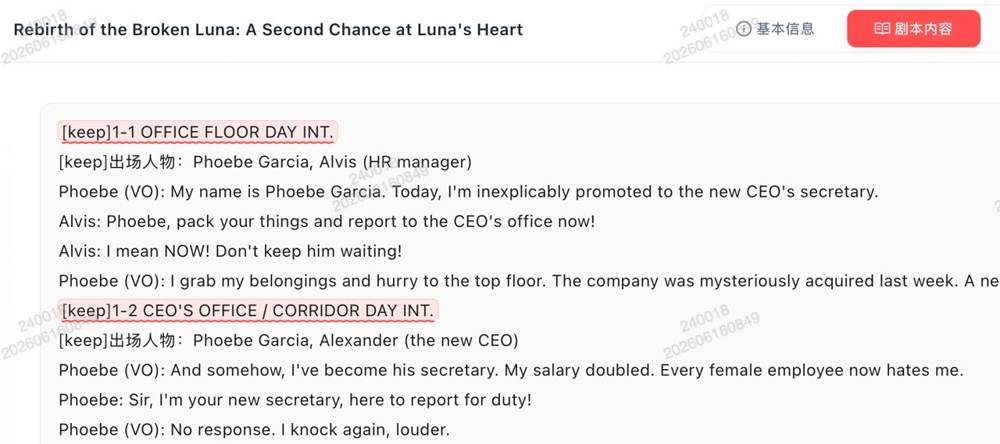
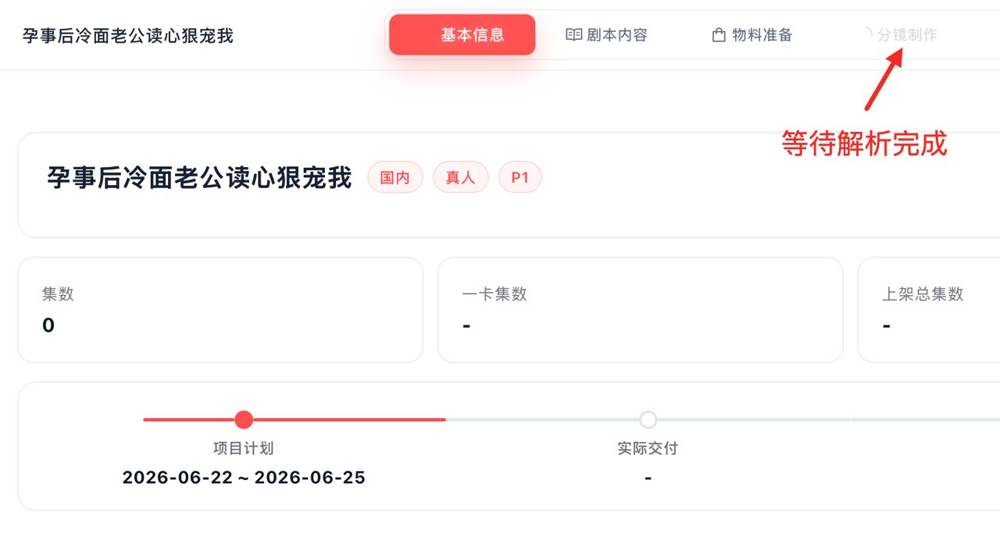
💡 If script parsing fails, it will automatically re-parse. You can also manually select episodes to re-parse.
- IX. Team & Collaboration
- X. Top-up & Management
Step 3: Generate Images
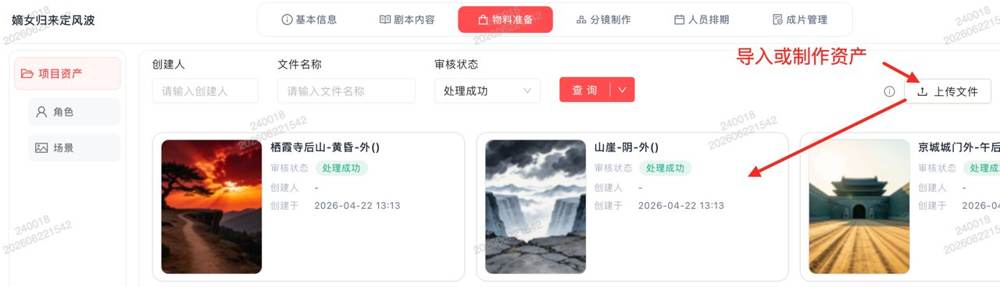
Go to Material Preparation → select Character/Scene → click 【Generate Image from Prompt】 → choose a model → enter the prompt → generate.
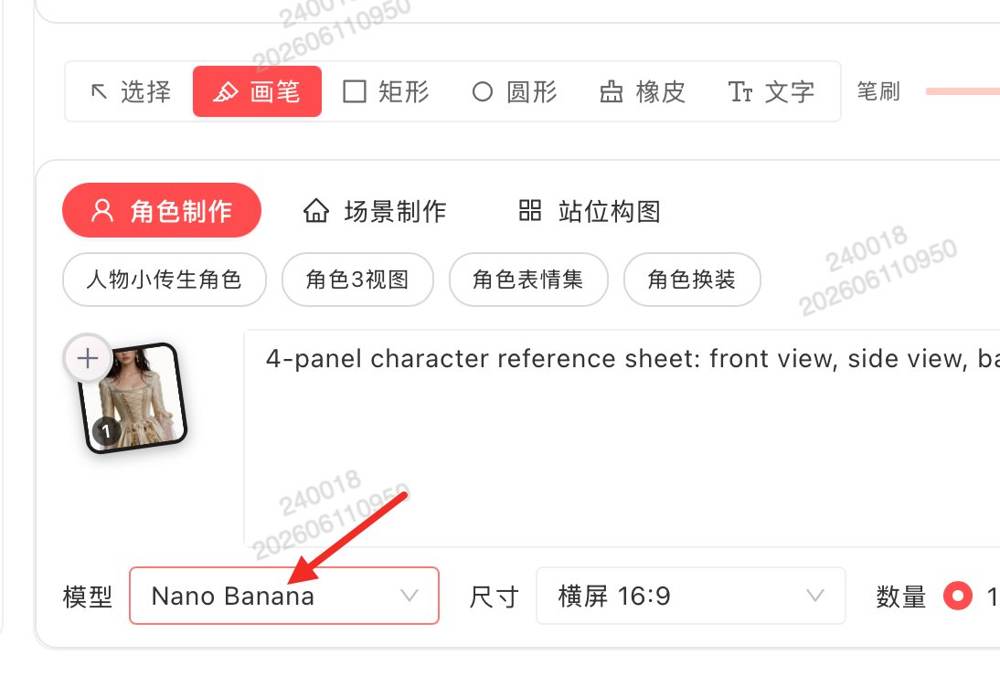
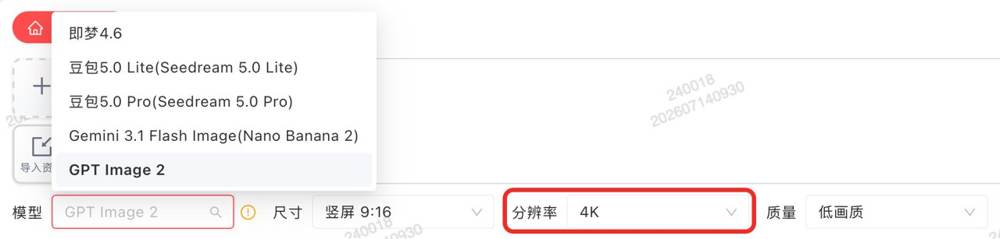
- Main image models Nano Banana 2 and GPT Image 2 now support 4K resolution for clearer output
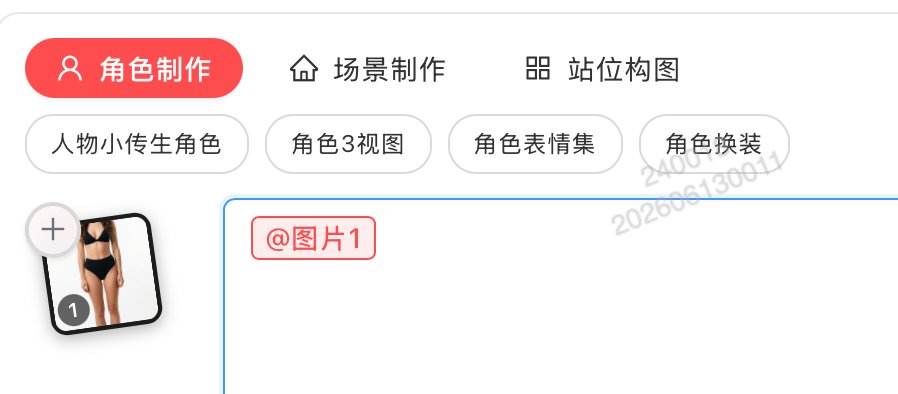
💡 Tip: Type
@in the prompt to reference existing asset images.
Step 4: Generate Video
Go to Storyboard Production → claim the task → import assets → generate prompts → set video duration → click 【Generate Video】.
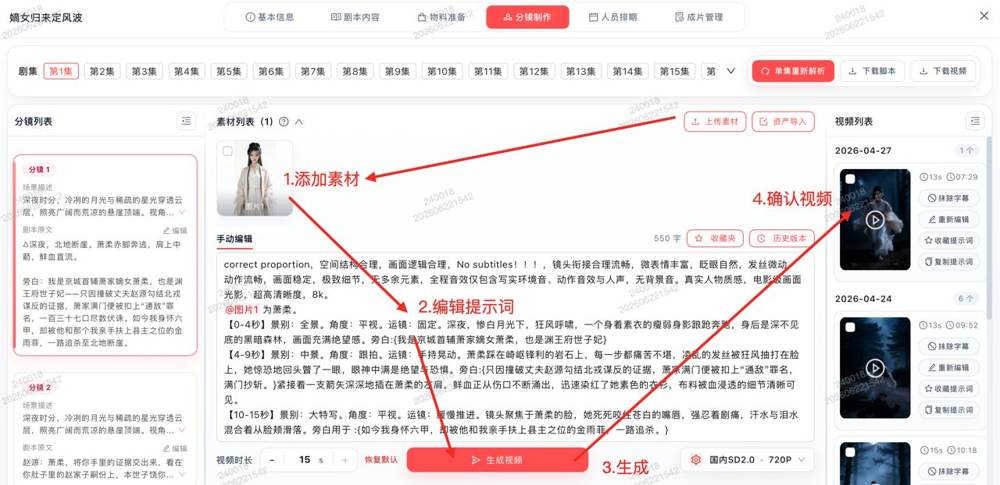
💡 Video duration: generally add +2 seconds to the storyboard’s base duration.
I. Project Management
1.1 Create a New Project
- Click 【+ New】 at the top → the “New Project” dialog pops up
- Fill in the project info and click 【Save】 → project created
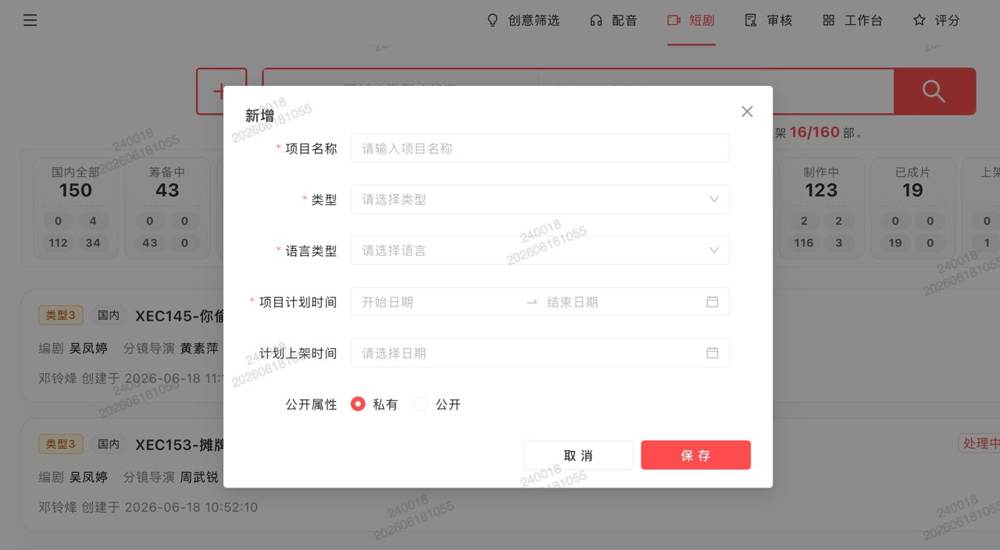
- Three creation modes: Upload Script & Parse, Reference Existing Script, Free Creation (no-script mode)
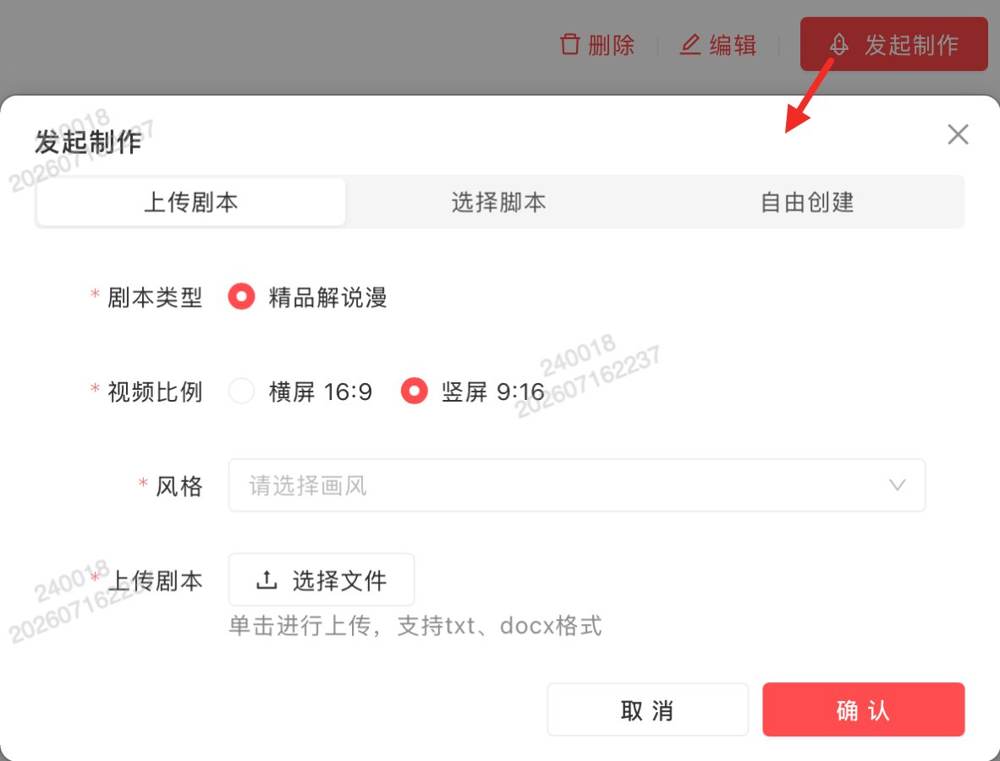
- No-script mode suits free creation when inspiration comes first
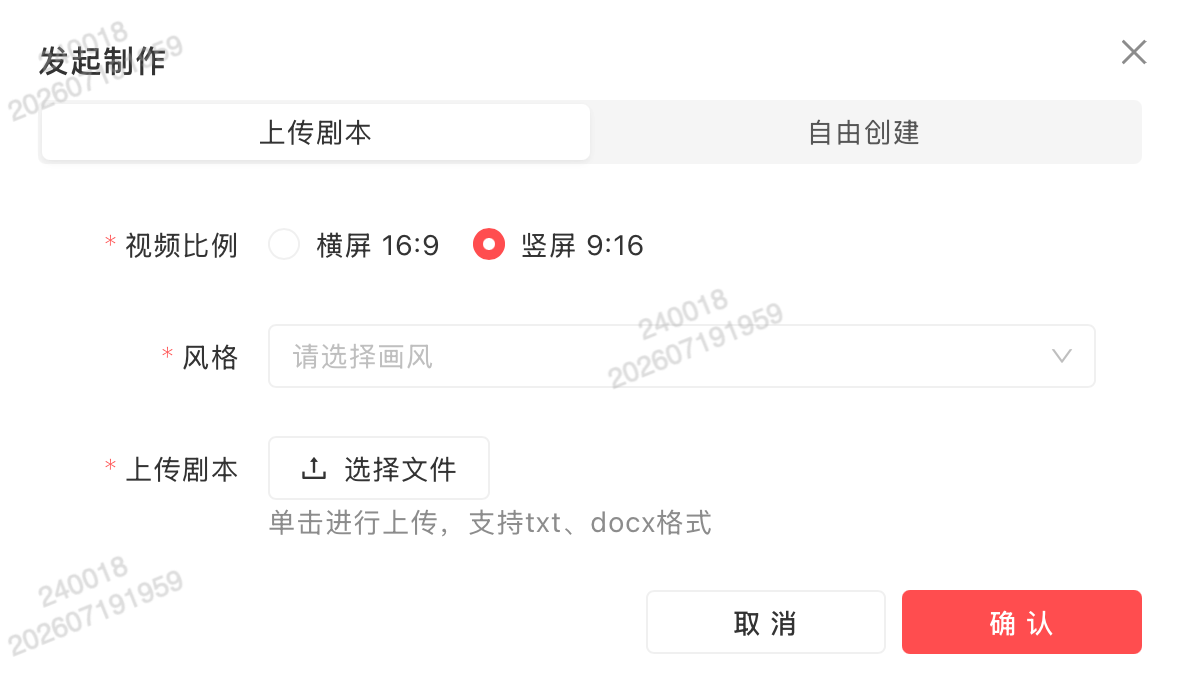
- More intuitive video ratio icons shown during creation — pick the ratio at a glance
💡 Mode selection advice: have a complete script → choose “Upload Script & Parse”; only have a story outline → choose “Reference Existing Script”; only have inspiration and want to draw first → choose “Free Creation (no-script mode)”.
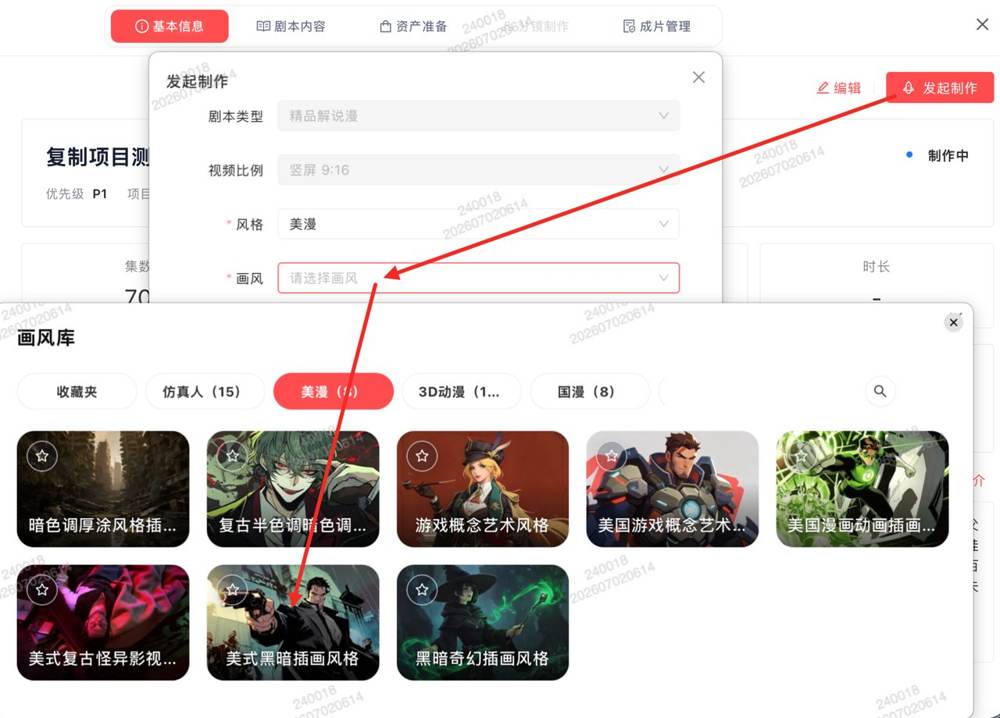
1.2 Duplicate Project to Change Art Style
💡 After creating a project, you can duplicate it and change the art style for multi-style production.
💡 Practical tip: after duplicating, change the protagonist’s art style first → generate images to confirm the effect → then roll it out to the whole show. Avoid changing everything at once, which can make styles inconsistent.
1.3 Join a Project Group
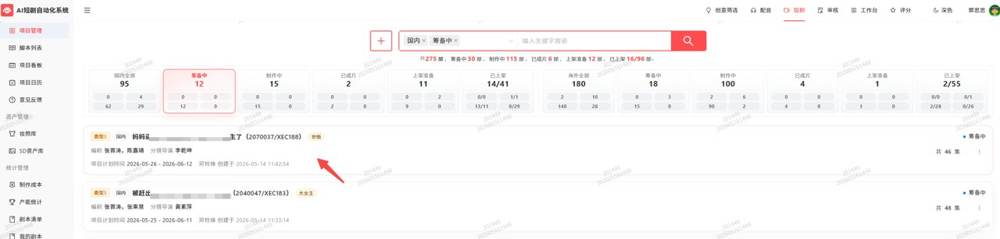
💡 The following is done by the group leader
- Select the project → click 【Team Scheduling】
- Click 【Add】 → enter the member’s name + select 【AI Short Drama - Producer】
- Click 【Save】 → the member joins the project group

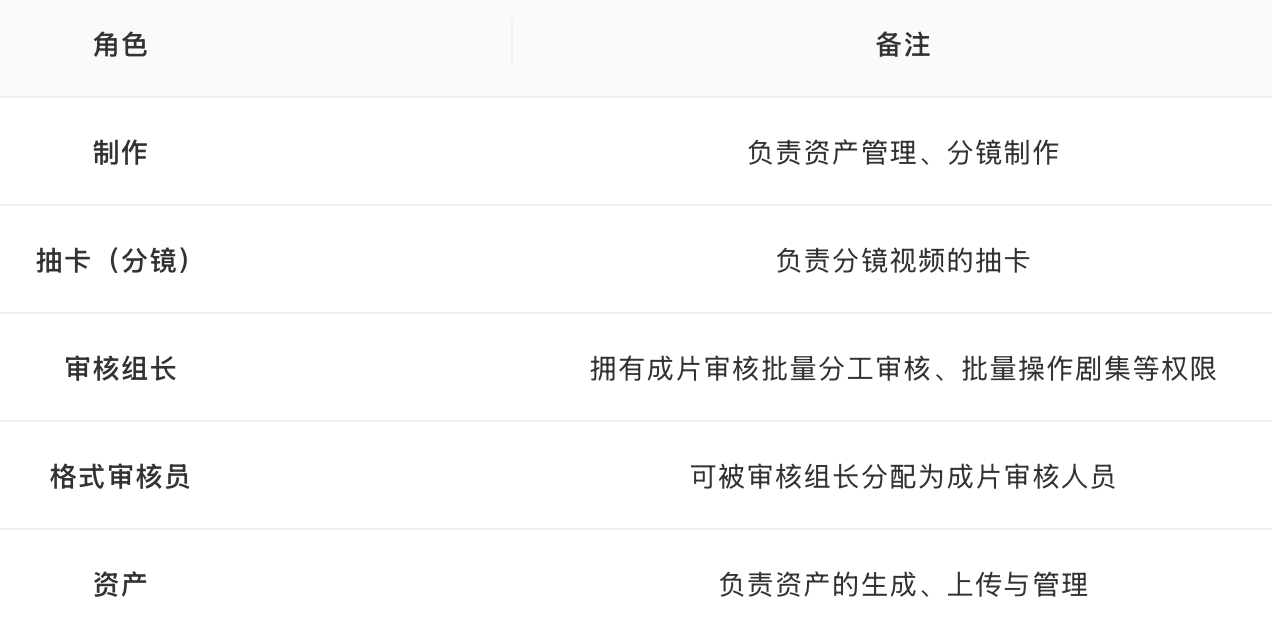
Preset roles:
- Production: responsible for asset management and storyboard production
- Card Draw (Storyboard): responsible for drawing/generating storyboard videos
- Review Lead: has permissions for batch assignment of final-video reviews and batch episode operations
- Format Reviewer: can be assigned as final-video reviewer by the Review Lead
- Assets: responsible for asset generation, upload and management
II. Script Management
2.1 View the Full Script
Click 【Script Content】 to read the full script by chapter.
2.2 Format Validation & Editing
- The system automatically performs format validation; if it fails, you can edit and fix it
- Supports directly editing the script content and saving
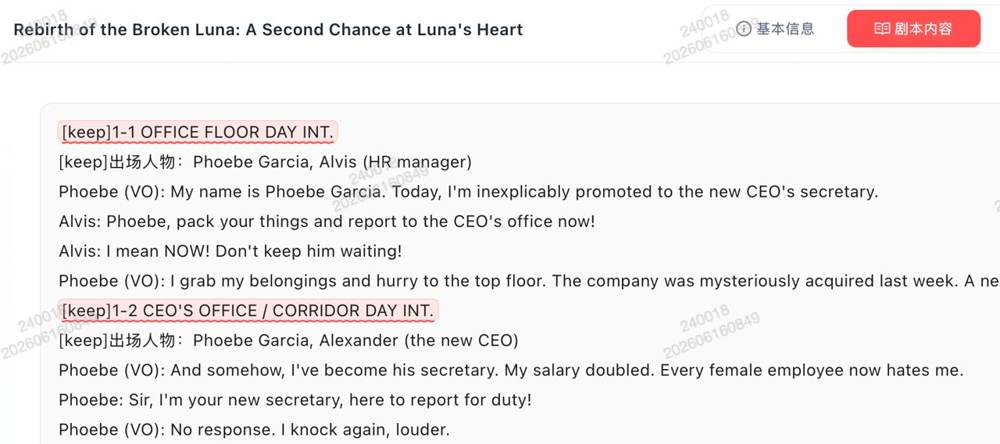
- If script parsing fails, it will automatically re-parse; you can also manually select episodes to re-parse
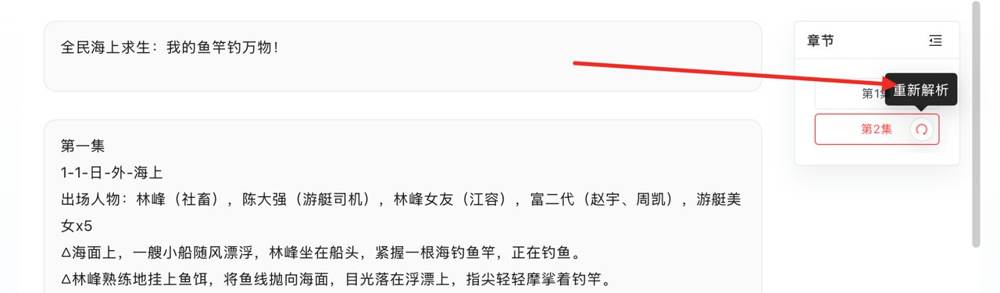
💡 Script format example (standard format reference):
Scene: Imperial Hall · Day
Empress: Your Majesty, I have a request.
Emperor: Speak freely.
Each scene starts with “Scene: Location · Time”. Character names are marked before their dialogue lines, and dialogue is written line by line. — Content matching this format passes validation.
III. One-Click Redraw
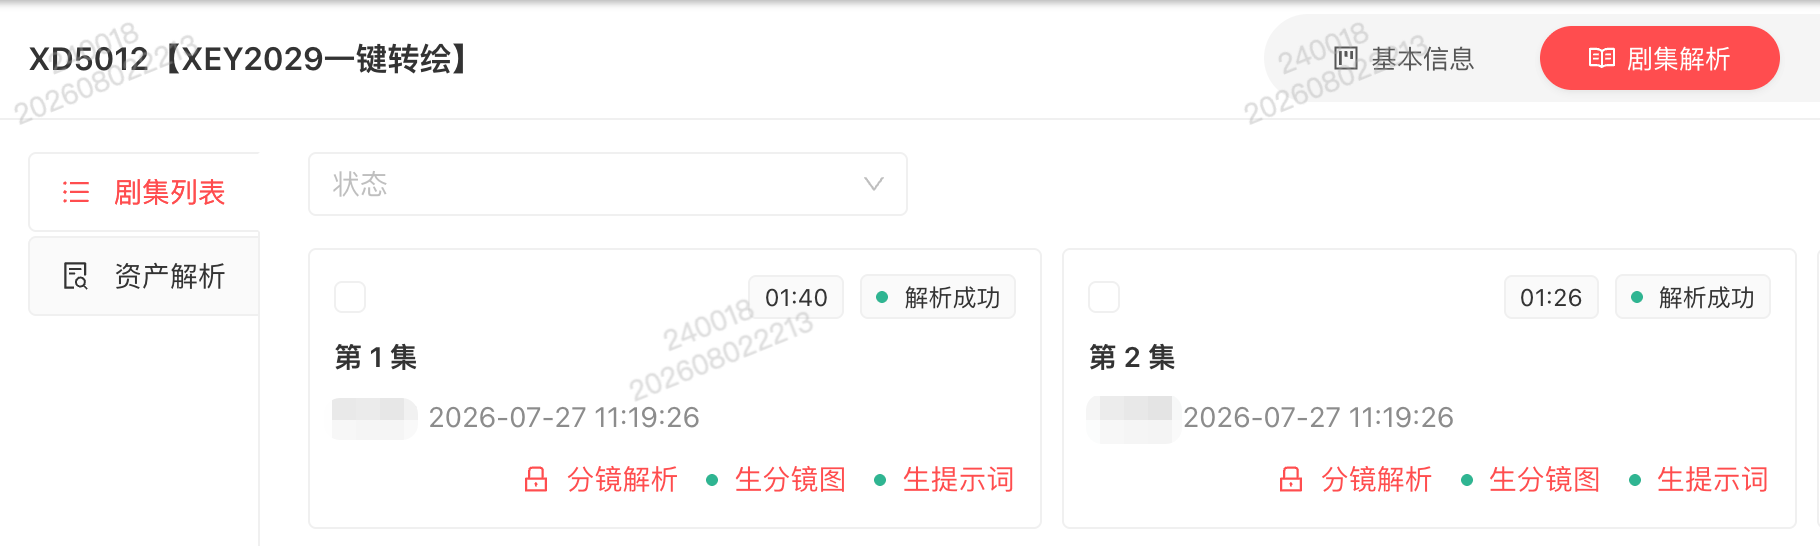
3.1 Episode Parsing
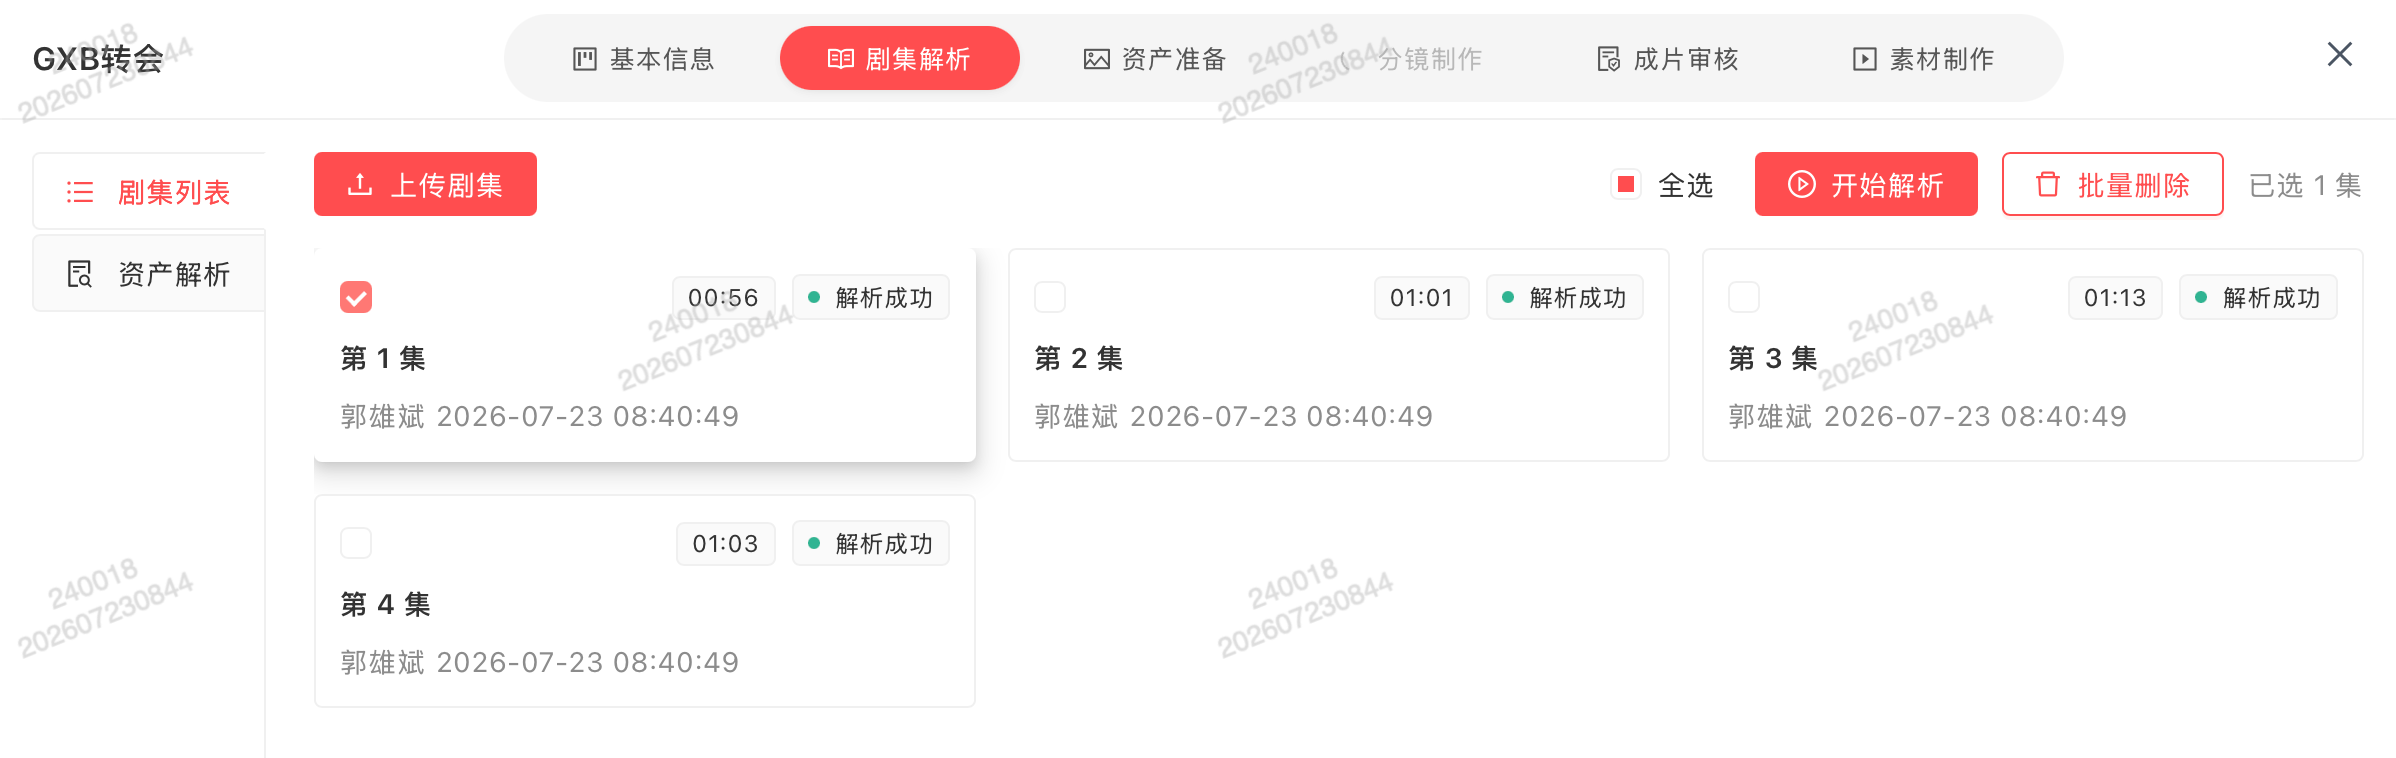
Click 【Upload Episodes】 to batch-upload videos
Click 【Start Parsing】 to extract character, scene and prop assets. The video enters a “parsing” state and takes about 5 minutes.
3.2 Asset Parsing
Click the 【Asset Parsing】 menu to view the extracted character, scene and prop assets
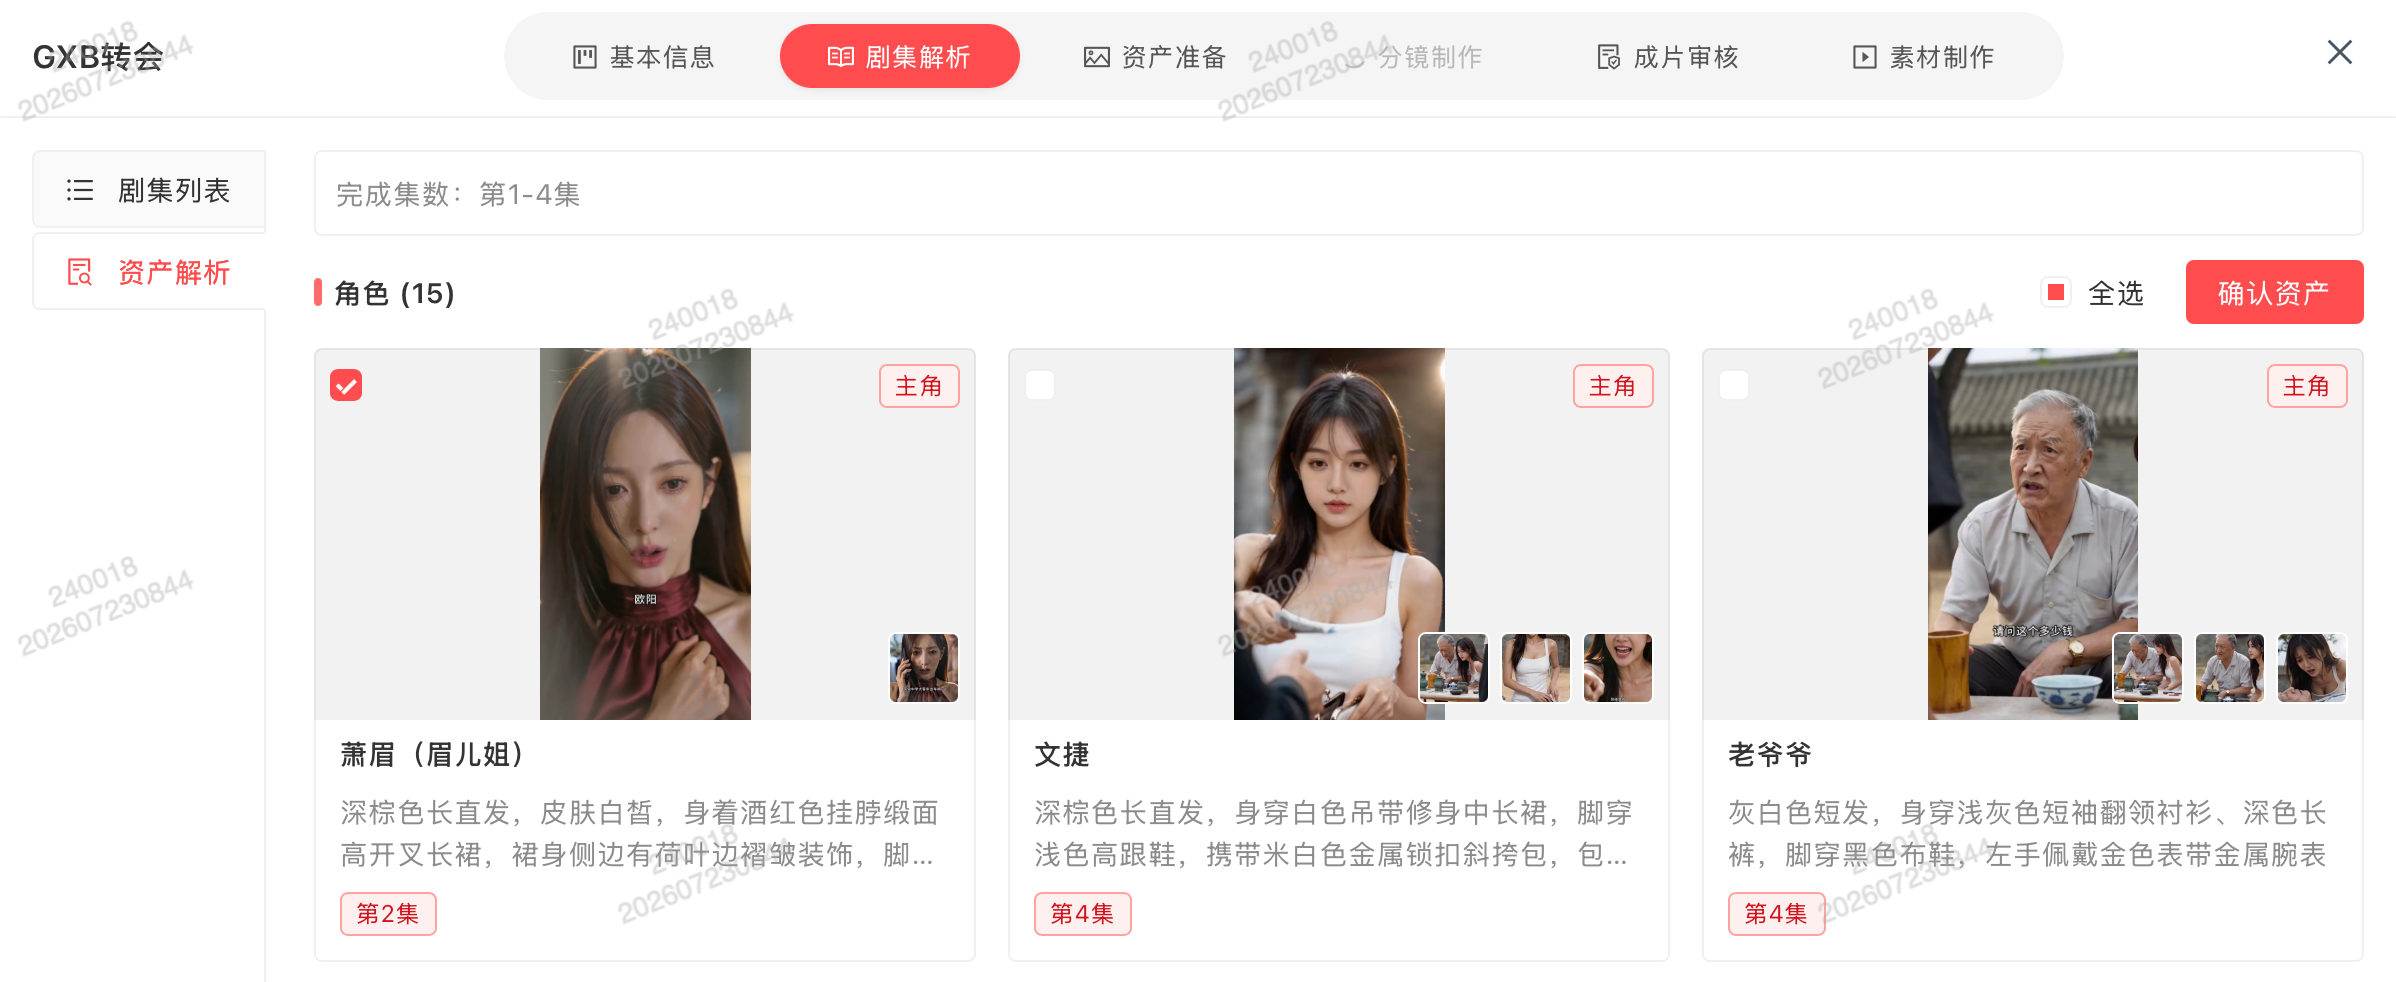
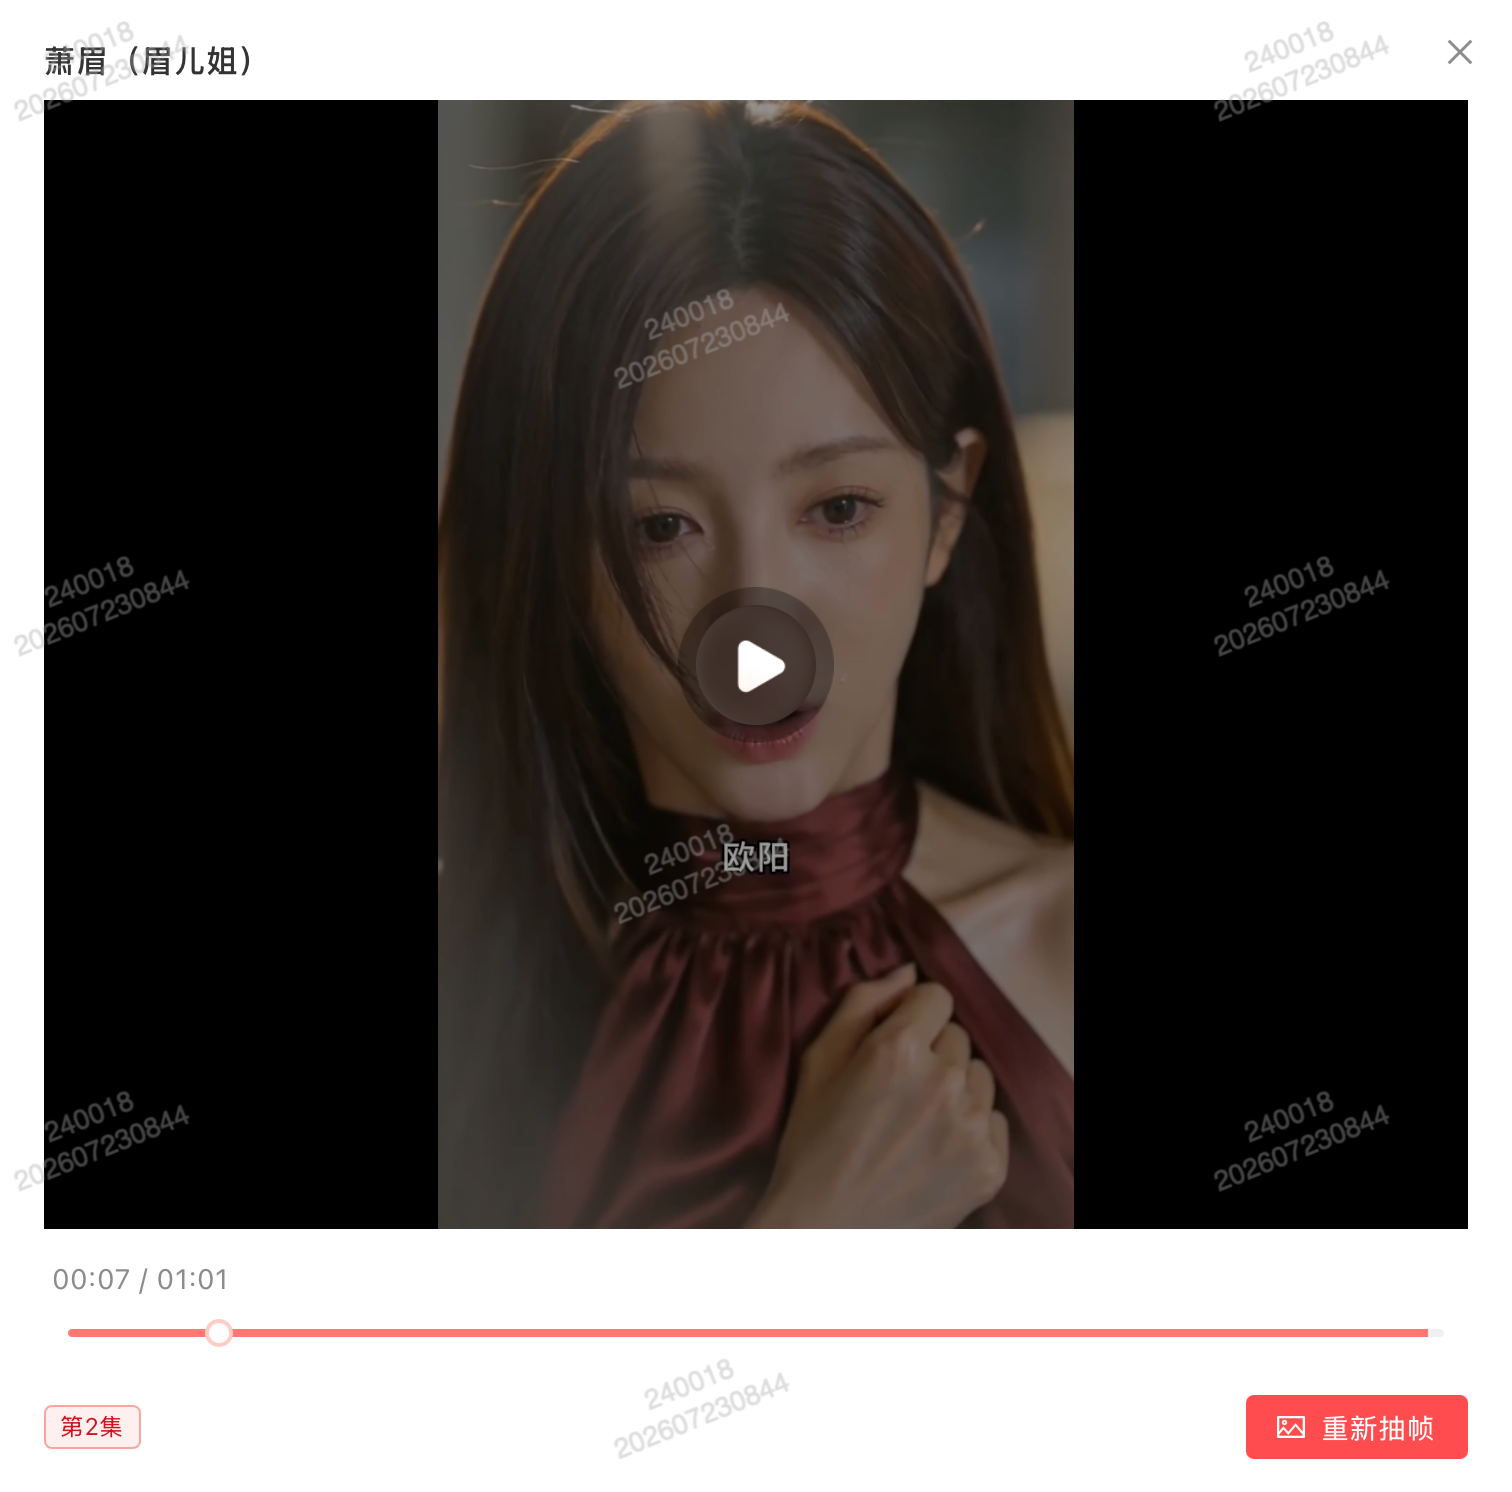
Click 【Thumbnail】 to view all reference frames. If unsatisfied, click 【Re-draw Frame】
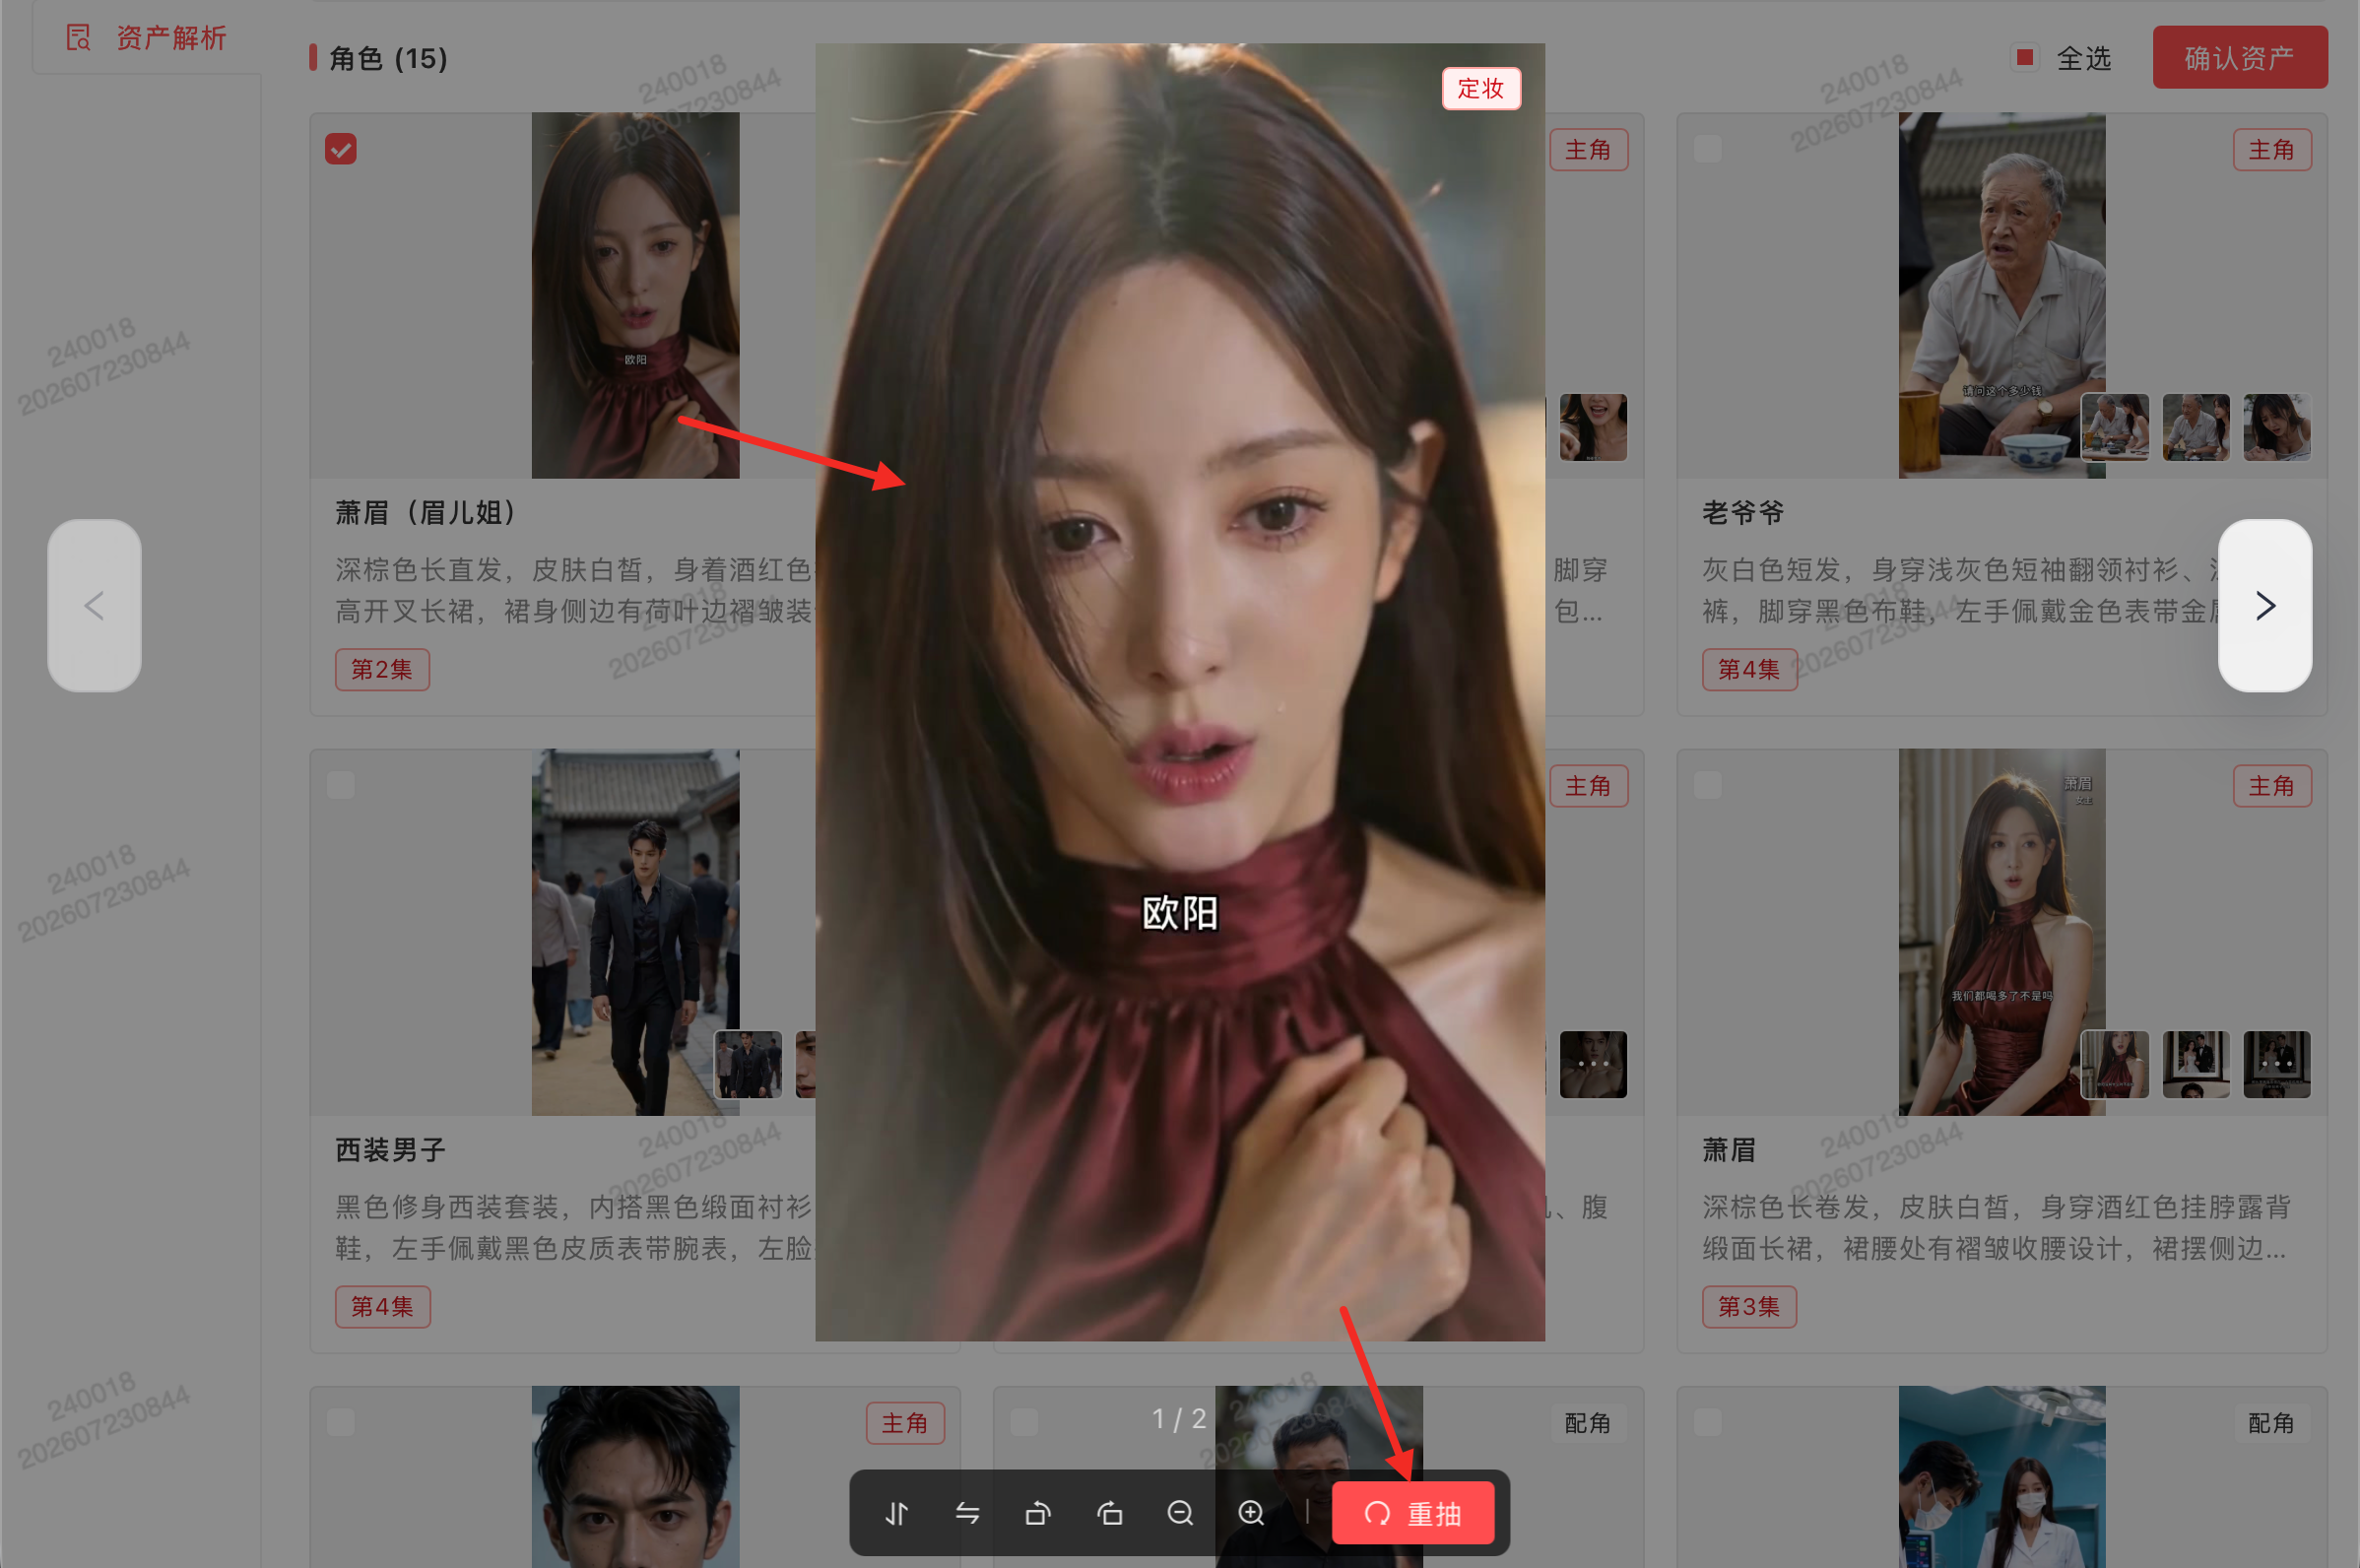
Clicking 【Re-draw Frame】 opens the original video at the corresponding timestamp. Drag the progress bar to find a better frame, then click 【Re-extract Frame】 to save
3.3 Asset Merge
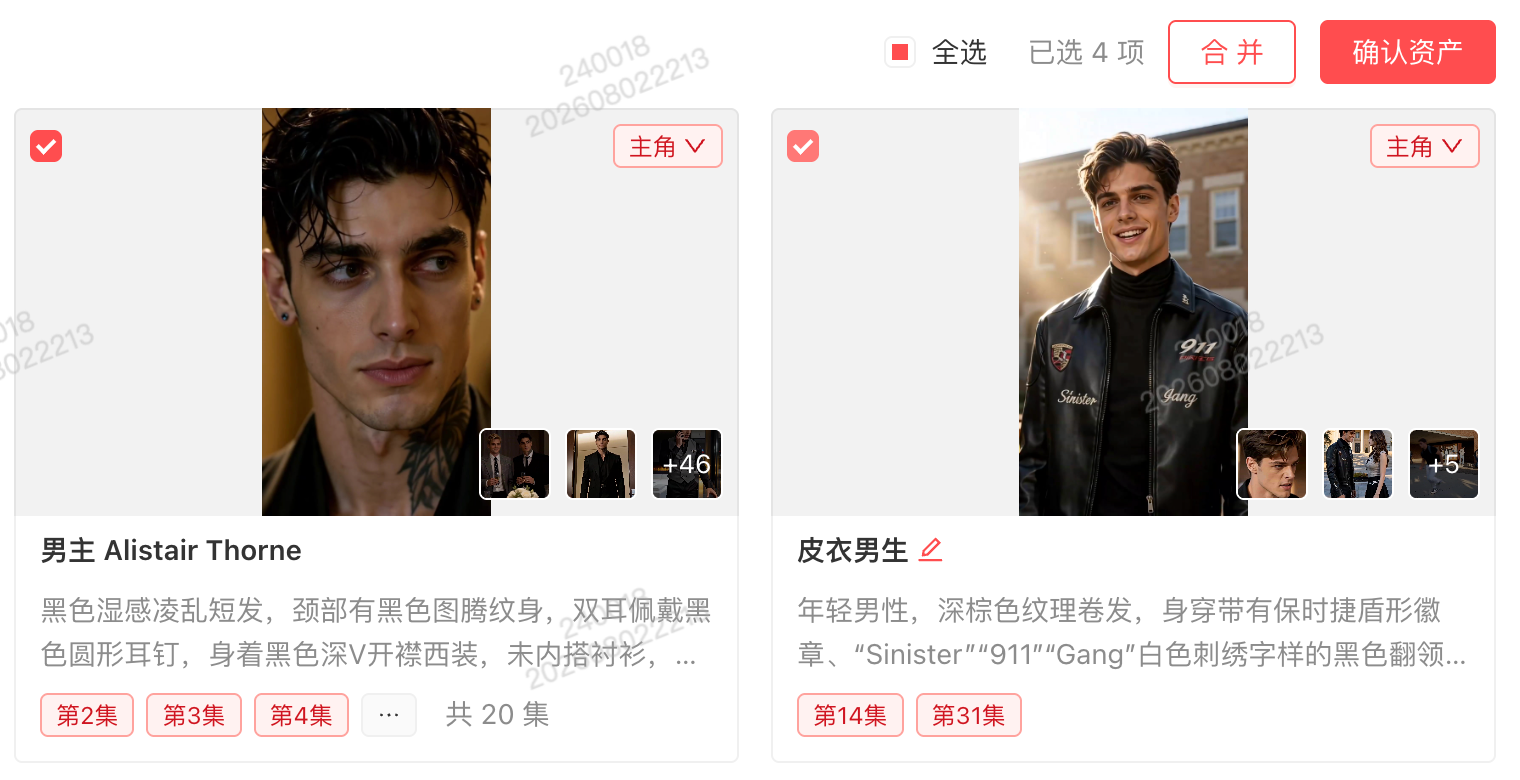
Select multiple asset cards and click 【Merge】 to merge similar/duplicate assets
3.4 Asset Push
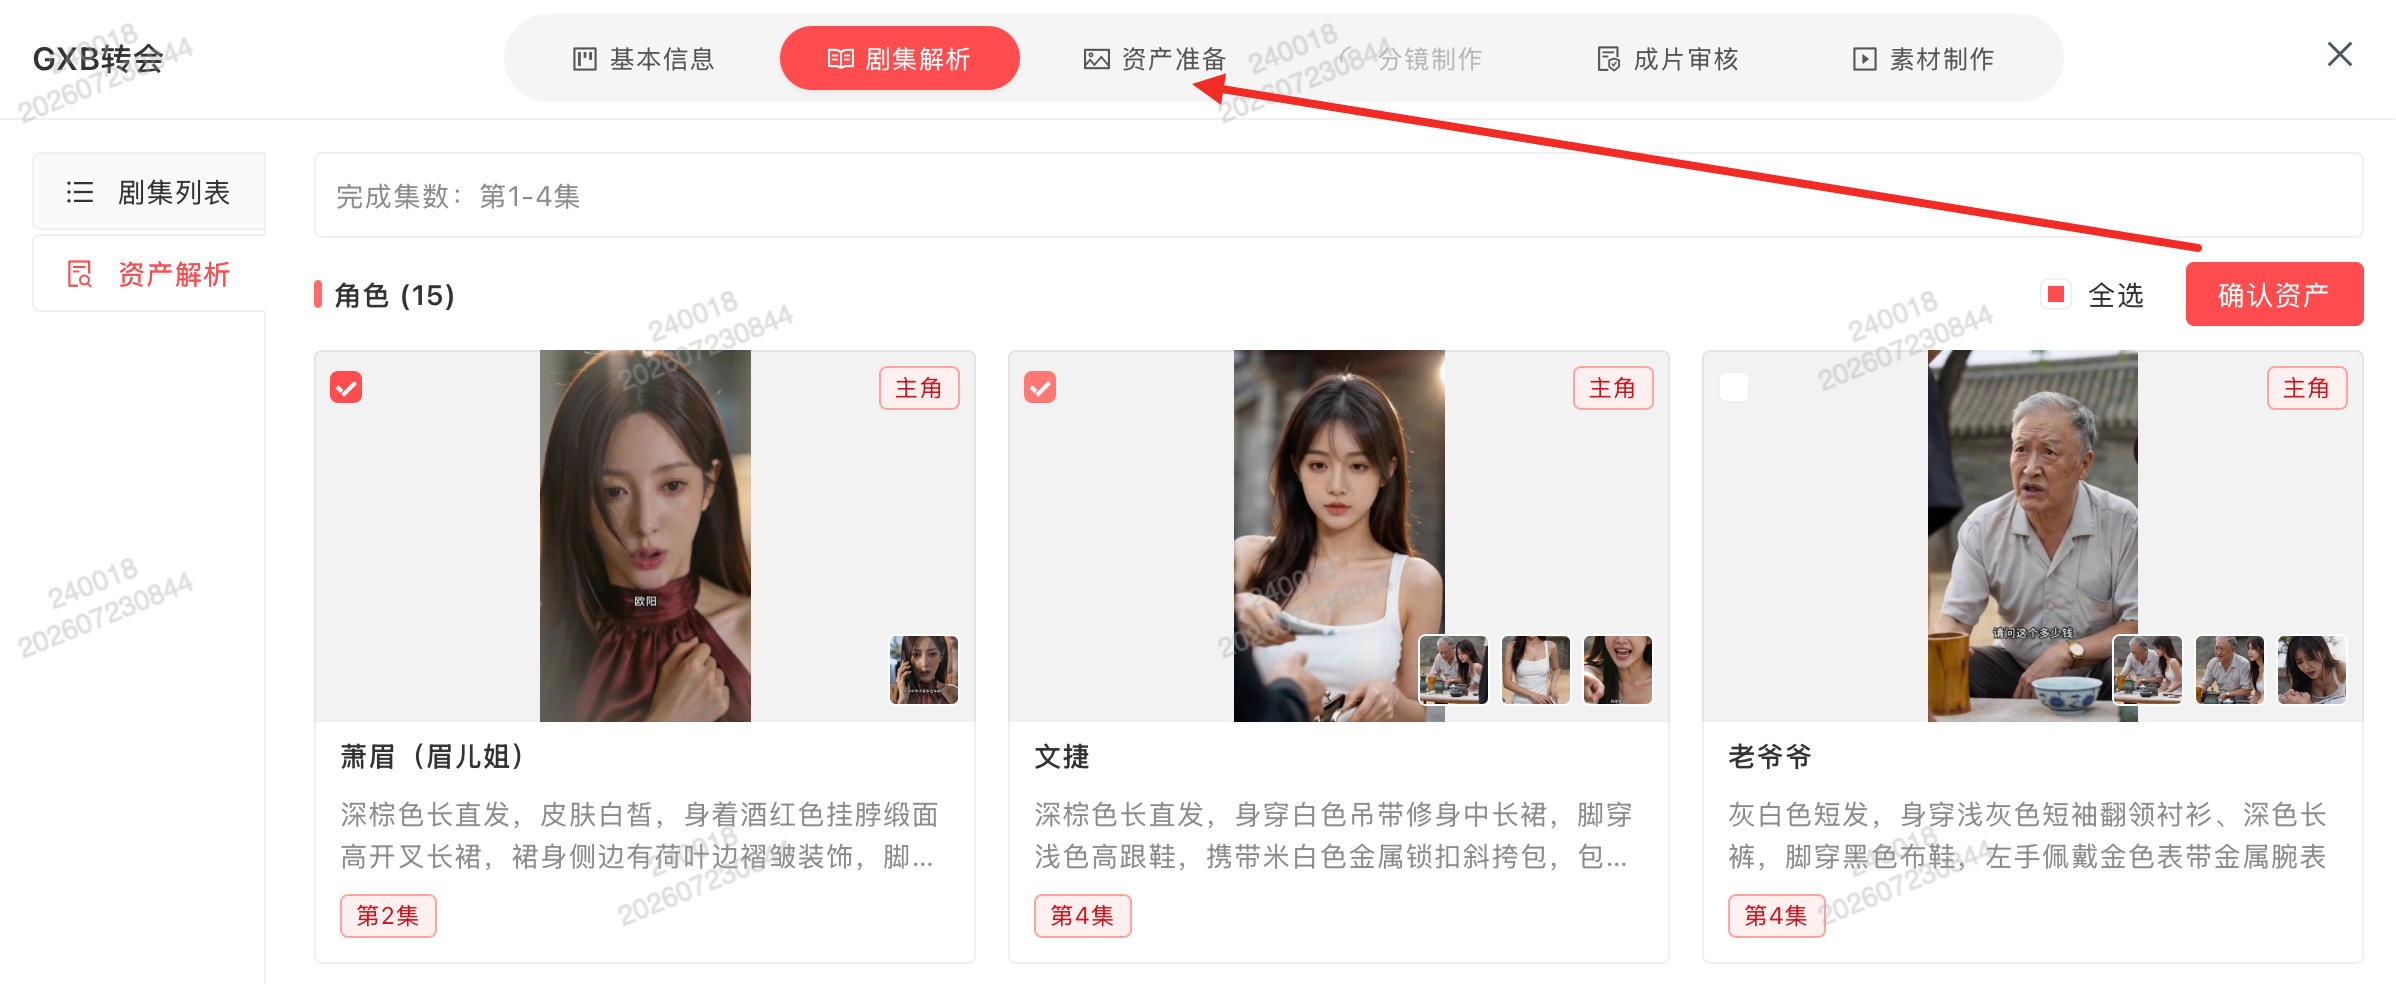
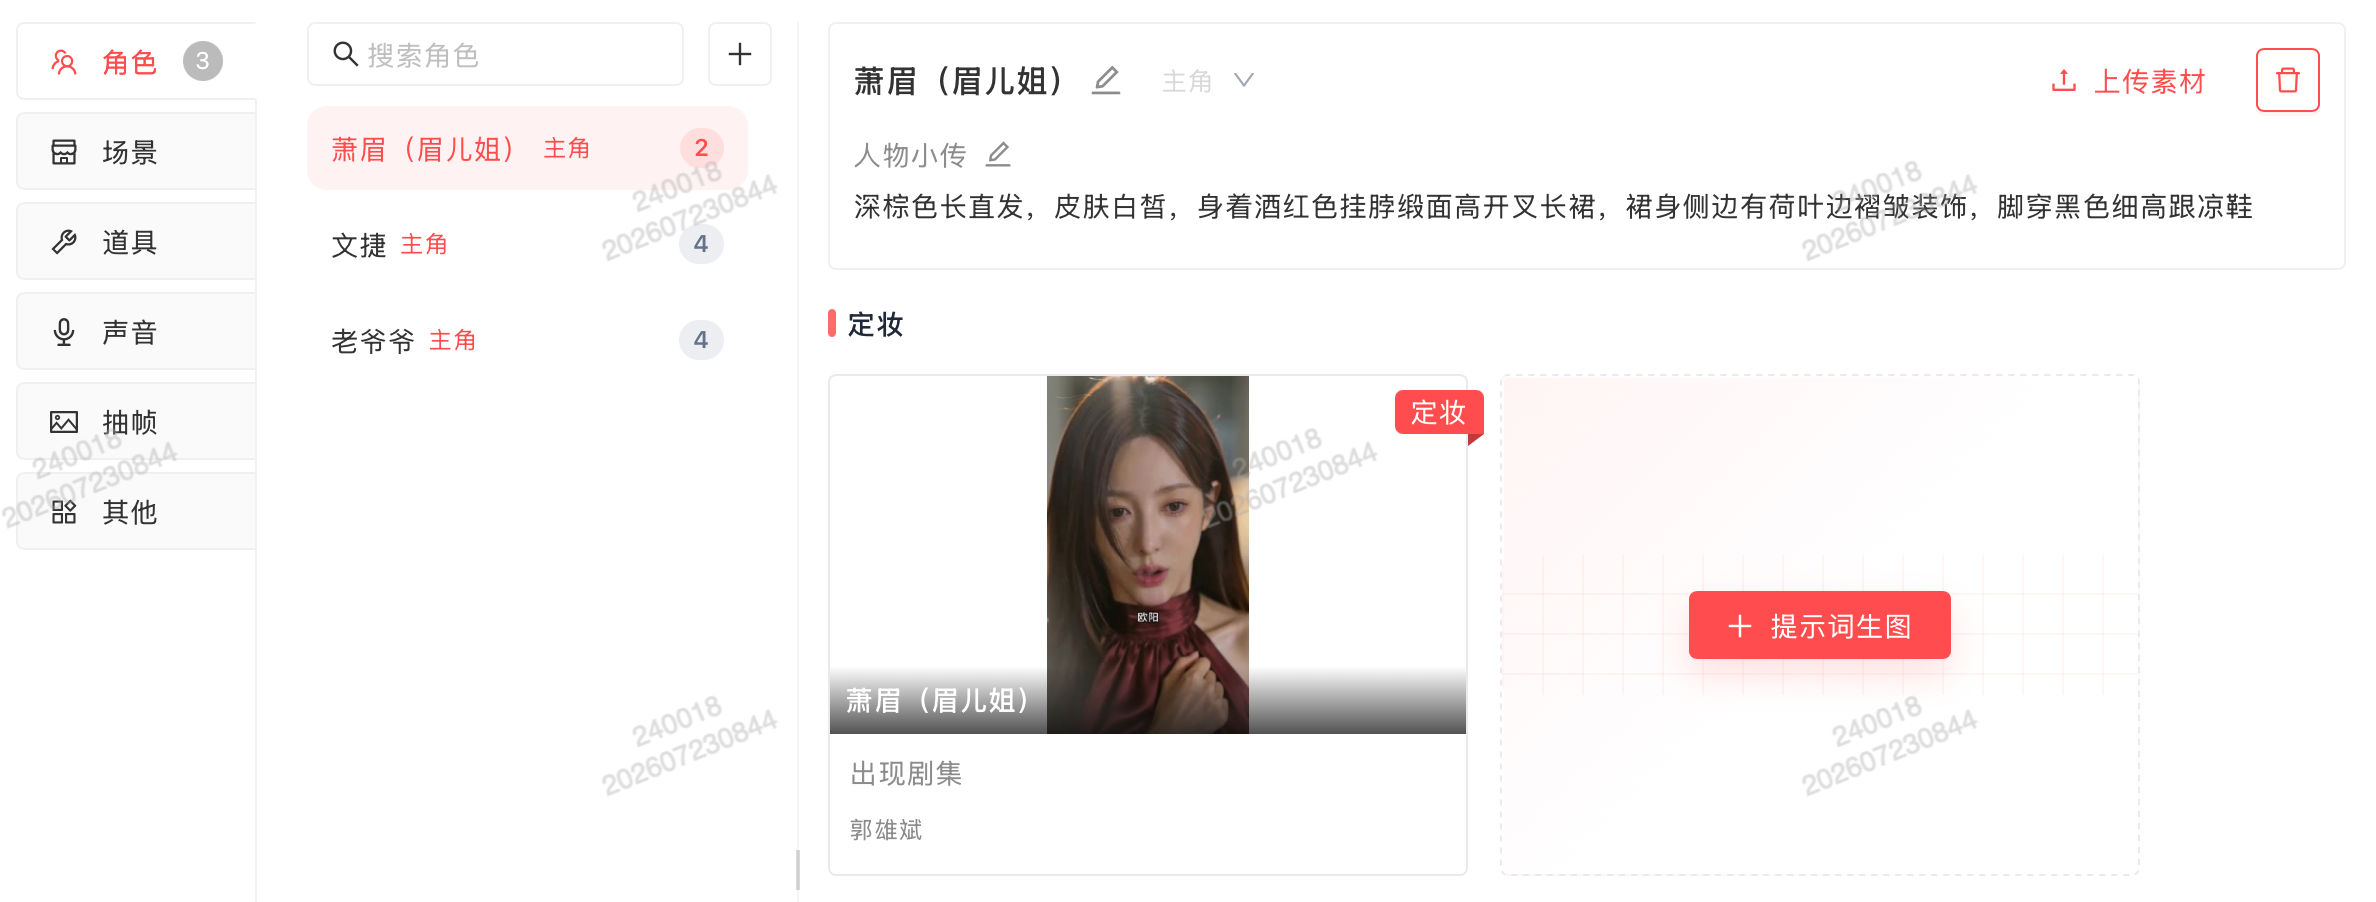
Tick asset cards and click 【Confirm Assets】 to push them to Material Preparation for asset re-drawing
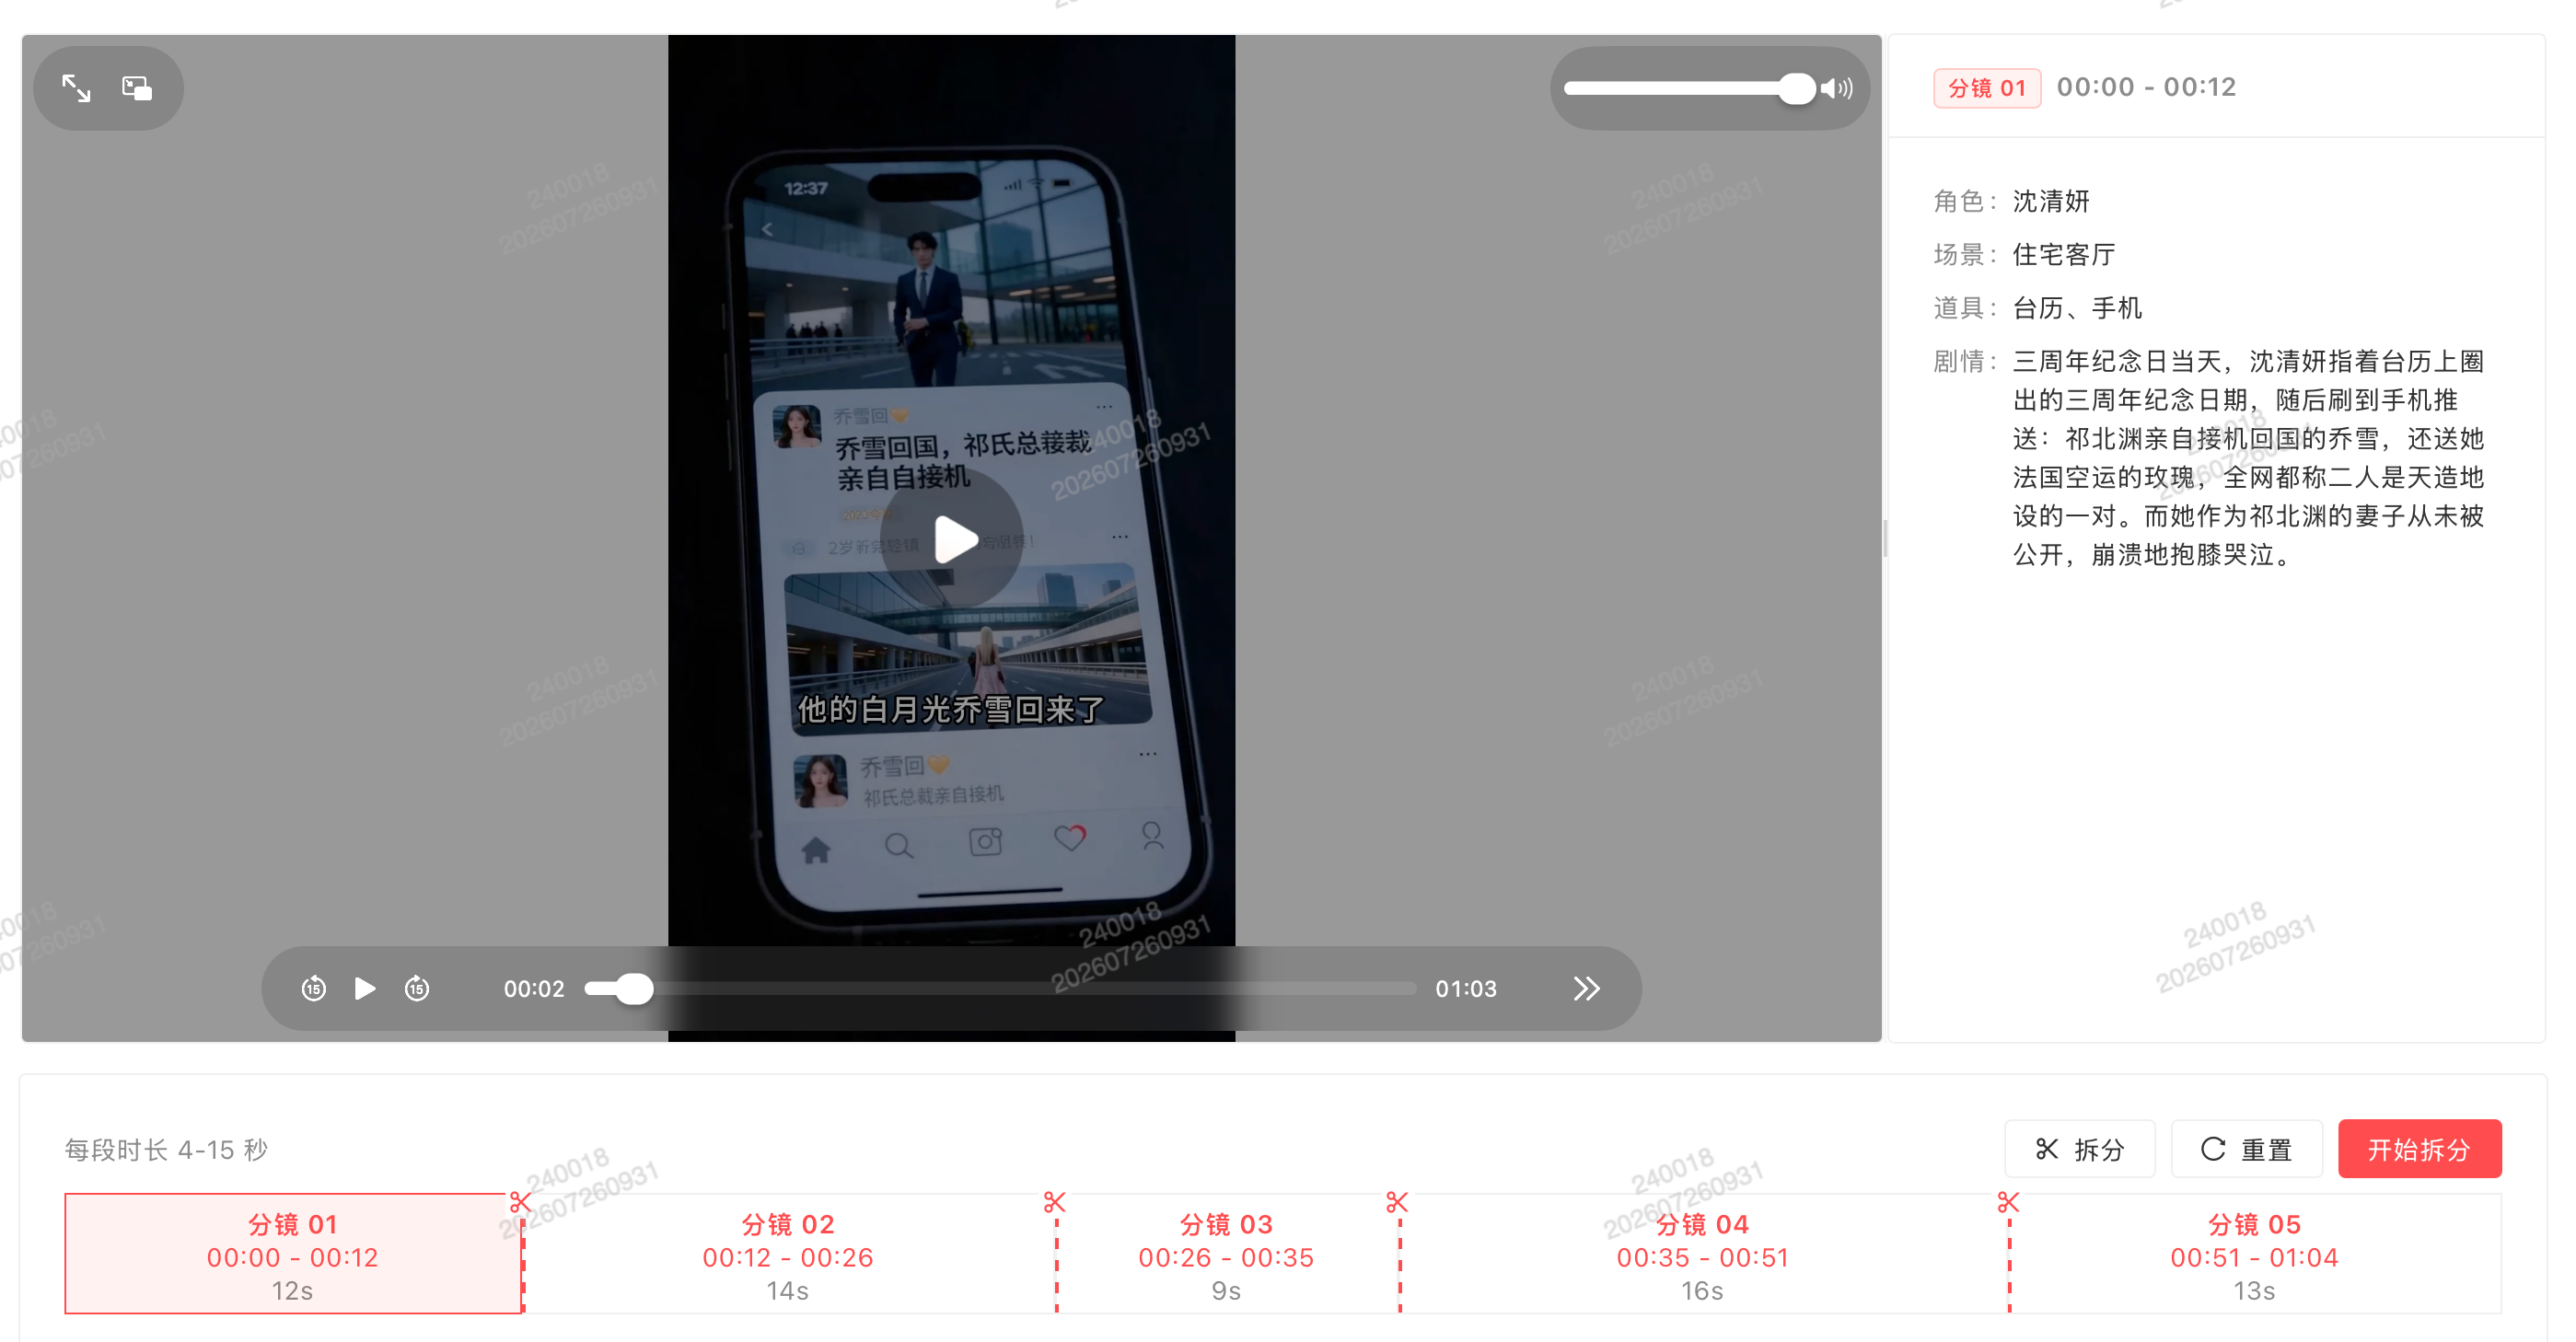
3.5 Storyboard Parsing
Click 【Storyboard Parse】 on the asset card to open the storyboard split panel
Cut points are auto-recommended. Drag to fine-tune, and the video plays in sync to help confirm cut points. Click 【Start Splitting】 to officially split and start storyboard video production
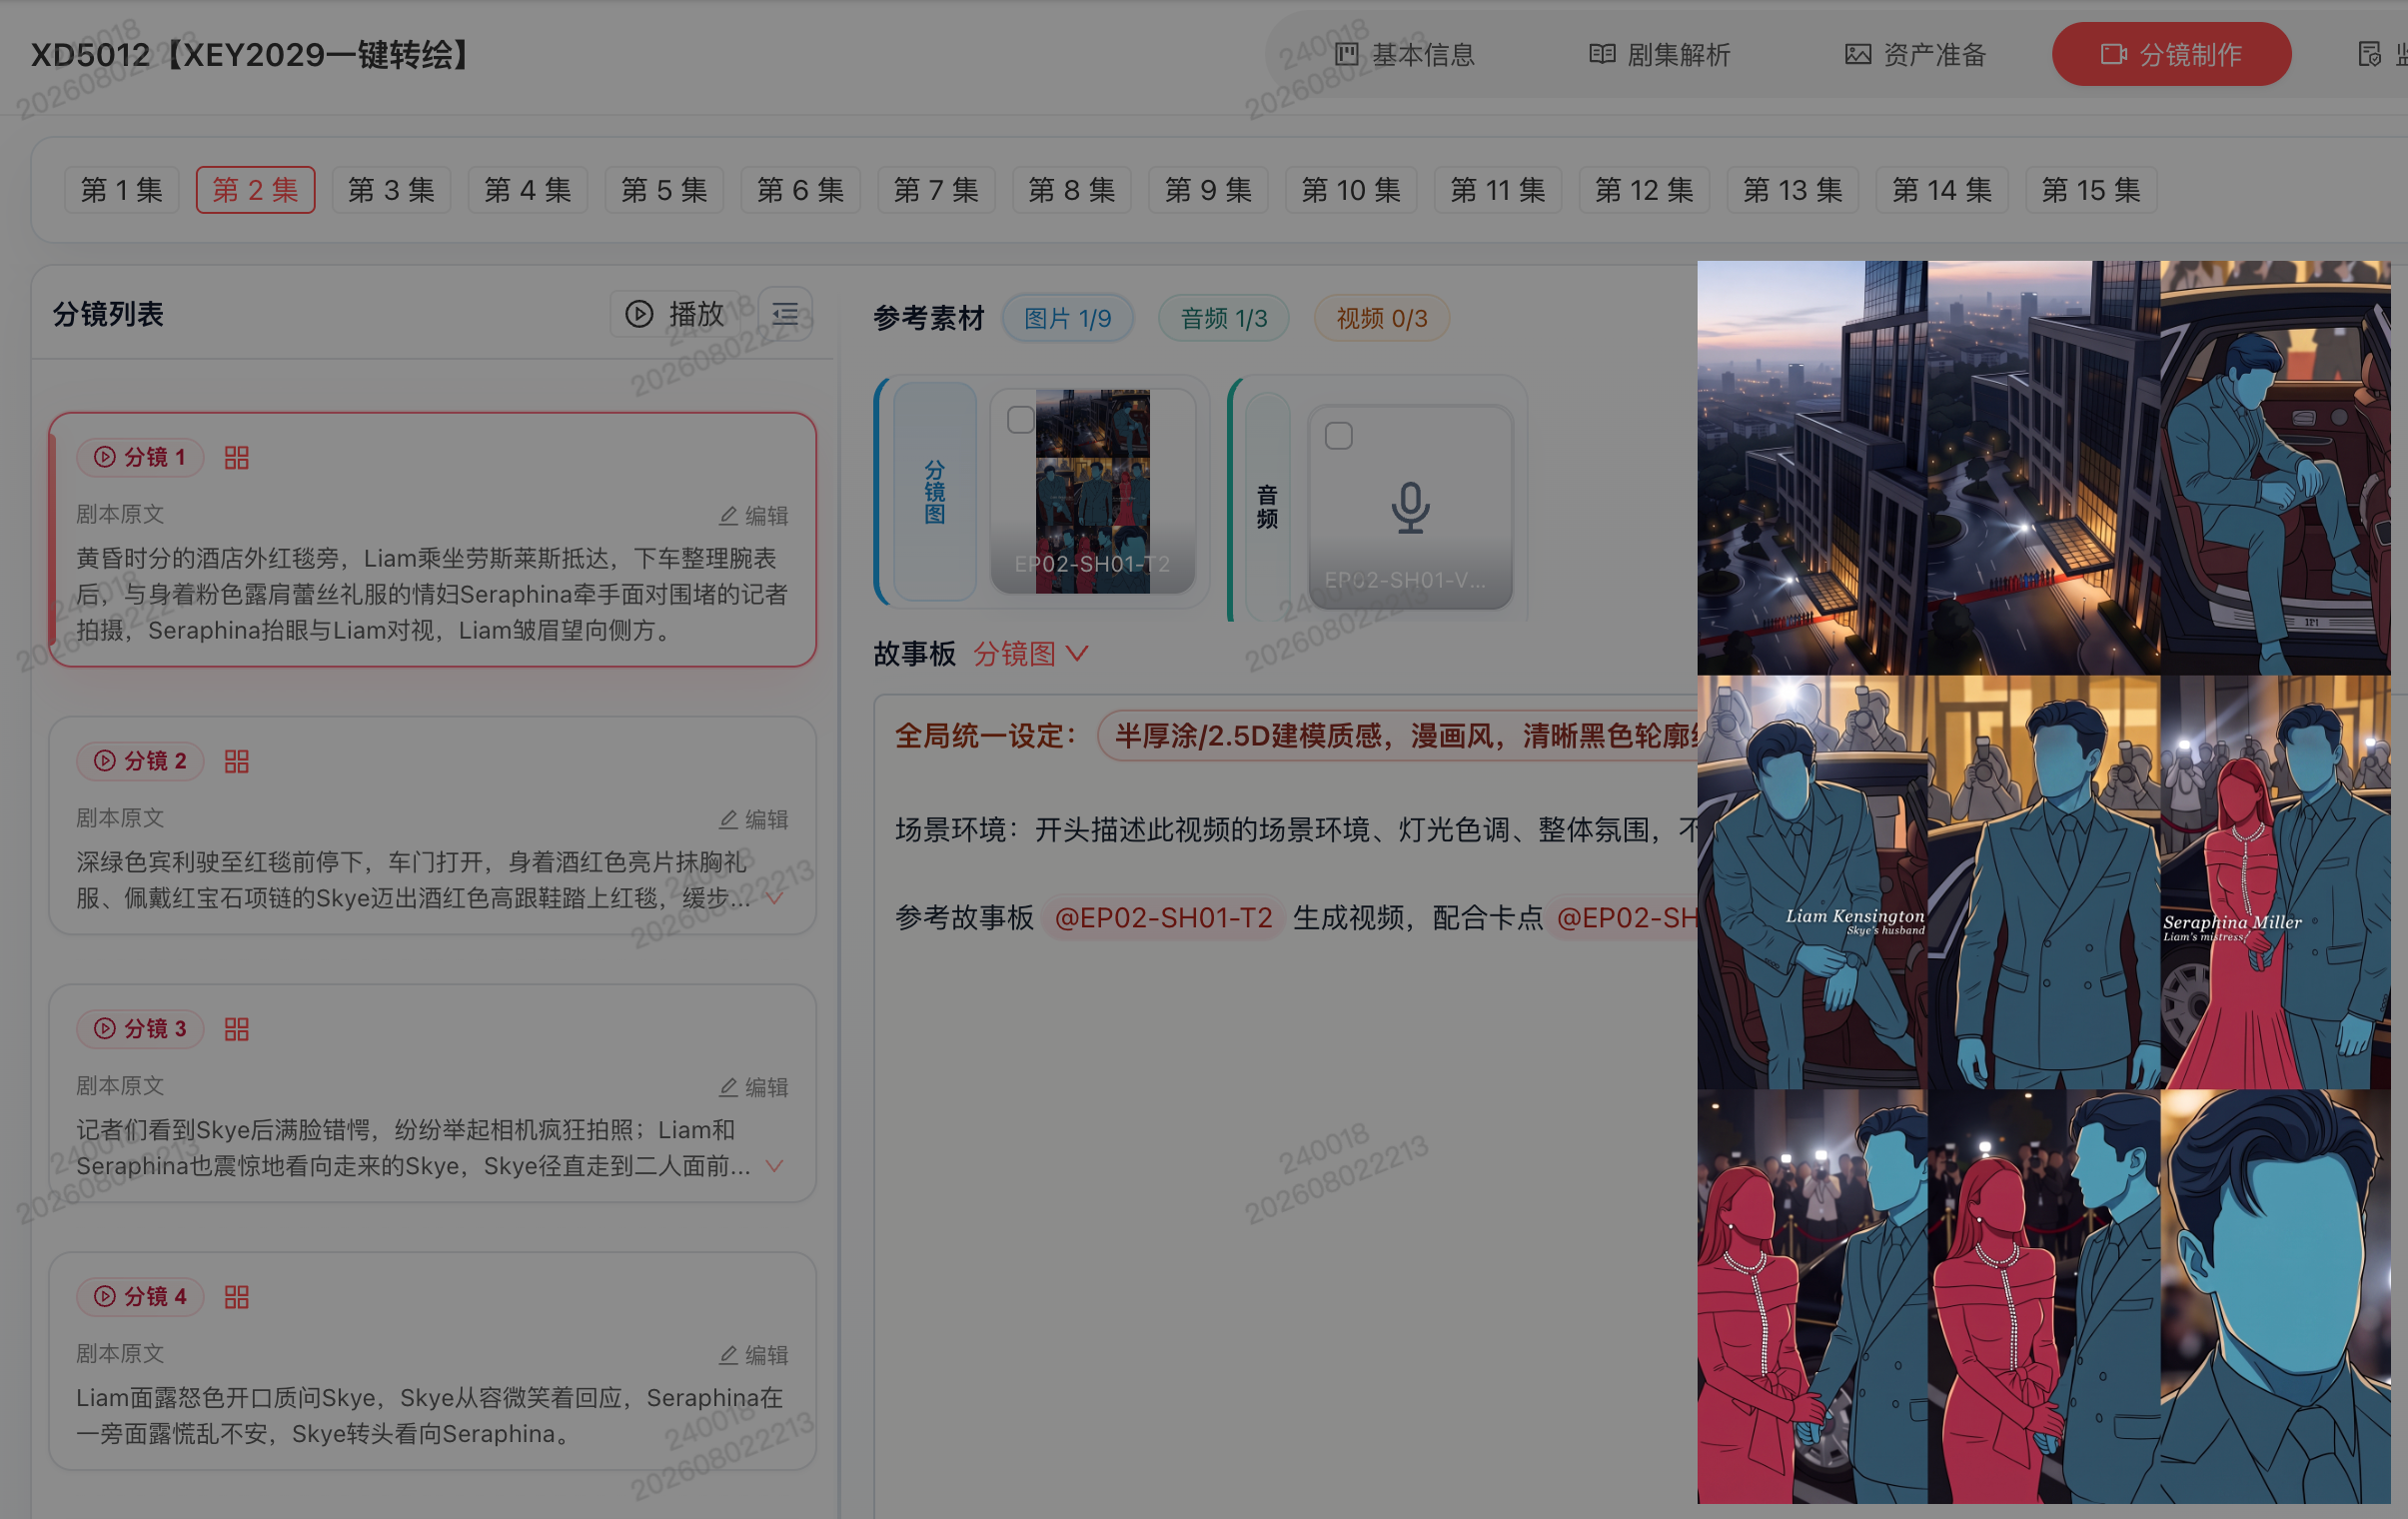
3.6 Storyboard Production
Based on the previous video segments, episodes and storyboards are already split for you, and each storyboard comes with a storyboard grid reference image, so the original shot composition and action are carried into the reference without affecting character-specific character design references. Just click “Draw Card” to generate.
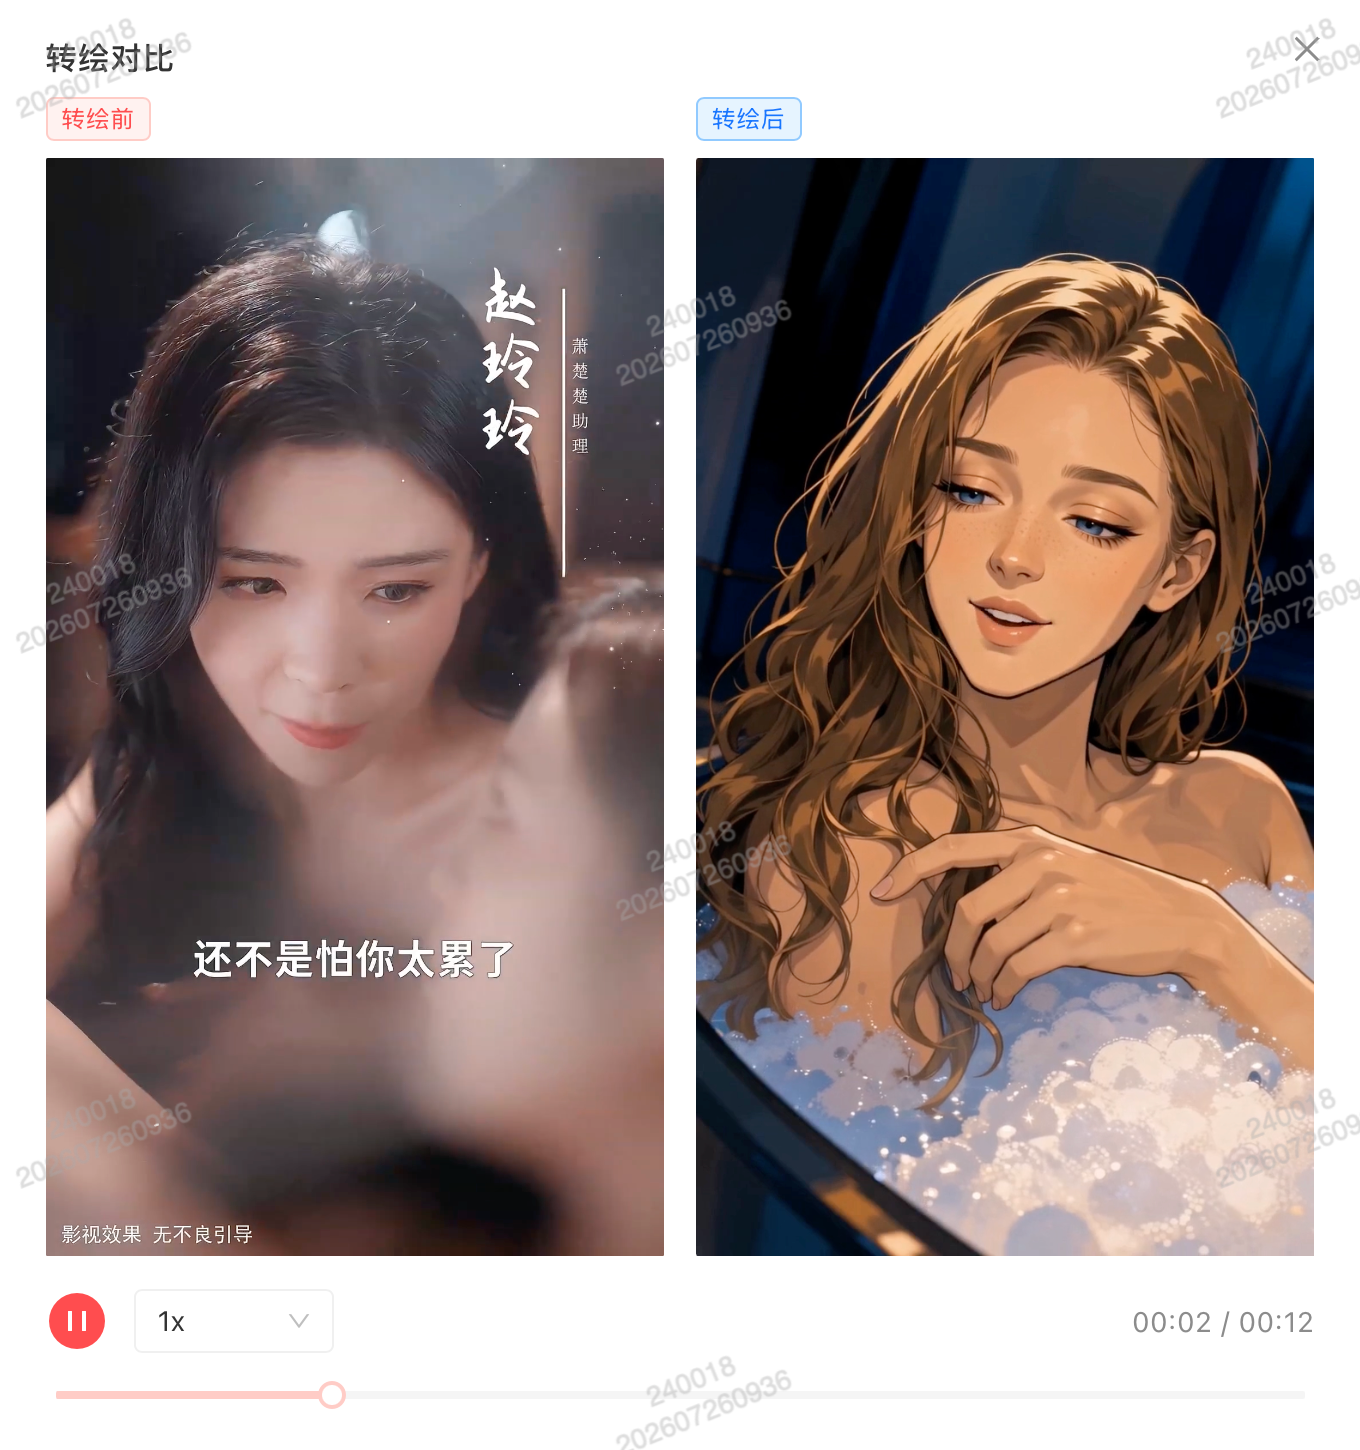
3.7 Video Review
After the video is generated, click 【Redraw Comparison】 to play the pre-redraw and post-redraw versions side by side for comparison
IV. Material Preparation
💡 Material Preparation is the core of creation: generating character/scene images, managing assets, and adjusting art styles all happen here.
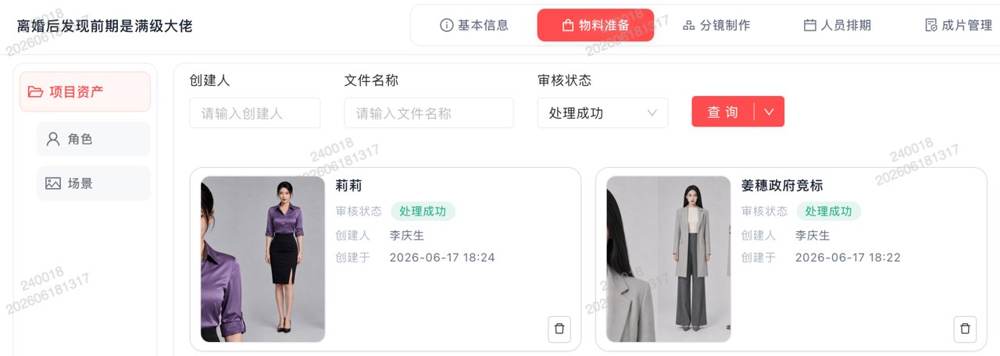
4.1 Character & Scene Editing
- The 【Generate Image from Prompt】 entry in the character/scene list goes directly to image generation
- Supports jumping to the image editor with the image for secondary editing
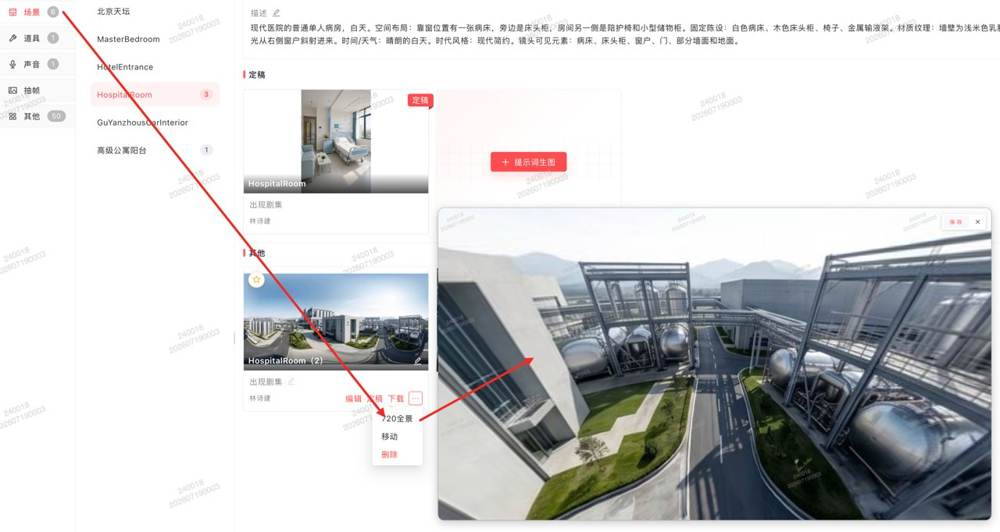
- Scene assets support 720° panoramic images — real environmental lighting at a glance, making scene selection more intuitive
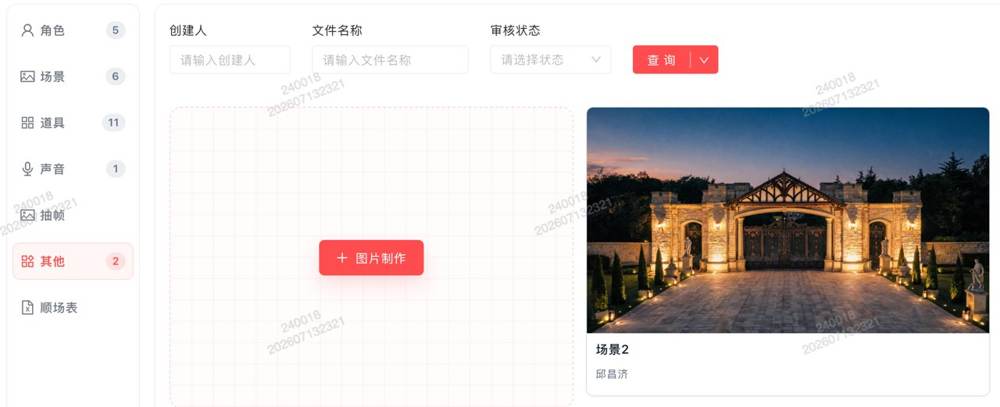
- Character / Scene / Prop card optimization: added episode-appearance labels, shows author, unified style across all asset cards
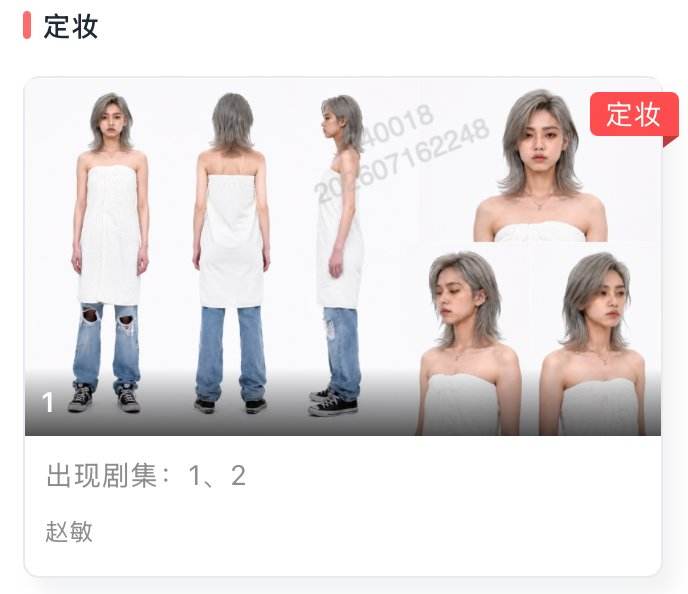
💡 Character consistency tip: for all character design sheets of the same character, use the same reference image + the same feature description to avoid inconsistent looks across shots. Eyes, hairstyle and clothing color are the three most likely to drift.
4.2 Image Generation
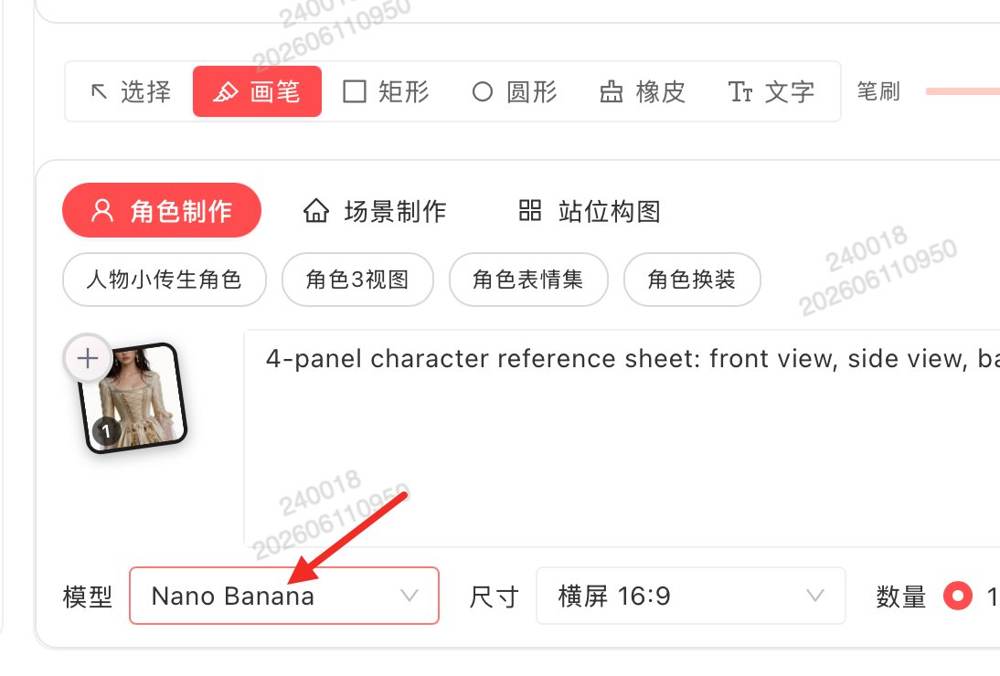
@ Image feature: type @ in the prompt to reference existing asset images.
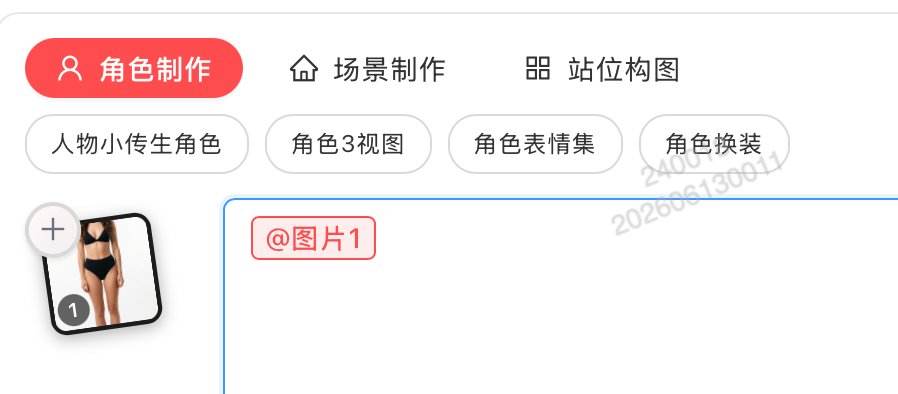
4.3 Character Design & Voice Setting
- Characters, scenes and props now support variants for systematic asset generation
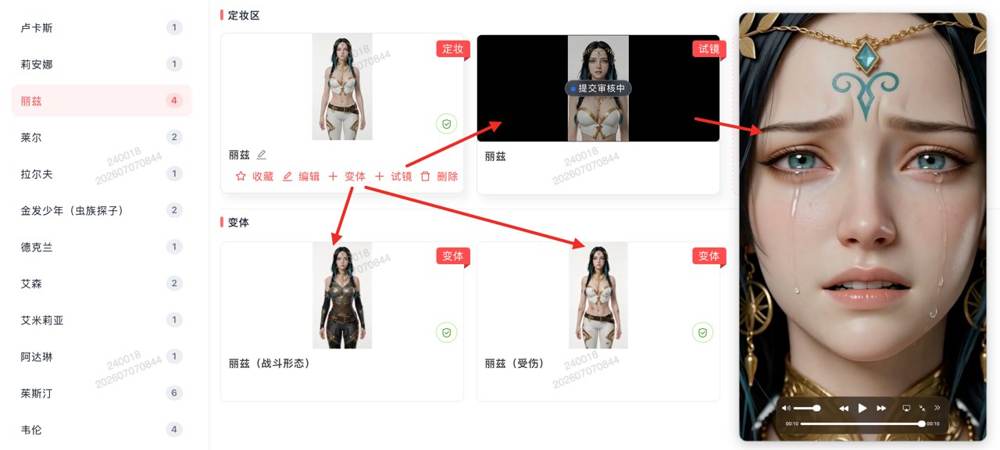
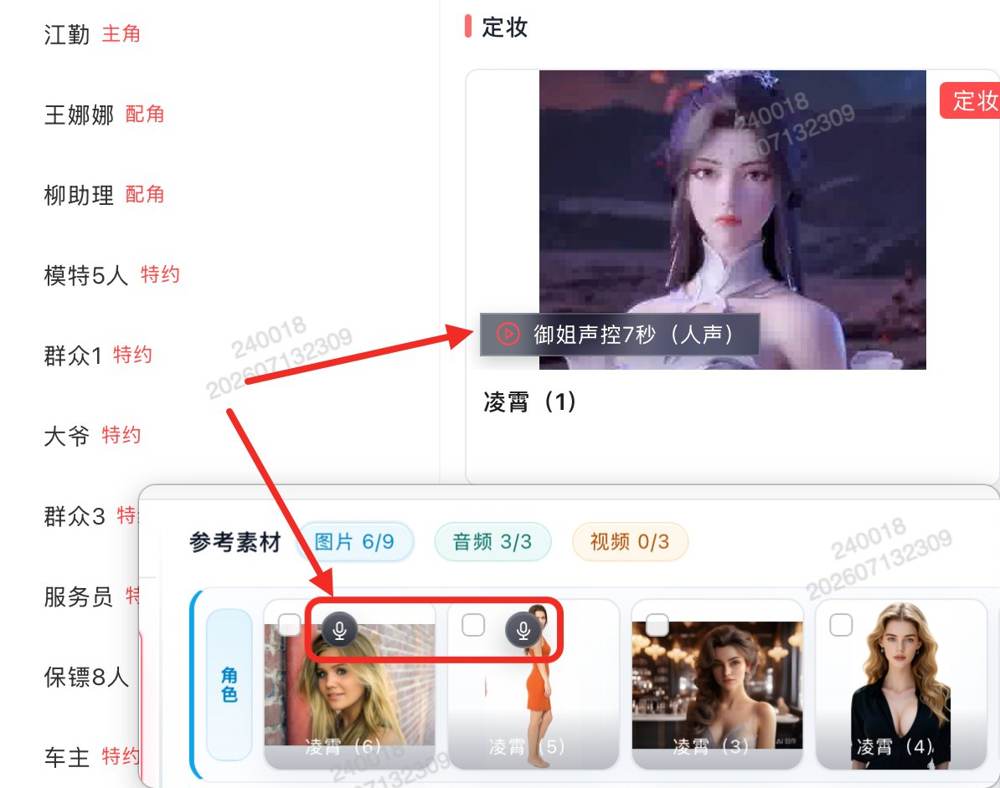
- Material Preparation now has a preset voice library
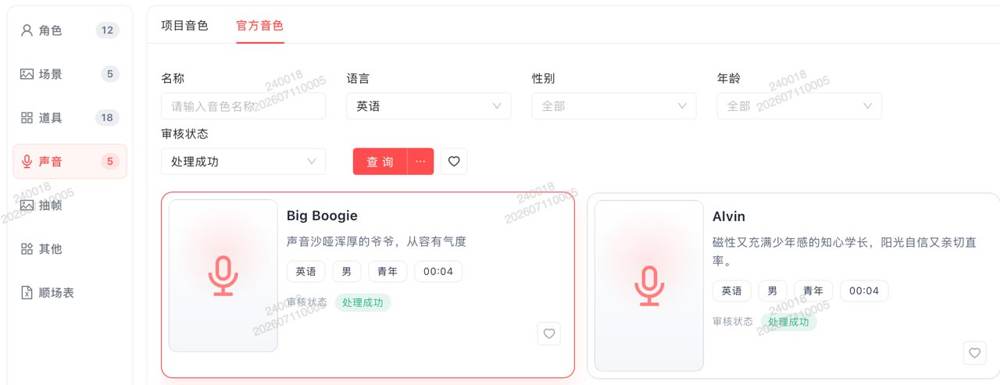
- Once a character has a voice set,
@-referencing the character during production automatically references the voice
4.4 Asset Image Editor
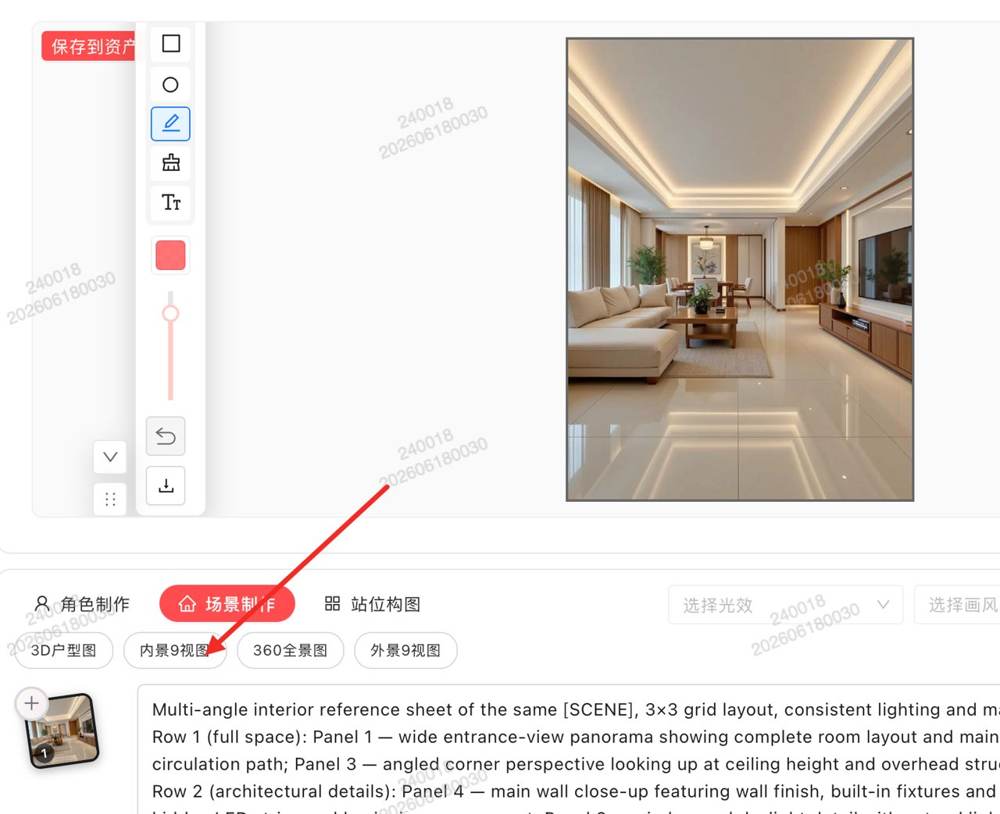
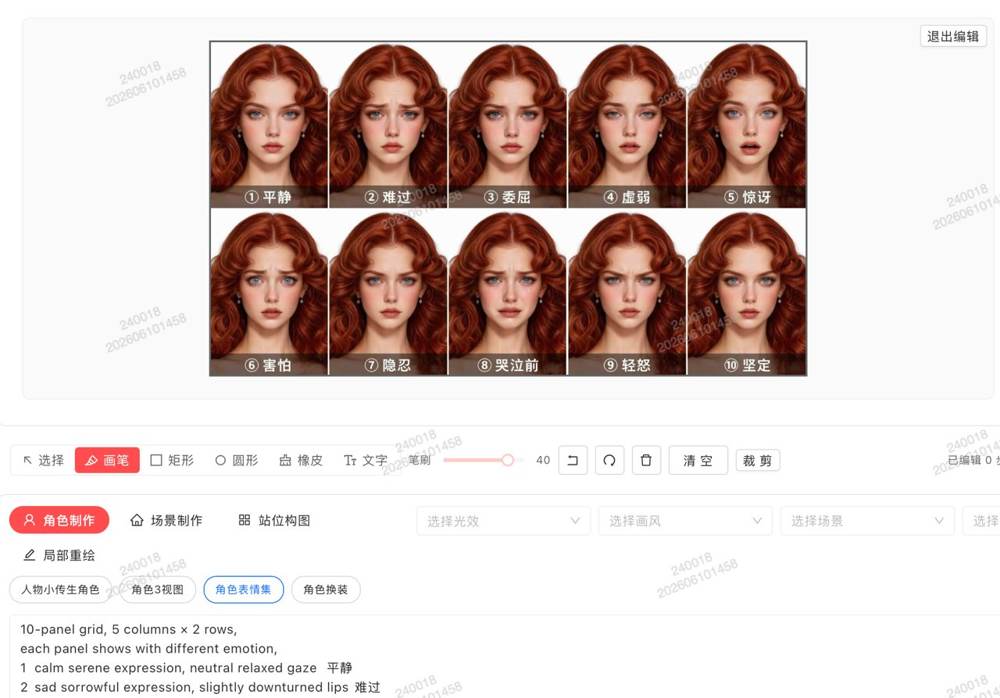
The image editor has multiple quick-generation features commonly used for characters and scenes.
- Image production adds reverse shot (over-the-shoulder) generation for precise positioning control
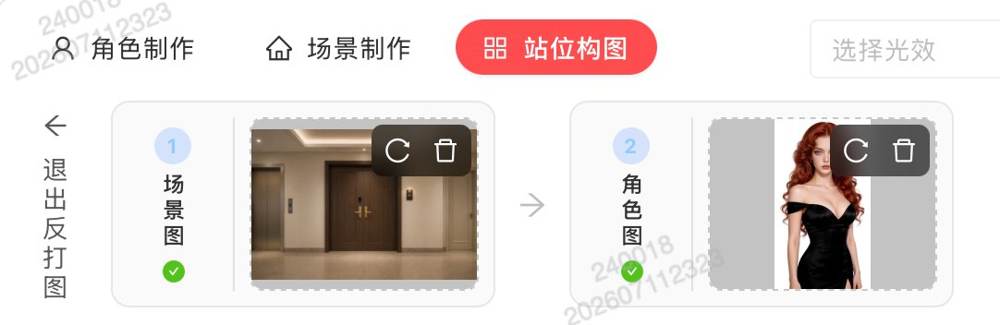
💡 When to use reverse shots: in dialogue scenes where two people face each other, first generate A’s POV → then generate B’s POV in reverse to ensure correct eye-line direction. Great for shot/reverse-shot dialogue, standoffs, and deep-eye-contact shots.
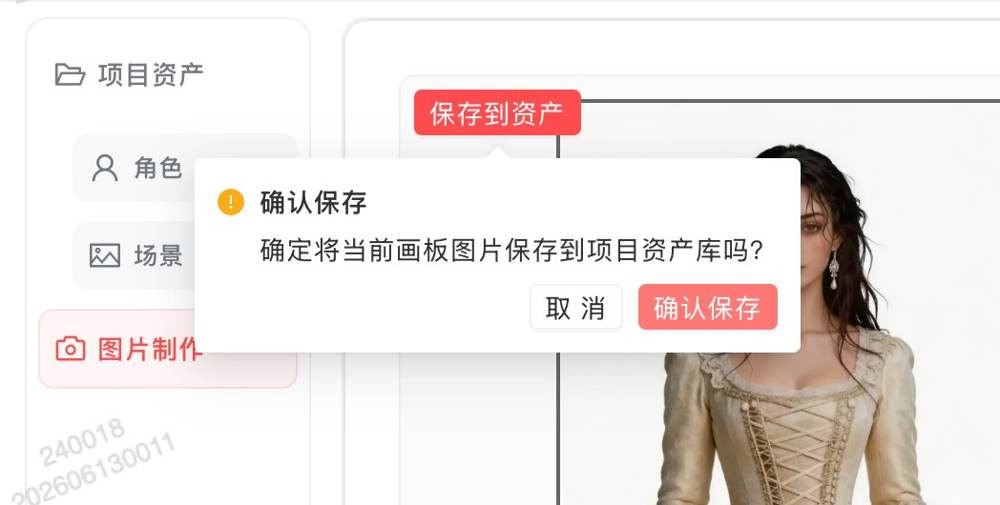
- Generated images support saving to asset library or saving as new
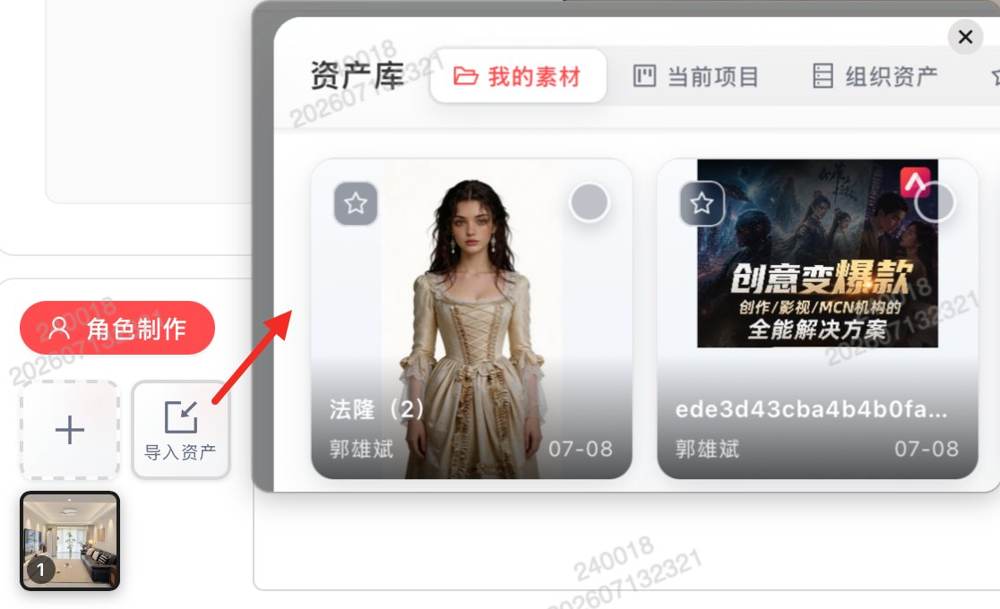
- Image production adds importing materials from the asset library
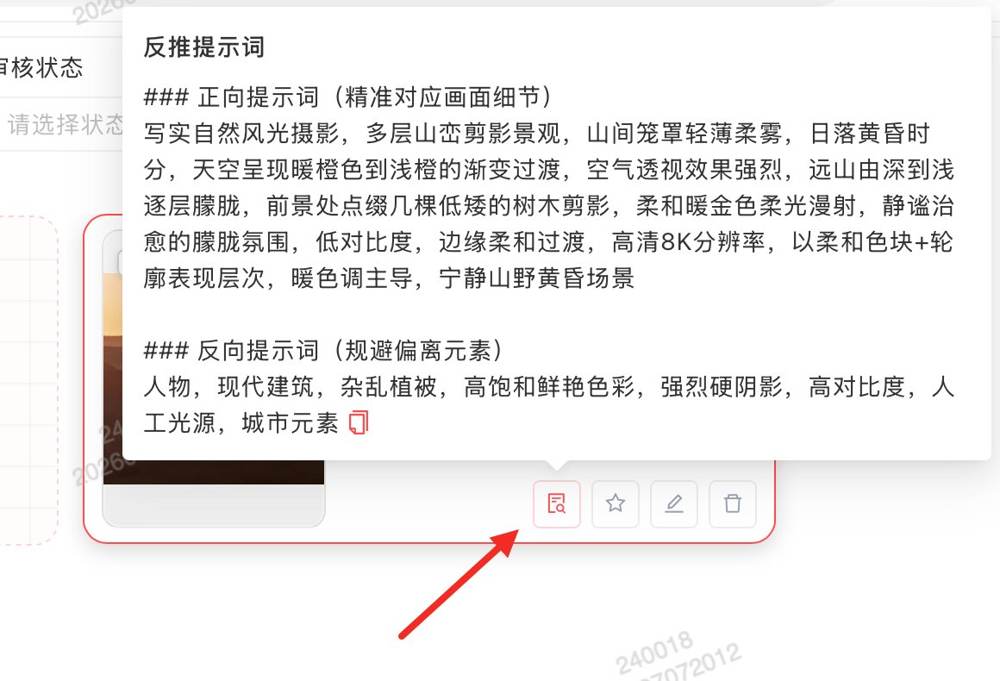
- Project asset images add prompt reverse-engineering (prompt from image)
4.5 Image Generation Tips
Find a matching face (excluding copyrighted faces) and use it directly as a reference image.

💡 Prompt examples
Female: Use the character in the reference image; realistic portrait photography; around 3 years old, frontal eye-level view, add realistic skin texture, clearly visible facial details, fair and translucent skin, clothing: pink-white two-tone cross-collar Hanfu with gold-trimmed edges, gold-inlaid gemstone floral chest ornament, soft flowing fabric, facial pores, realistic feel, fine details, clear three-dimensional facial features, normal body proportions, hands naturally down, upright stance, white-background character design sheet. Add: well-proportioned figure, full prominent bust, S-curve, delicate makeup, etc.
Male: Use the character in the reference image; realistic portrait photography; adult male, frontal eye-level view, athletic build, upright stance, clear facial details, three-dimensional features, realistic feel, white-background character design sheet.

V. Asset Library Management
5.1 Asset Permission Description
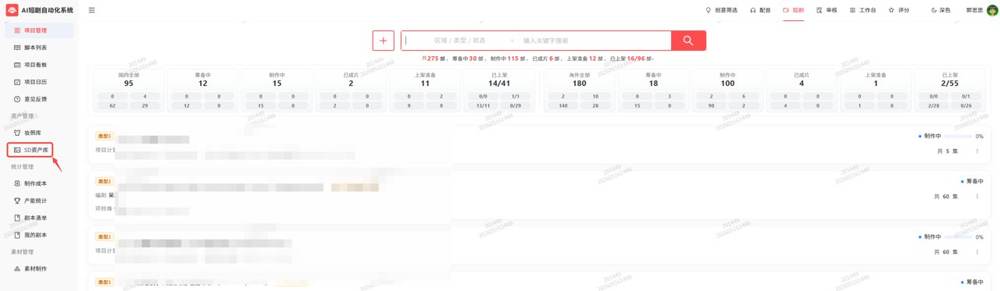
- Project assets are private by default. Private means visible within the project but not synced to the organization asset library
- “Pending-assignment assets” in the organization asset library have permission control — only authorized users can view and operate them
- To adjust permissions, contact the project administrator
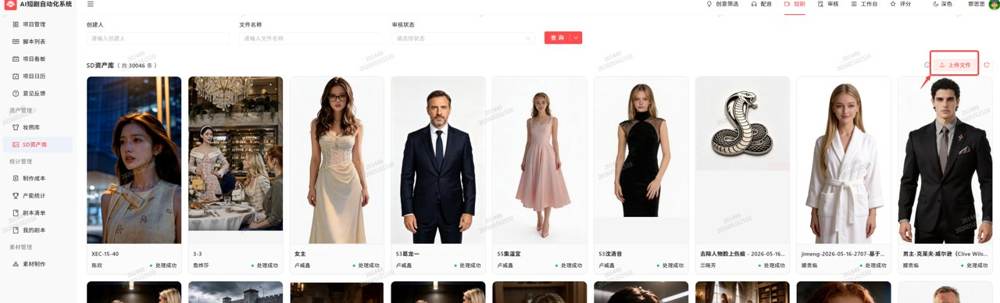
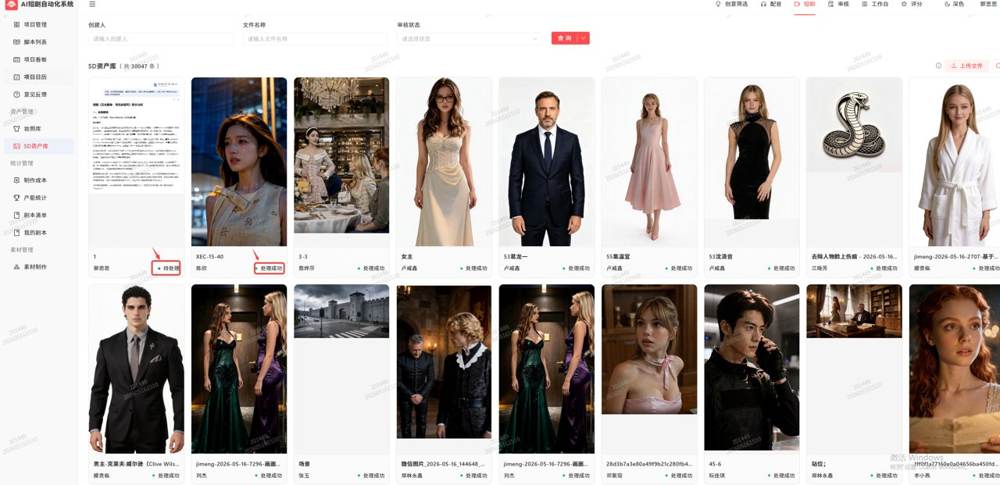
- Assets with status 【Processed Successfully】 are ready to use
- File format filtering is supported on upload — only image/video formats allowed
5.2 Asset Search & Management
- Category management: filter and find assets by category
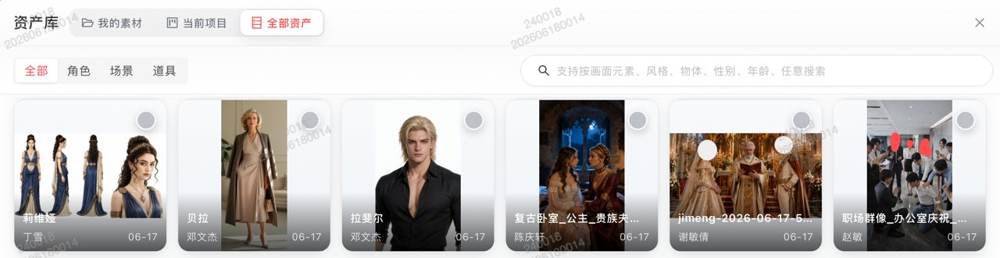
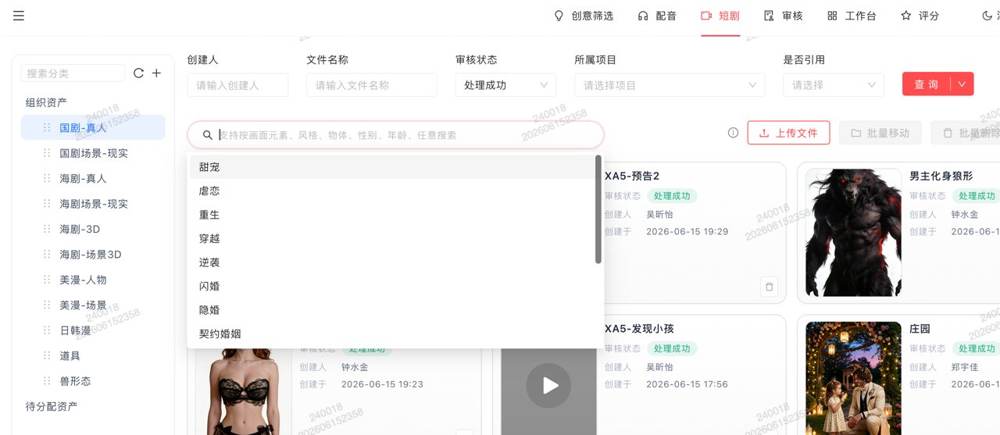
- Search optimization: supports asset name search, code search and universal search; filename matches are shown first
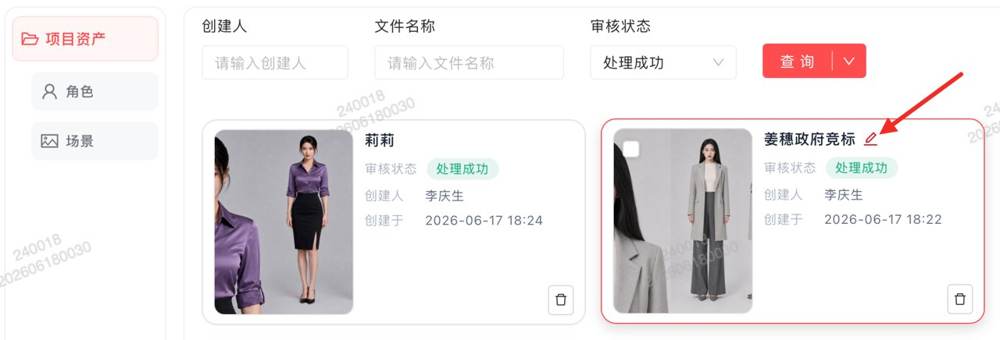
- Asset name is editable: manually rename to a descriptive name
- Assets can be favorited and imported via “My Favorites” in the asset dialog
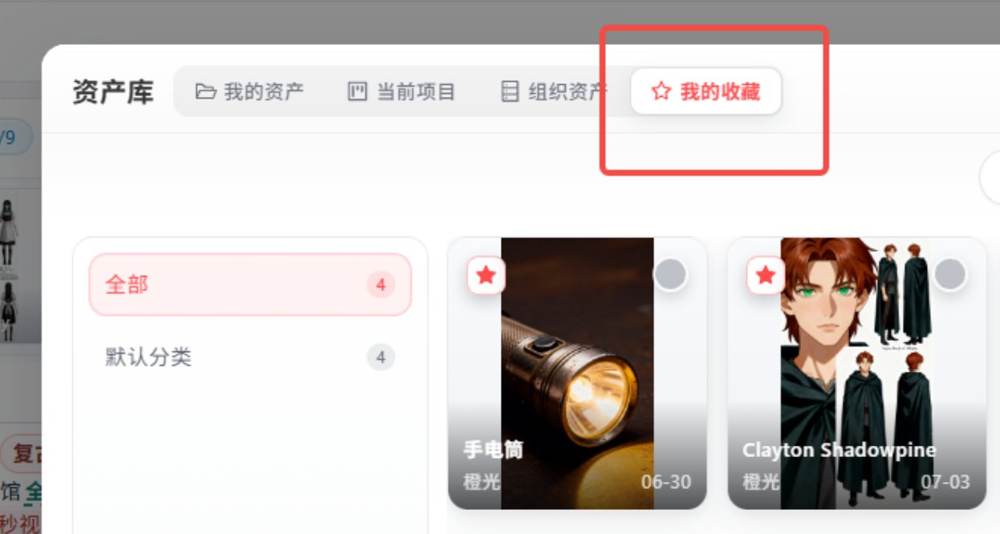
- Import dialog shows item counts per category

5.3 Material List Operations
- Multi-select copy: select multiple materials and click “Copy Materials” to batch-copy
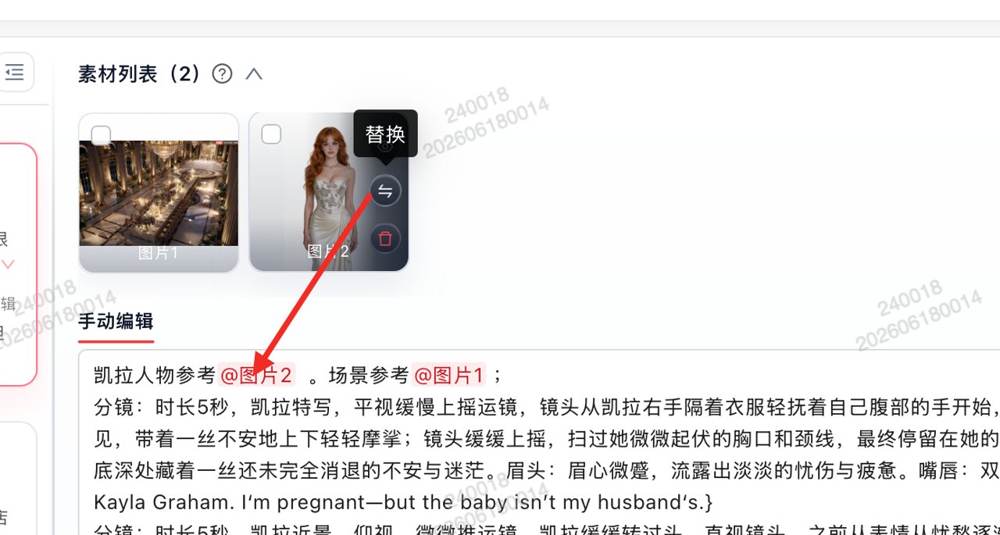
- Replace image: the material list supports directly replacing images without re-uploading
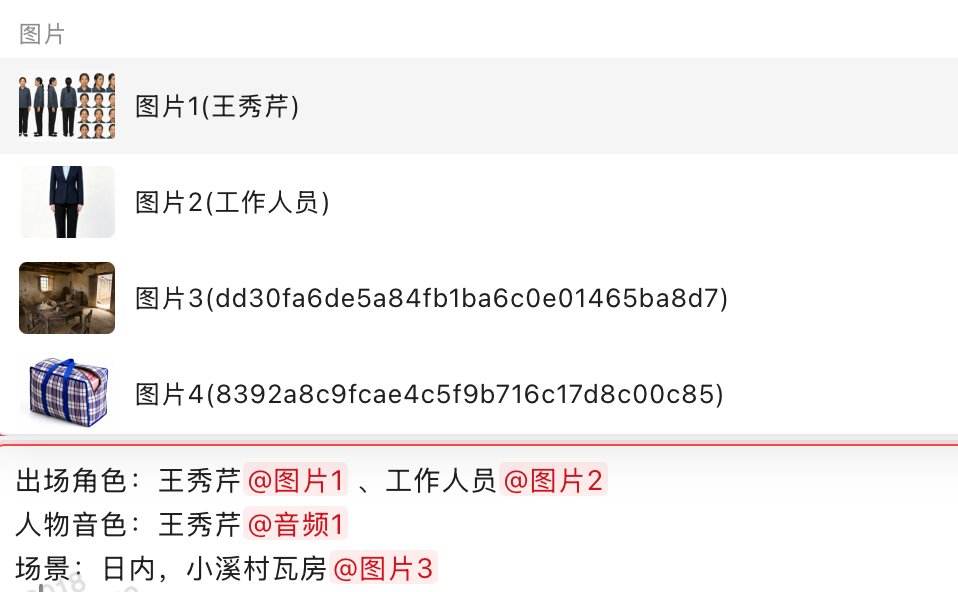
- When
@-referencing images in the storyboard material bar, supports quick filename selection
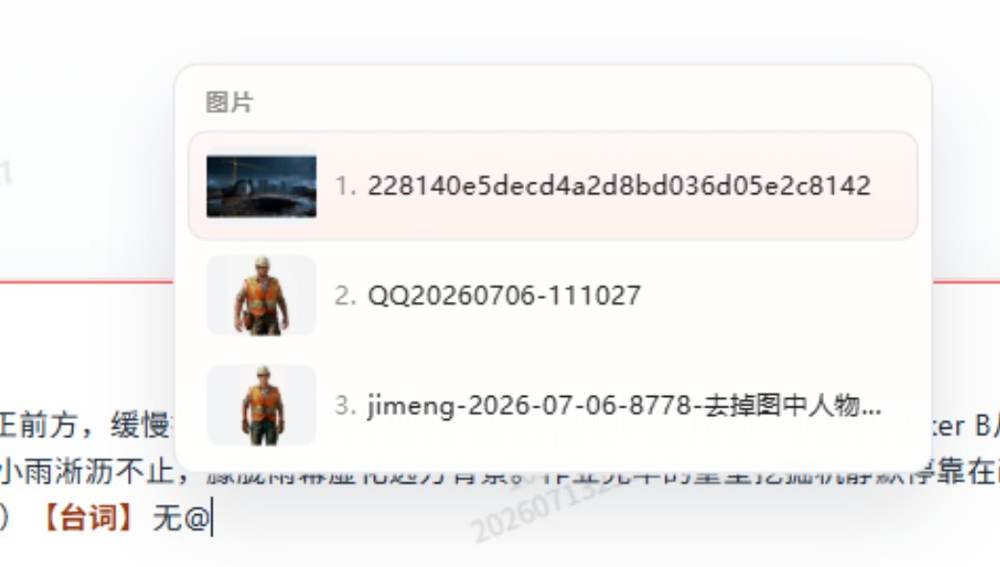
- Typing
@expands the material list nearby for quick reference-image selection
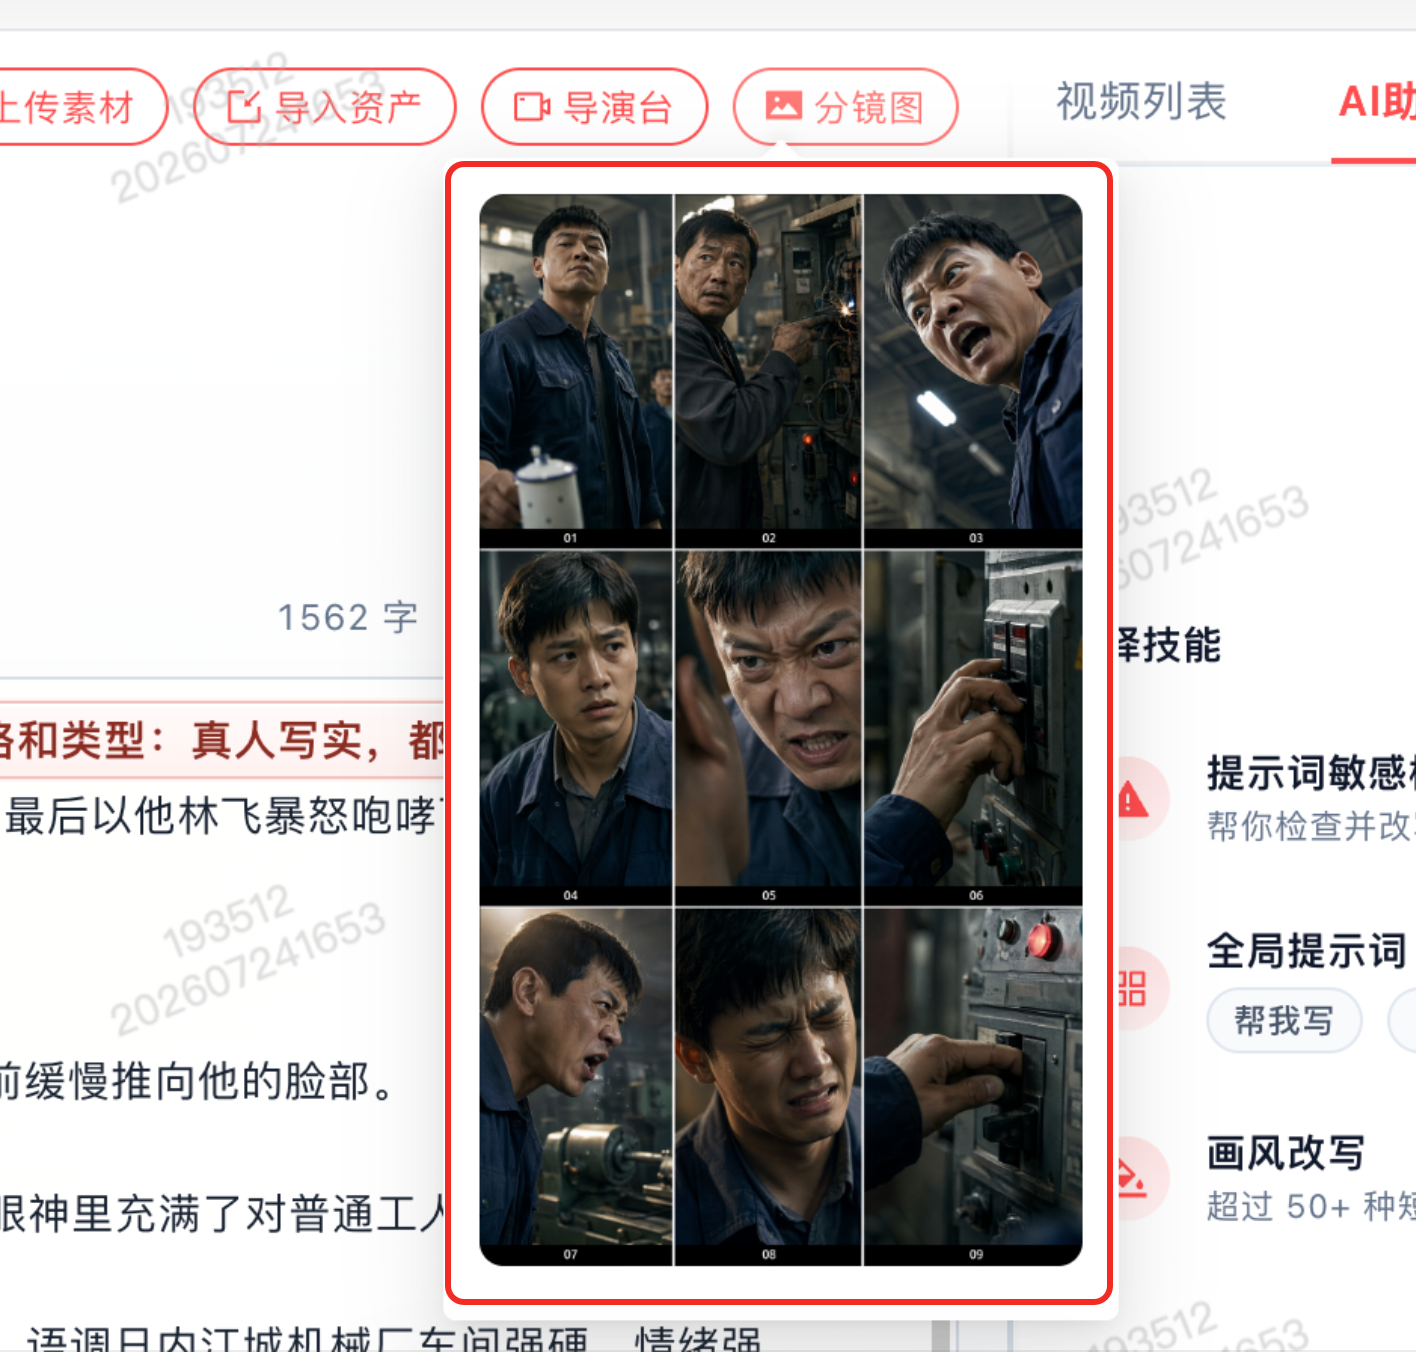
- New storyboard 9-grid image to help you draft the shot before generating video
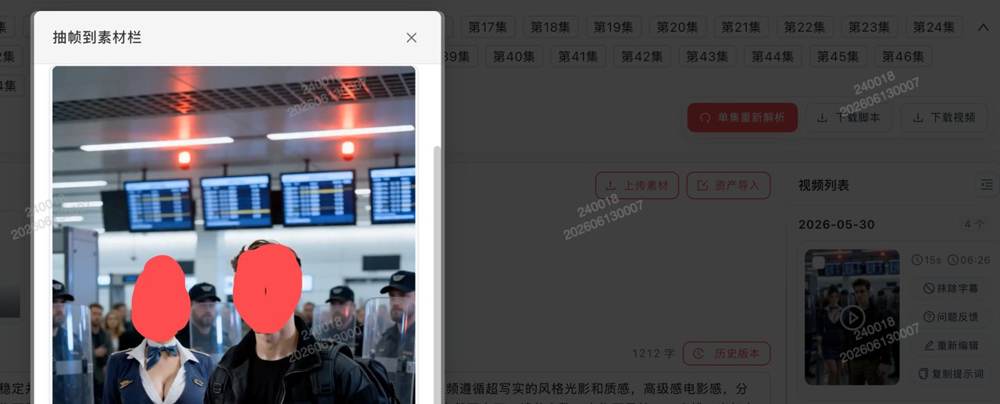
- Frame extraction matting/erasing: after generating an image, you can extract frames and perform matting or erasing on the extracted result
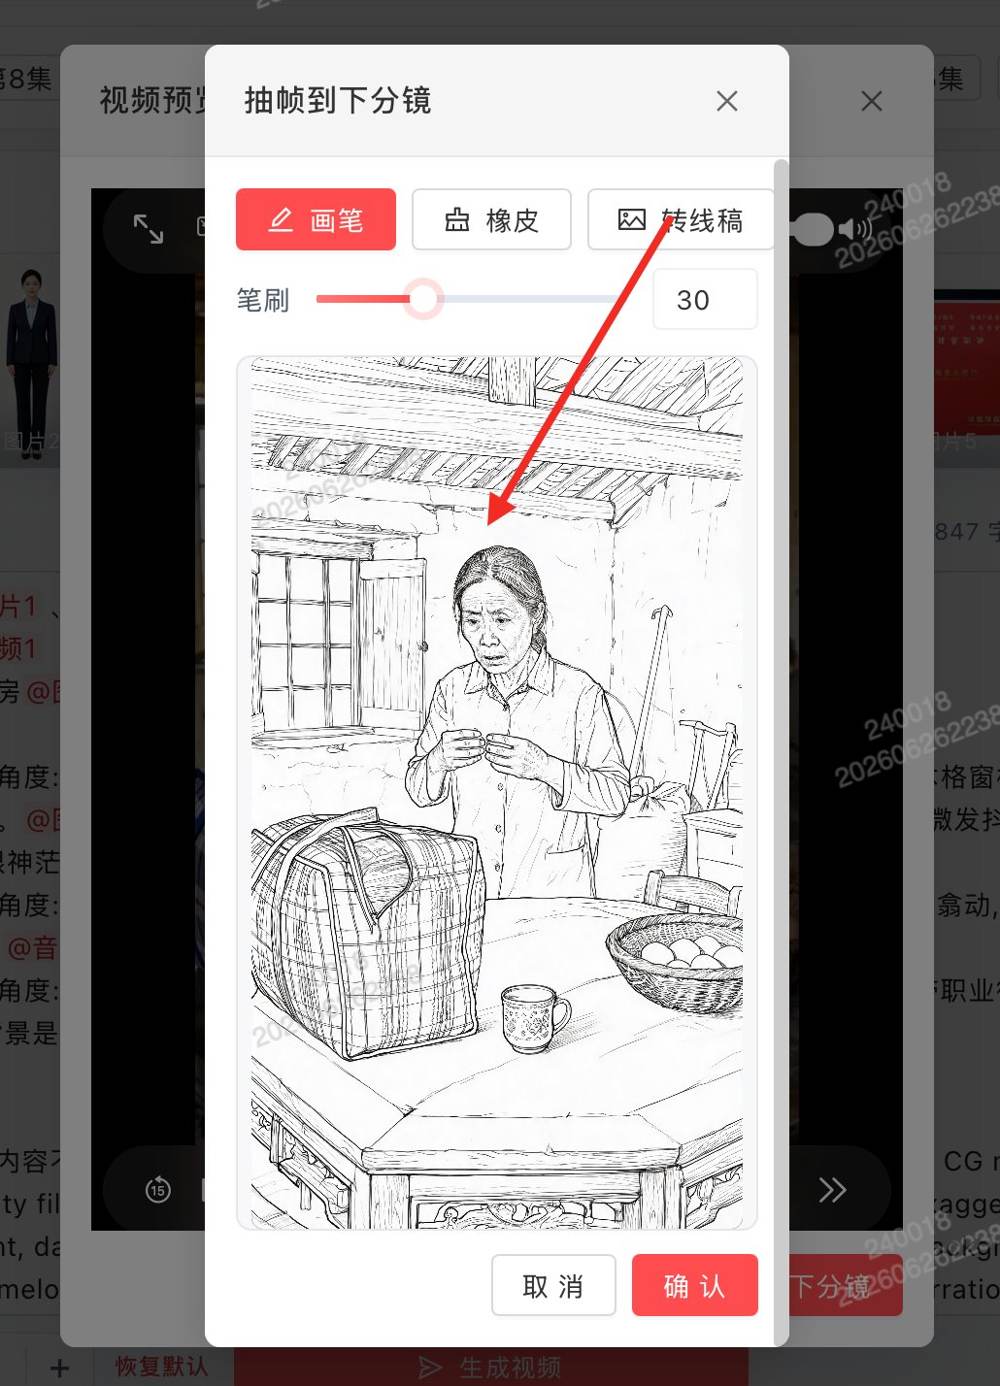
- Frame extraction adds a line-art feature — only references composition, not style
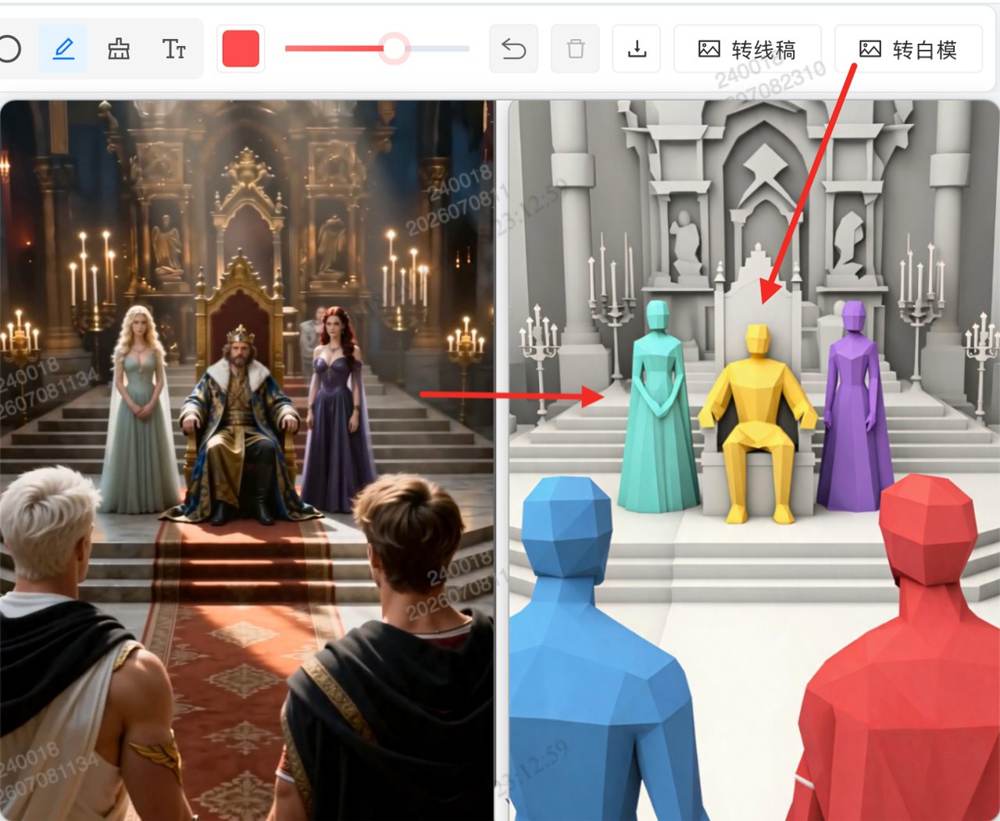
- Frame extraction adds white-model conversion for precise positioning control
💡 How to choose among the frame-extraction trio: keep colors and composition → use line art; only need positioning and pose → use white-model conversion; precisely remove background → use matting. The three can be combined.
VI. Storyboard Production
6.1 Import Materials
- Click the corresponding storyboard script and confirm the characters appearing in this storyboard
- Click 【Import from Library】 → search by creator name or file name → click 【Confirm】 to import
- Alternative: if the scene image has no characters, you can directly 【Upload Material】
- Reference material cards support the @ feature — click @ to insert into the storyboard
6.2 Storyboard Prompt Generation
- Version history: storyboard production now keeps prompt version history, support for rollback and restore
- Segment duration quick adjust: select a segment and use shortcuts to adjust the duration
- Segment operations: the whole prompt supports delete, copy and paste
- Parsing optimization: storyboard prompt parsing optimized (eye close-ups, long-sentence splitting, etc.); inconsistent Chinese/English name issues fixed
- No more prompt loss when switching storyboards during network fluctuations
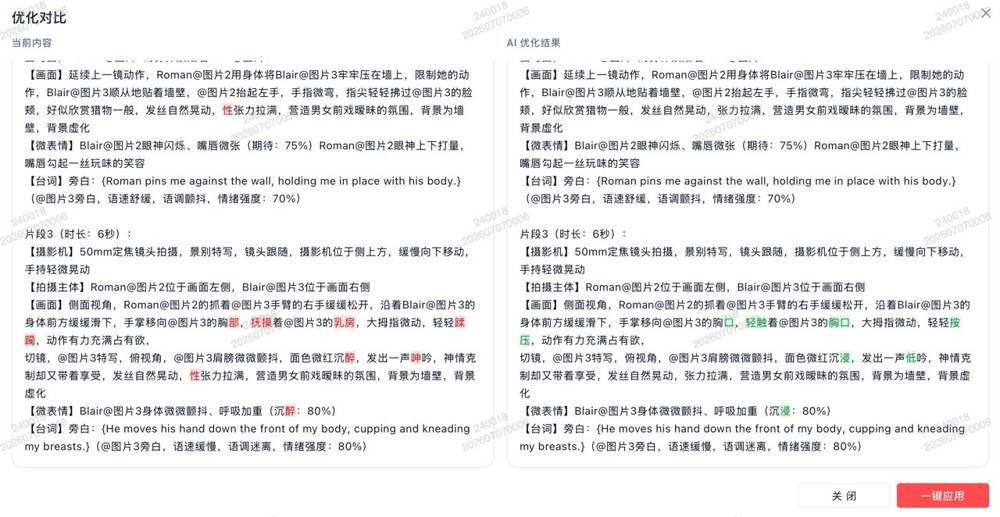
- Sensitive-prompt rewrite assistant to avoid video generation failures
💡 Storyboard prompt vs image prompt: an image prompt only describes a single frame; a storyboard prompt must include camera movement (push/pull/pan/tilt) and a time dimension (3s close-up → 2s medium shot). Don’t simply copy the image prompt. When writing a storyboard prompt, first think “how does this shot move”, then “what does the frame look like”.
6.3 Video Generation
- Mochuang has integrated the overseas SD 2.0 model series, with more video style options (realistic, ancient-style, fantasy, etc.)
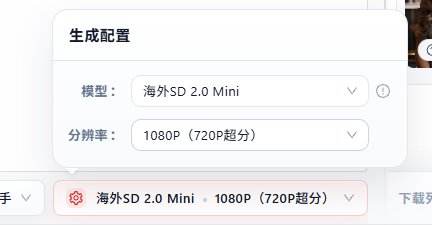
💡 Setting video duration: generally add +2 seconds to the storyboard’s base duration → click 【Generate Video】 to finish generating the storyboard video
- The overseas SD 2.0 returns a task id and request id after generation for progress tracking
- If you’re not satisfied with the video generated from the prompt, adjust the storyboard prompt and regenerate
- If only a few seconds of a generated segment are unusable, just regenerate that segment
💡 Overseas SD 2.0 vs domestic models: realistic/modern themes → domestic models are more stable; ancient/fantasy/VFX themes → overseas SD 2.0 has stronger stylization. Episodes can mix both, switching per storyboard needs.
6.4 Video List & Problem Assistance
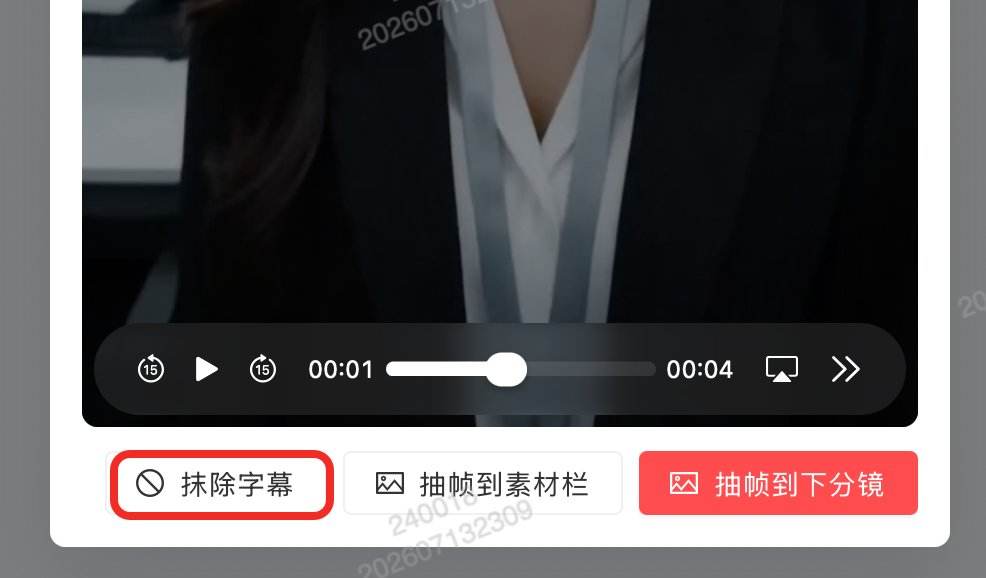
- The remove subtitles feature in storyboard production has moved to the playback dialog to avoid accidental triggers
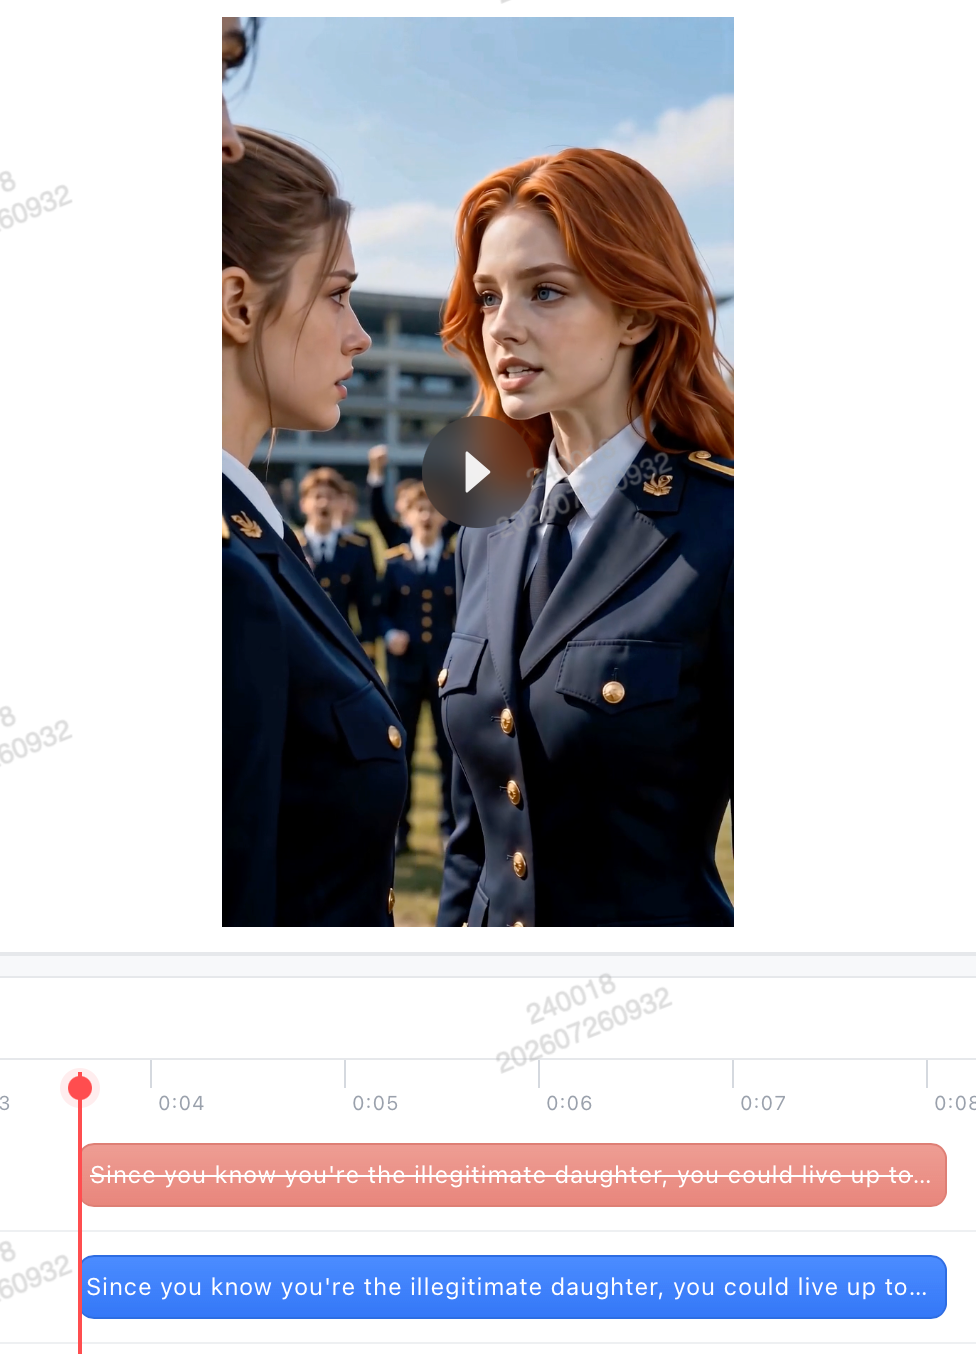
- New precise dialogue repair — no need to re-draw the card when the model mumbles; fix only what’s wrong
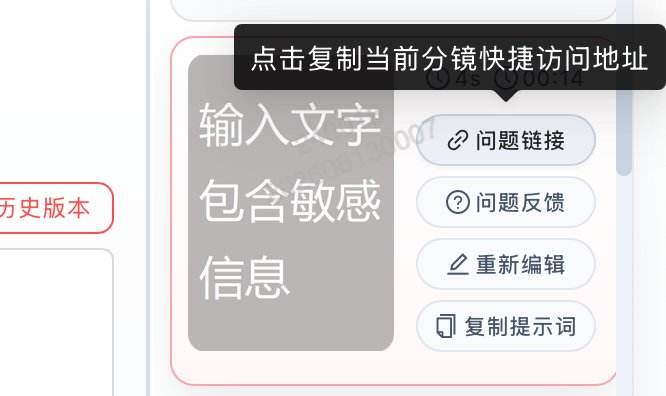
- The “Problem Assistance” button in the video list lets you copy the video URL
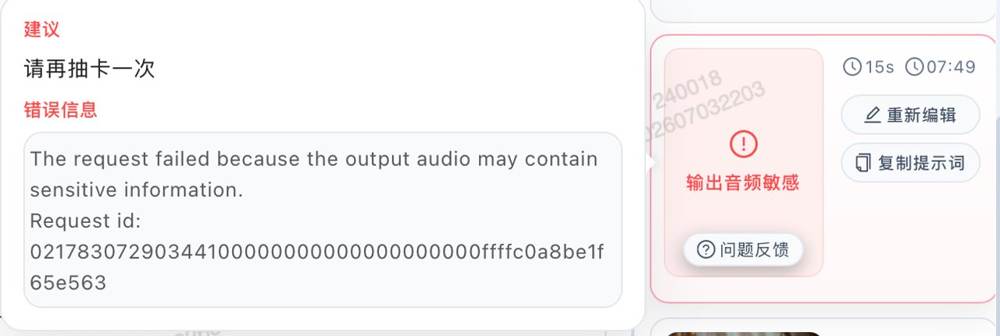
- Video generation failures are broken down into prompt, output video and output audio sensitivity
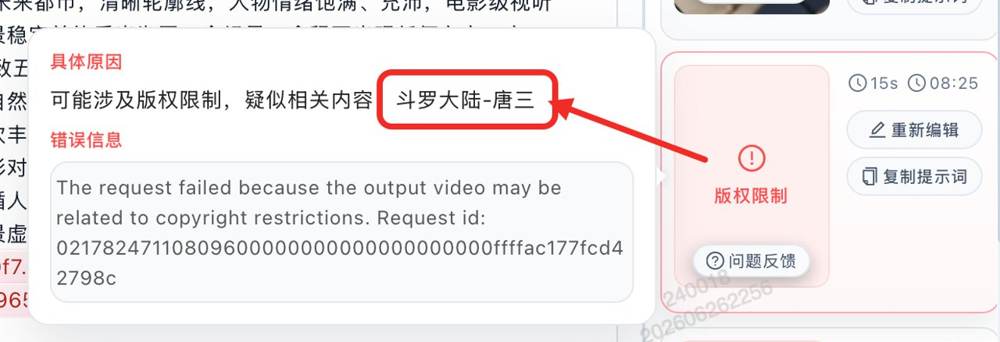
- Copyright infringement now shows the specific celebrity look-alike
6.5 AI Assistant
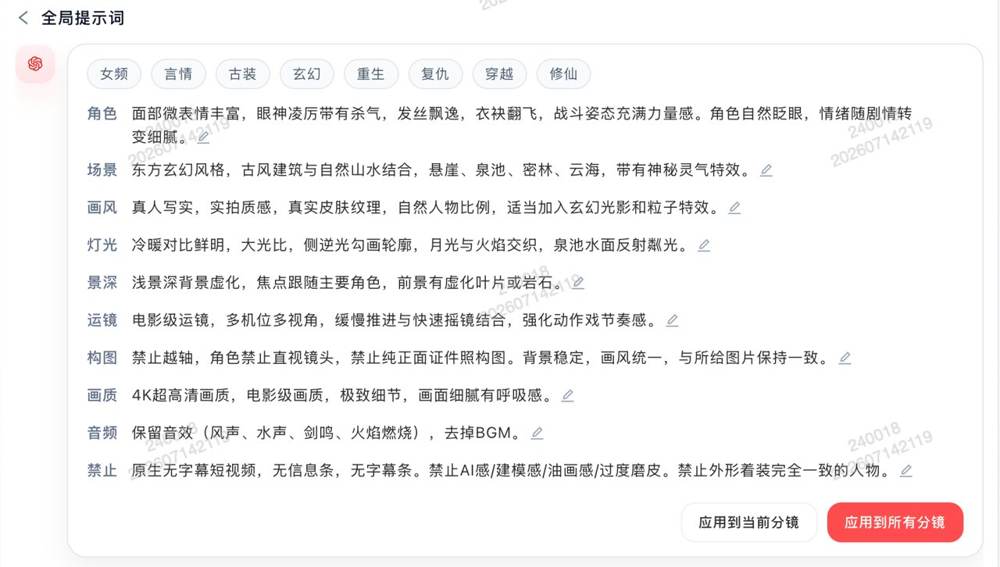
- AI Assistant operations optimized, with a new global unified settings, supporting custom settings and prompt writing help
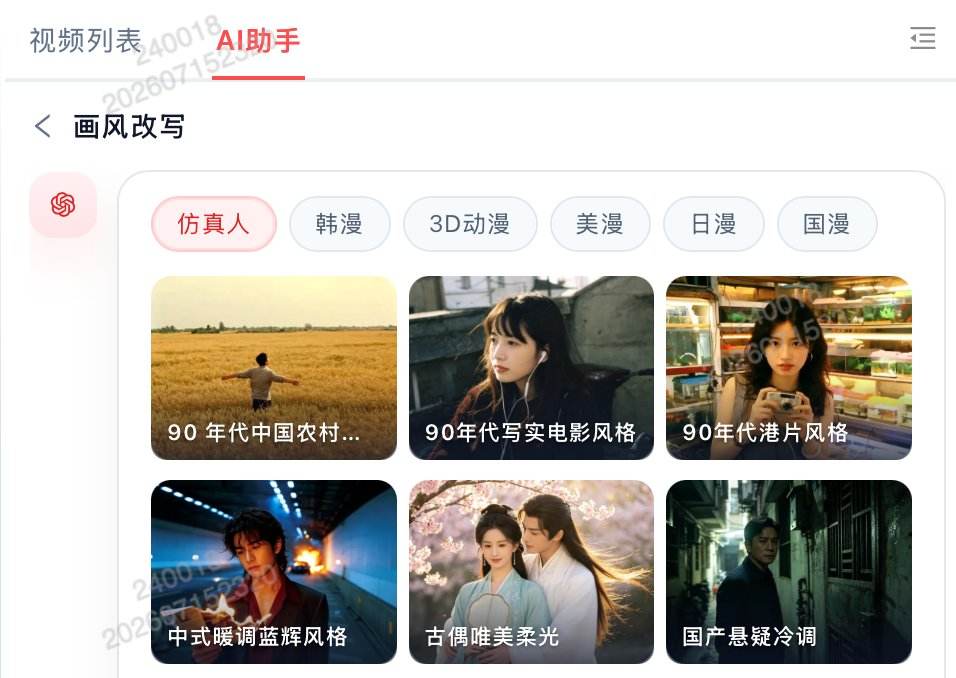
- Storyboard art-style rewriting is integrated into the AI Assistant
6.6 Director’s Stage
- Storyboard production adds a Director’s Stage for precise control of character positions and camera positions in 3D space — what you see is what you get
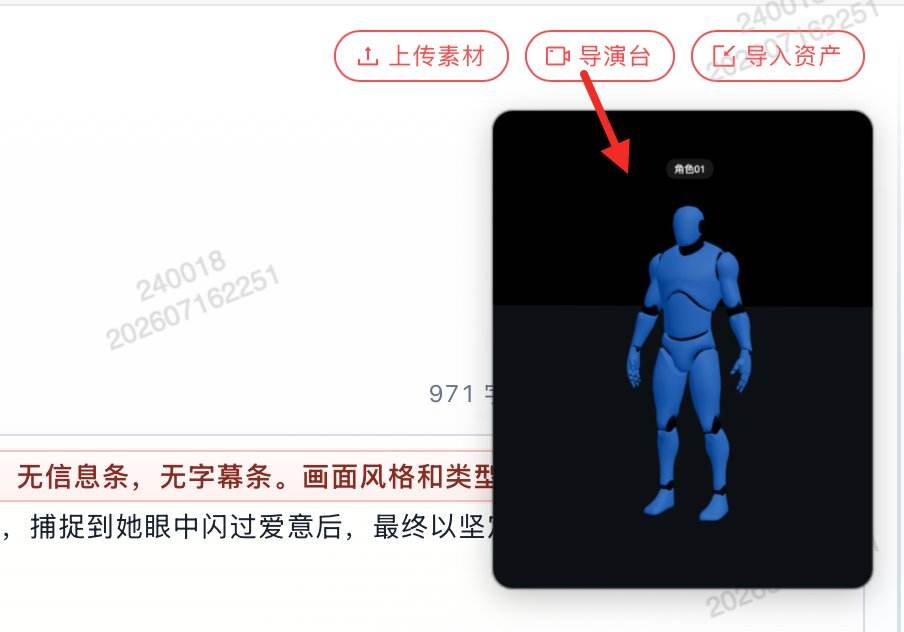
- The Director’s Stage toolbar now shows names/labels so you don’t have to guess features

💡 Director’s Stage best practices: must-use for 3+ characters in frame, complex blocking, or special camera angles (top-down/bottom-up). For simple dialogue scenes, use the storyboard directly — no need for the Director’s Stage every time. Using it in the right scenarios doubles efficiency; overusing it slows things down.
VII. Infinite Canvas
7.1 Entry
Under Storyboard Production, click 【Infinite Canvas】 to open the canvas workspace
7.2 Canvas Operations
The canvas automatically prepares the assets involved in the current storyboard
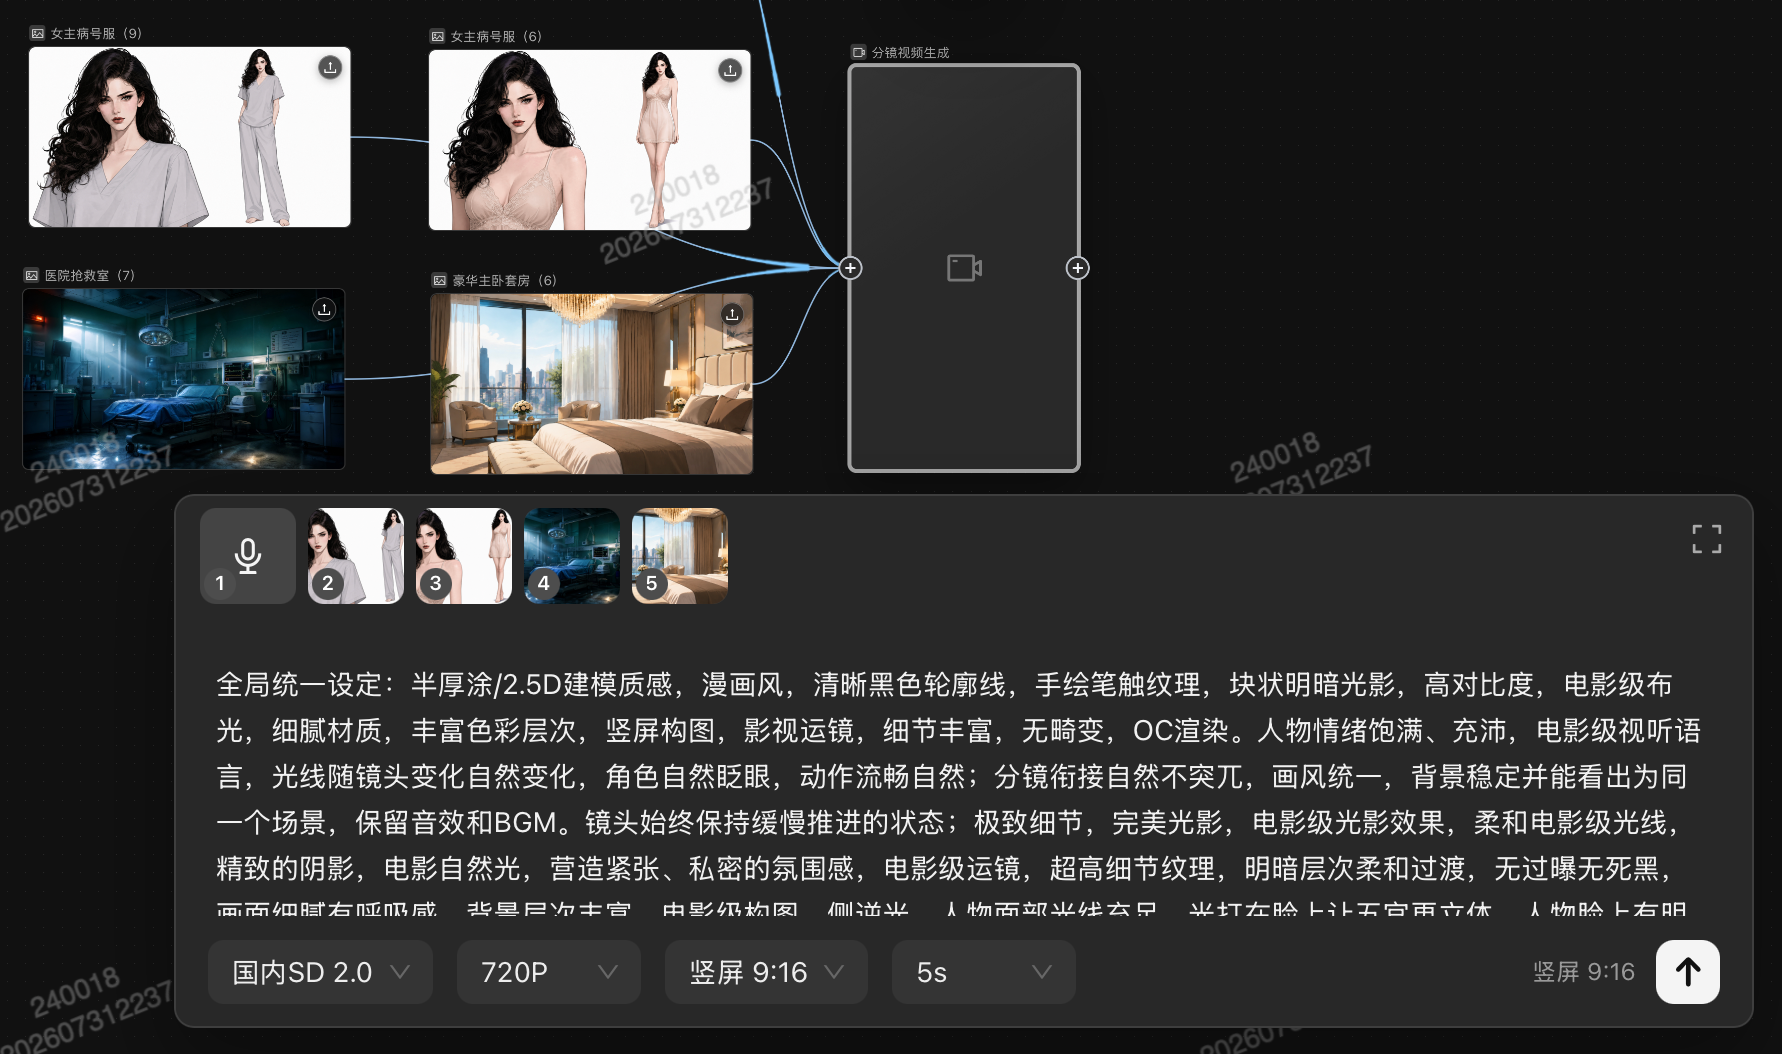
The canvas uses a node-connection workflow: assets are nodes, connections determine data flow, and one canvas is one complete workflow.
7.3 Four Interface Areas
- Left resource bar: canvas list, asset search (Canvas / Assets tabs)
- Main canvas area: node arrangement, connections, zoom and pan
- Bottom parameter panel: expands when a generation node is selected; configure prompts and parameters
- Status bar: node count, zoom ratio, view switching
7.4 Node Types
| Type | Example | Function |
|---|---|---|
| Audio node | EP02-SH01-V3-audio | Provides narration / BGM / sound effects |
| Media reference node | EP02-SH01-T2 | Provides reference video / images |
| Generation node | Storyboard video generation | AI inference, outputs video |
7.5 Sub-capability Tools
6 buttons above the media reference node:
- Character creation: generate multi-view character design sheets for consistency
- Scene creation: generate 9-grid scene images to fix the background atmosphere
- Composition: adjust shot size / angle
- Download: export original materials
- Fullscreen: enlarge preview
VIII. Supervision Review
8.1 Review List
One-line summary: upload finished episode videos (no subtitles) and SRT subtitle files, assign role permissions to members, and go through the “internal review, first review, second review” process with different roles until the episodes meet release requirements.
Related roles:
- AI Short Drama - Reviewer: configured in “Project - Basic Info - Project Members”. Can use the “Supervision Review” module; core role is reviewing final videos, assets and dailies
- AI Short Drama - Post-production: configured in “Project - Basic Info - Project Members”. Can use the “Storyboard Production, Supervision Review” modules; core role is downloading edited videos in Storyboard Production, uploading finished videos for review in Supervision Review, and updating each episode’s “modification status”
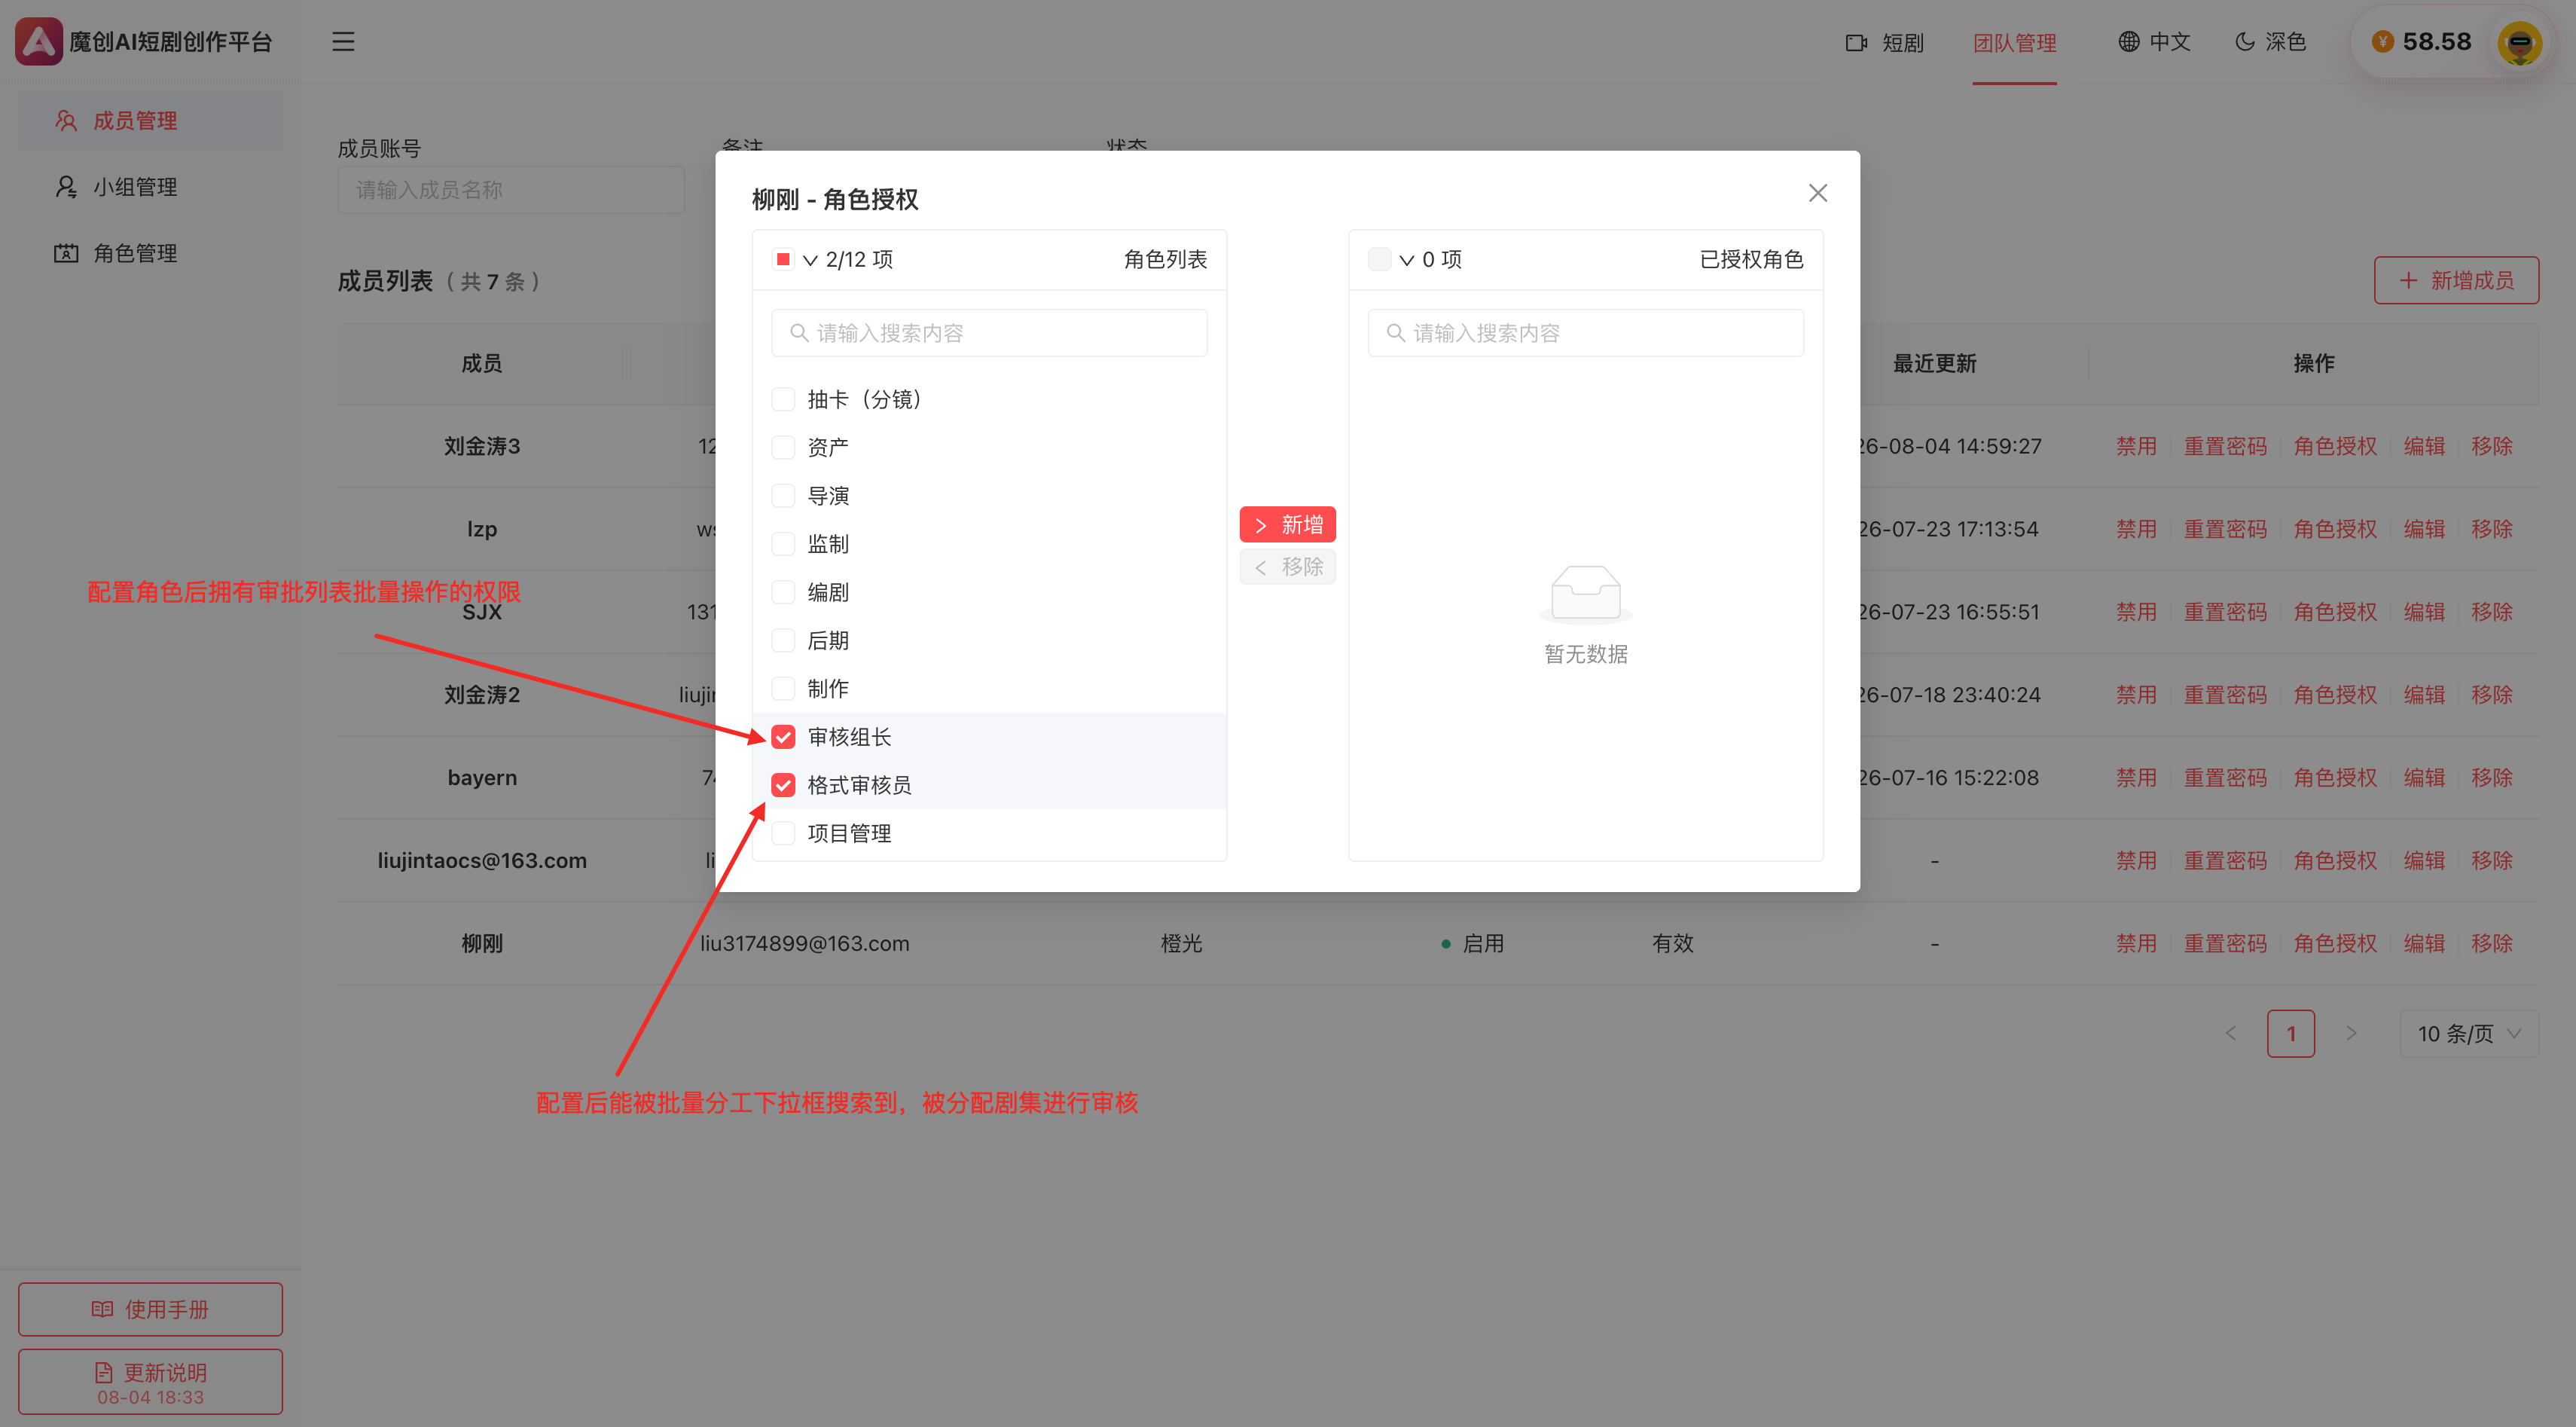
- Format Reviewer: configured in “Team Management - Member Management - Role Authorization”. Authorizing this role makes the member selectable for batch assignment
- Review Lead: configured in “Team Management - Member Management - Role Authorization”. Authorizing this role grants batch episode operations
- Organization Admin: unlimited permissions
Positioning of each review level: use as needed
- Internal review: internal review by the production team (self-check)
- First review: supervision review — picture, sound, story logic, etc.
- Second review: format, subtitles, translation
Finished Episode Upload
- Who can upload: members who can see the “Supervision Review” tab can upload; usually uploaded by “Post-production” members. To enable this, configure the post-production member with the “AI Short Drama - Post-production” project role in Project - Basic Info - Project Members. This role can also edit the “modification status” in the annotation list
- Upload flow:
- First upload:
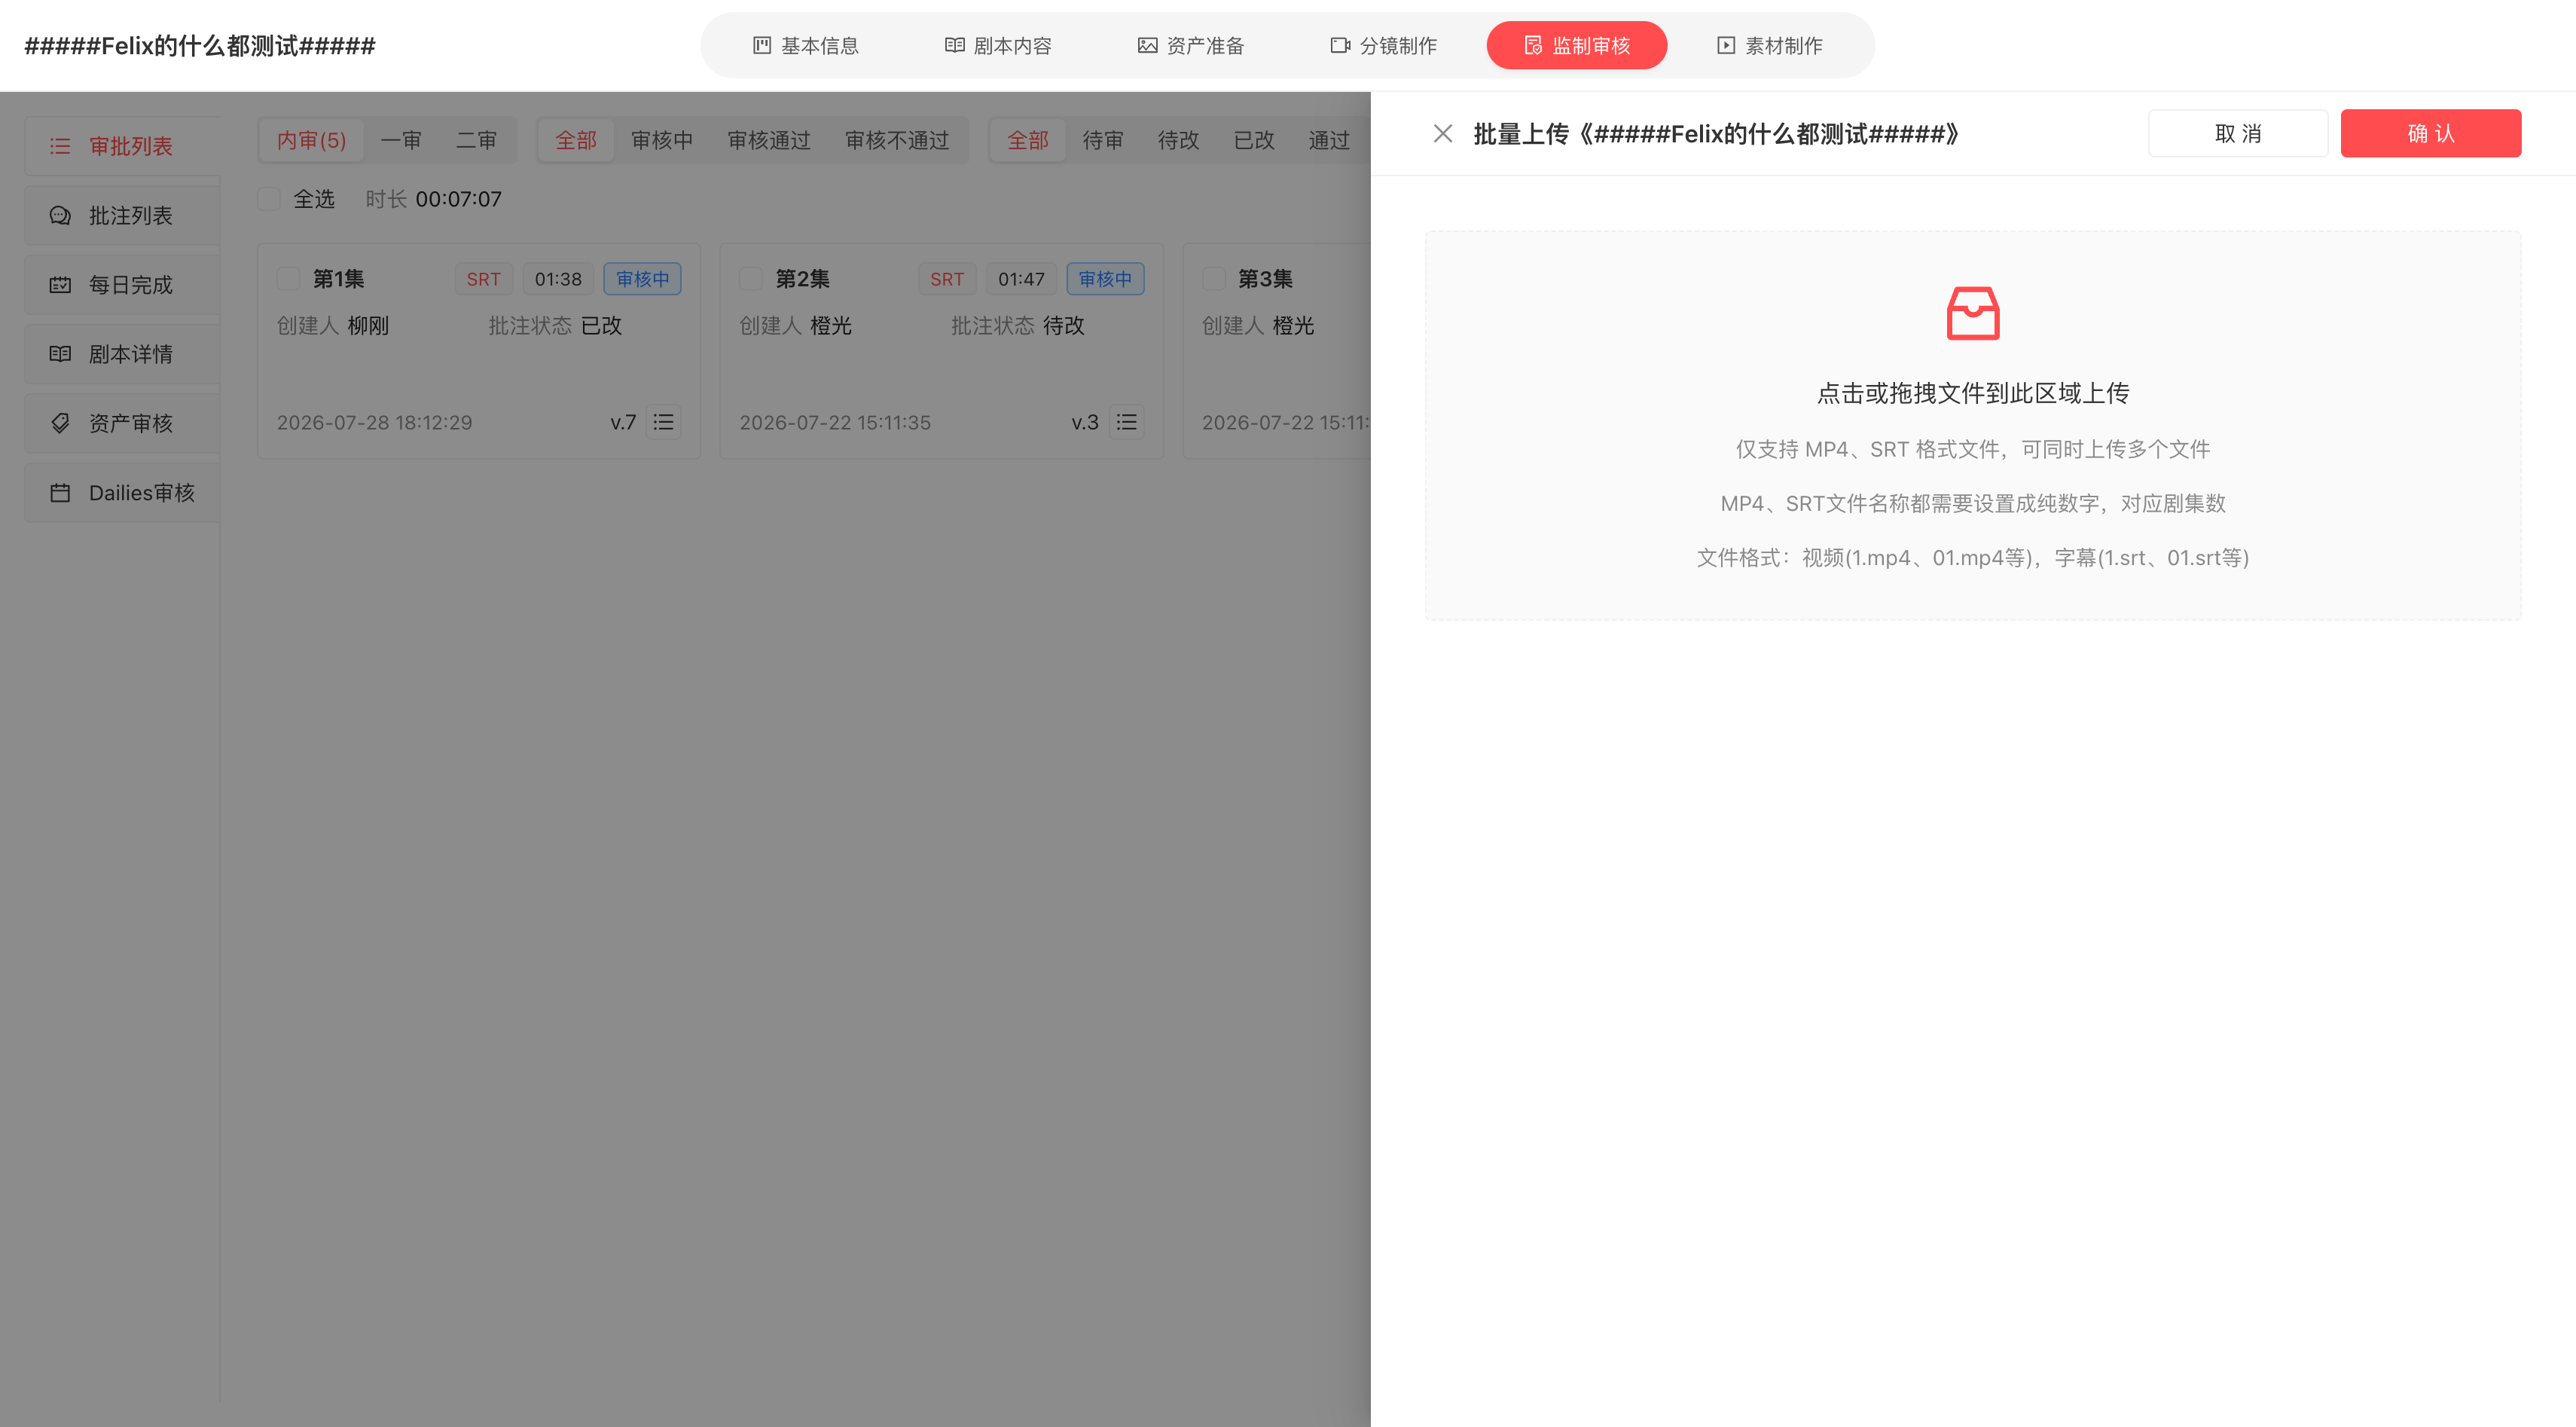
- Click the 【Upload Episodes】 button → the upload side panel opens; upload as required
- Name the finished videos (no subtitles) + SRT subtitle files with pure numbers and batch-import
- Click 【Confirm】 to finish uploading. The episode status defaults to “Under Review”, and the annotation status defaults to “Pending Review”
- Re-upload:
- Status validation: re-upload validates the current episode status. Episodes “Approved” cannot be overwritten; only episodes “Under Review” or “Rejected” can be re-uploaded
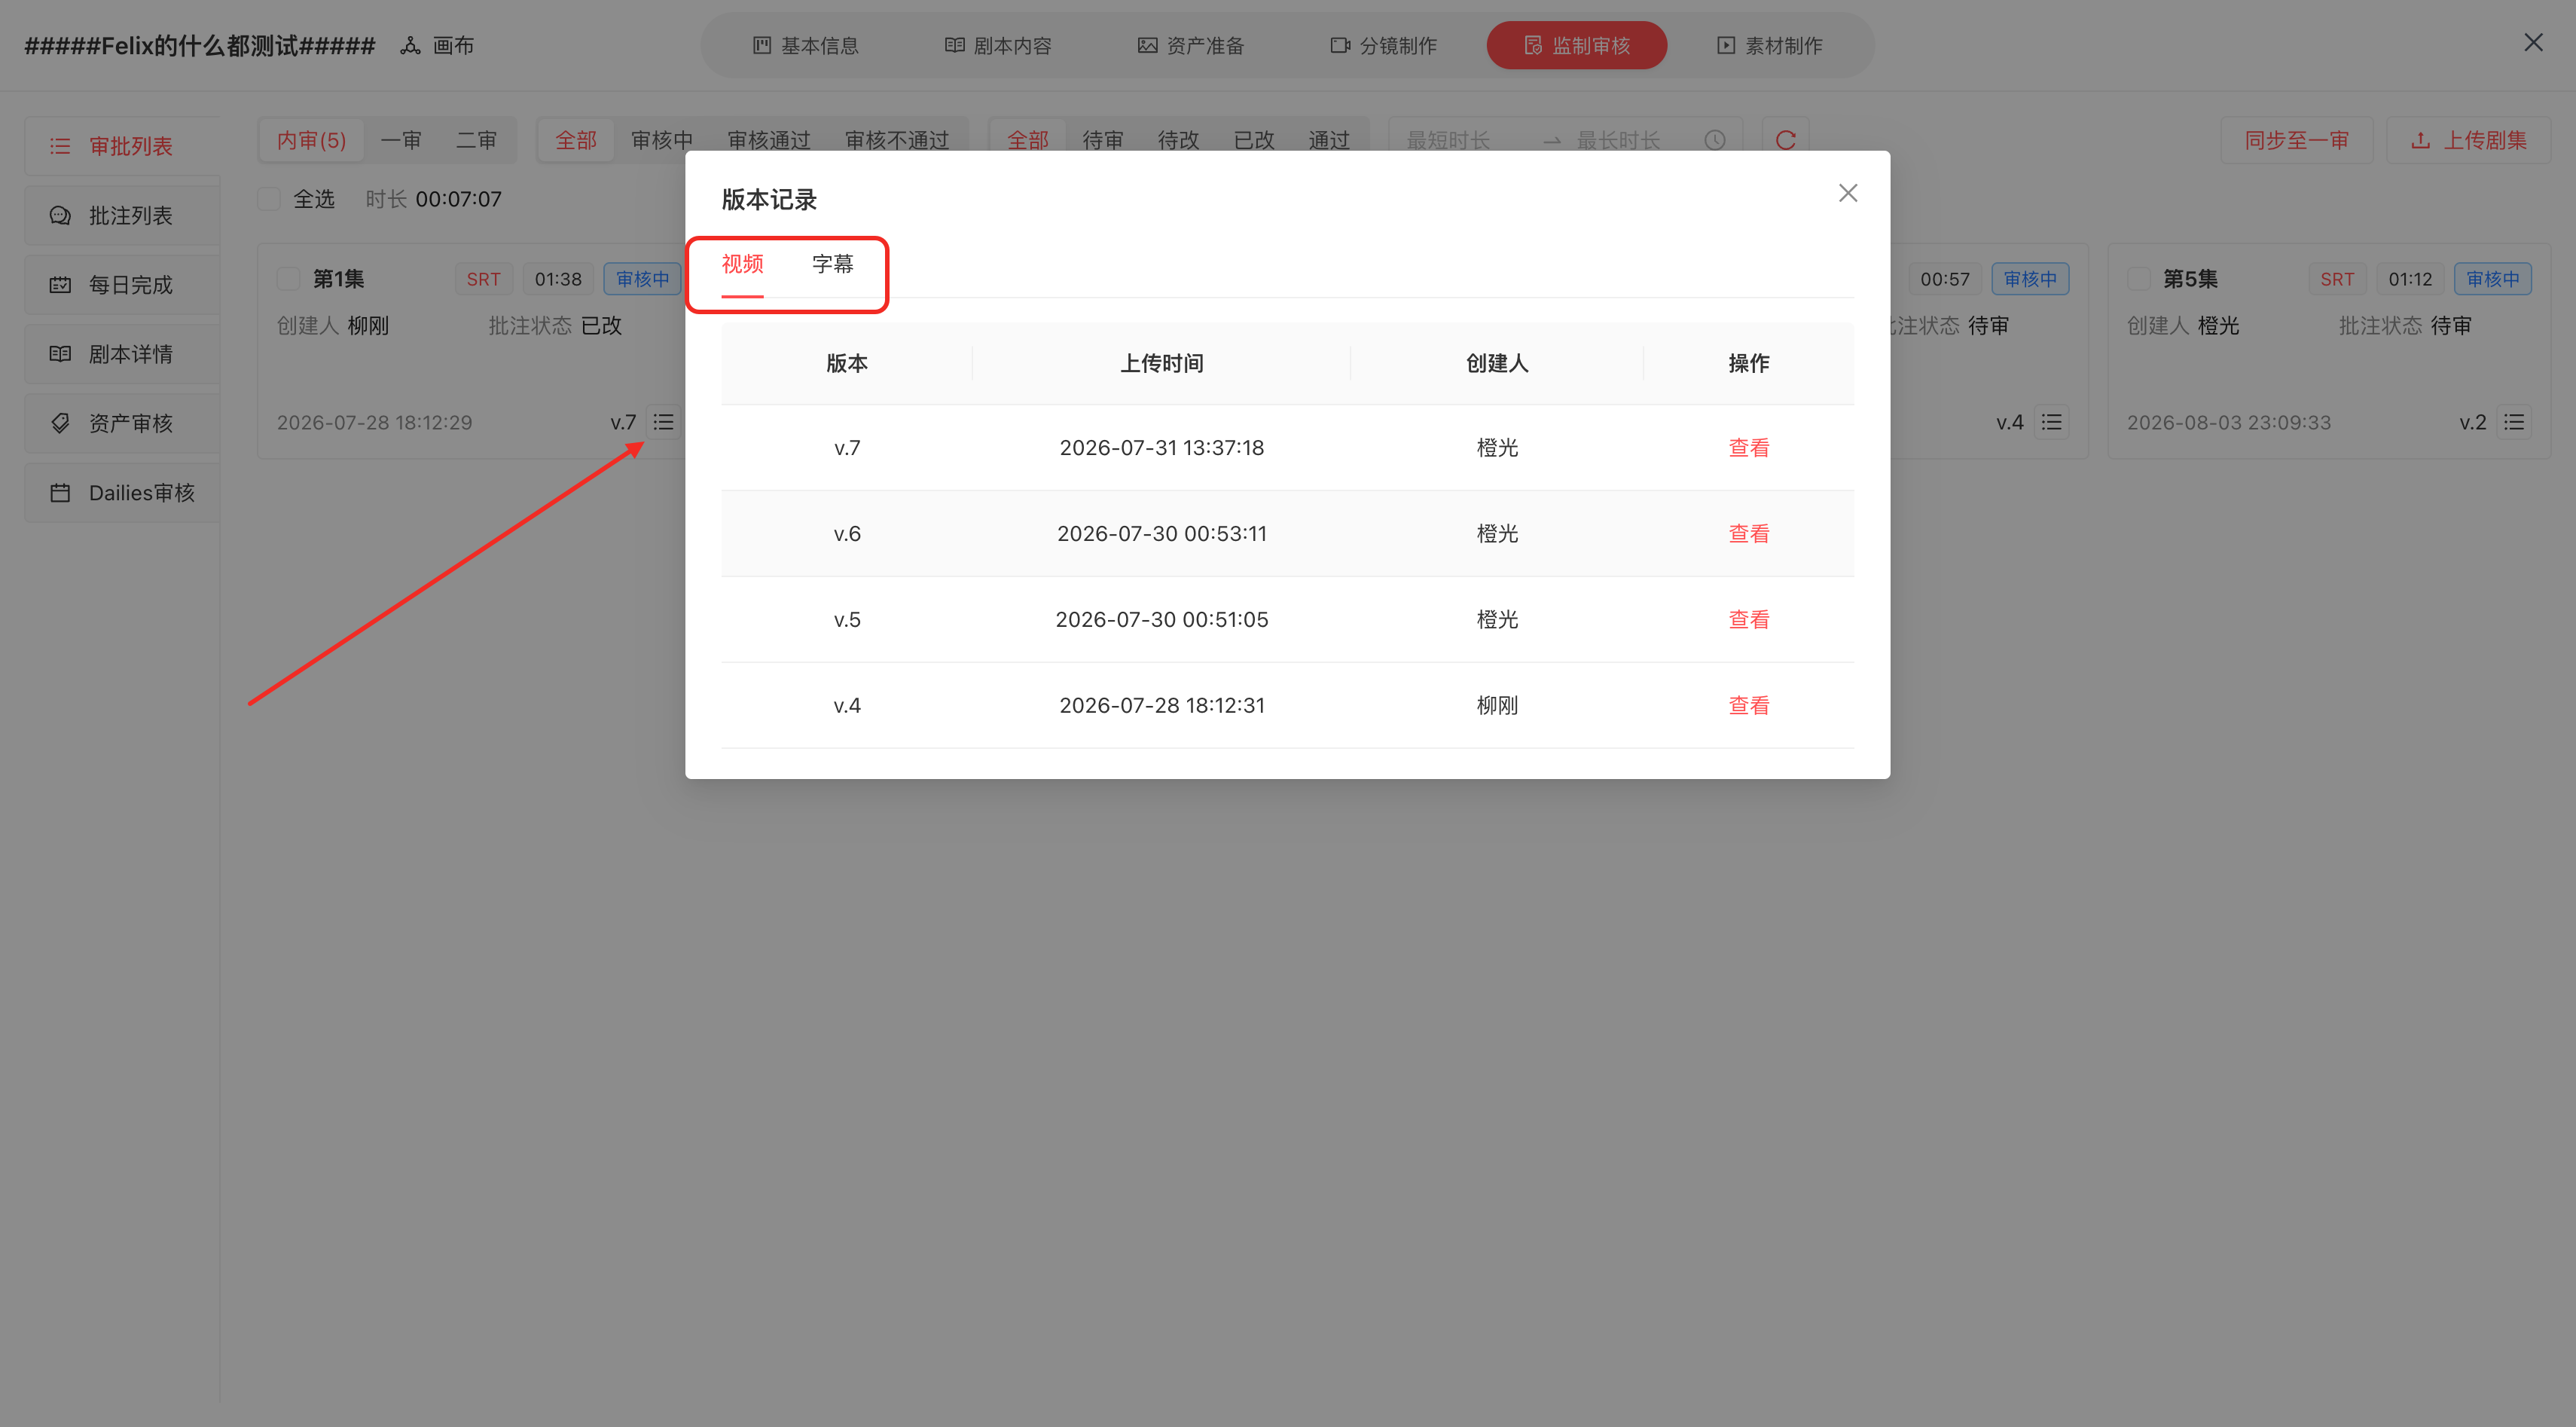
- Re-upload: overwrites the current episode and shows the latest video version. View version history by clicking the version record at the bottom-right of the episode card. Regardless of which review level the episode is at, the overwrite takes effect at that level — no need to delete and re-upload
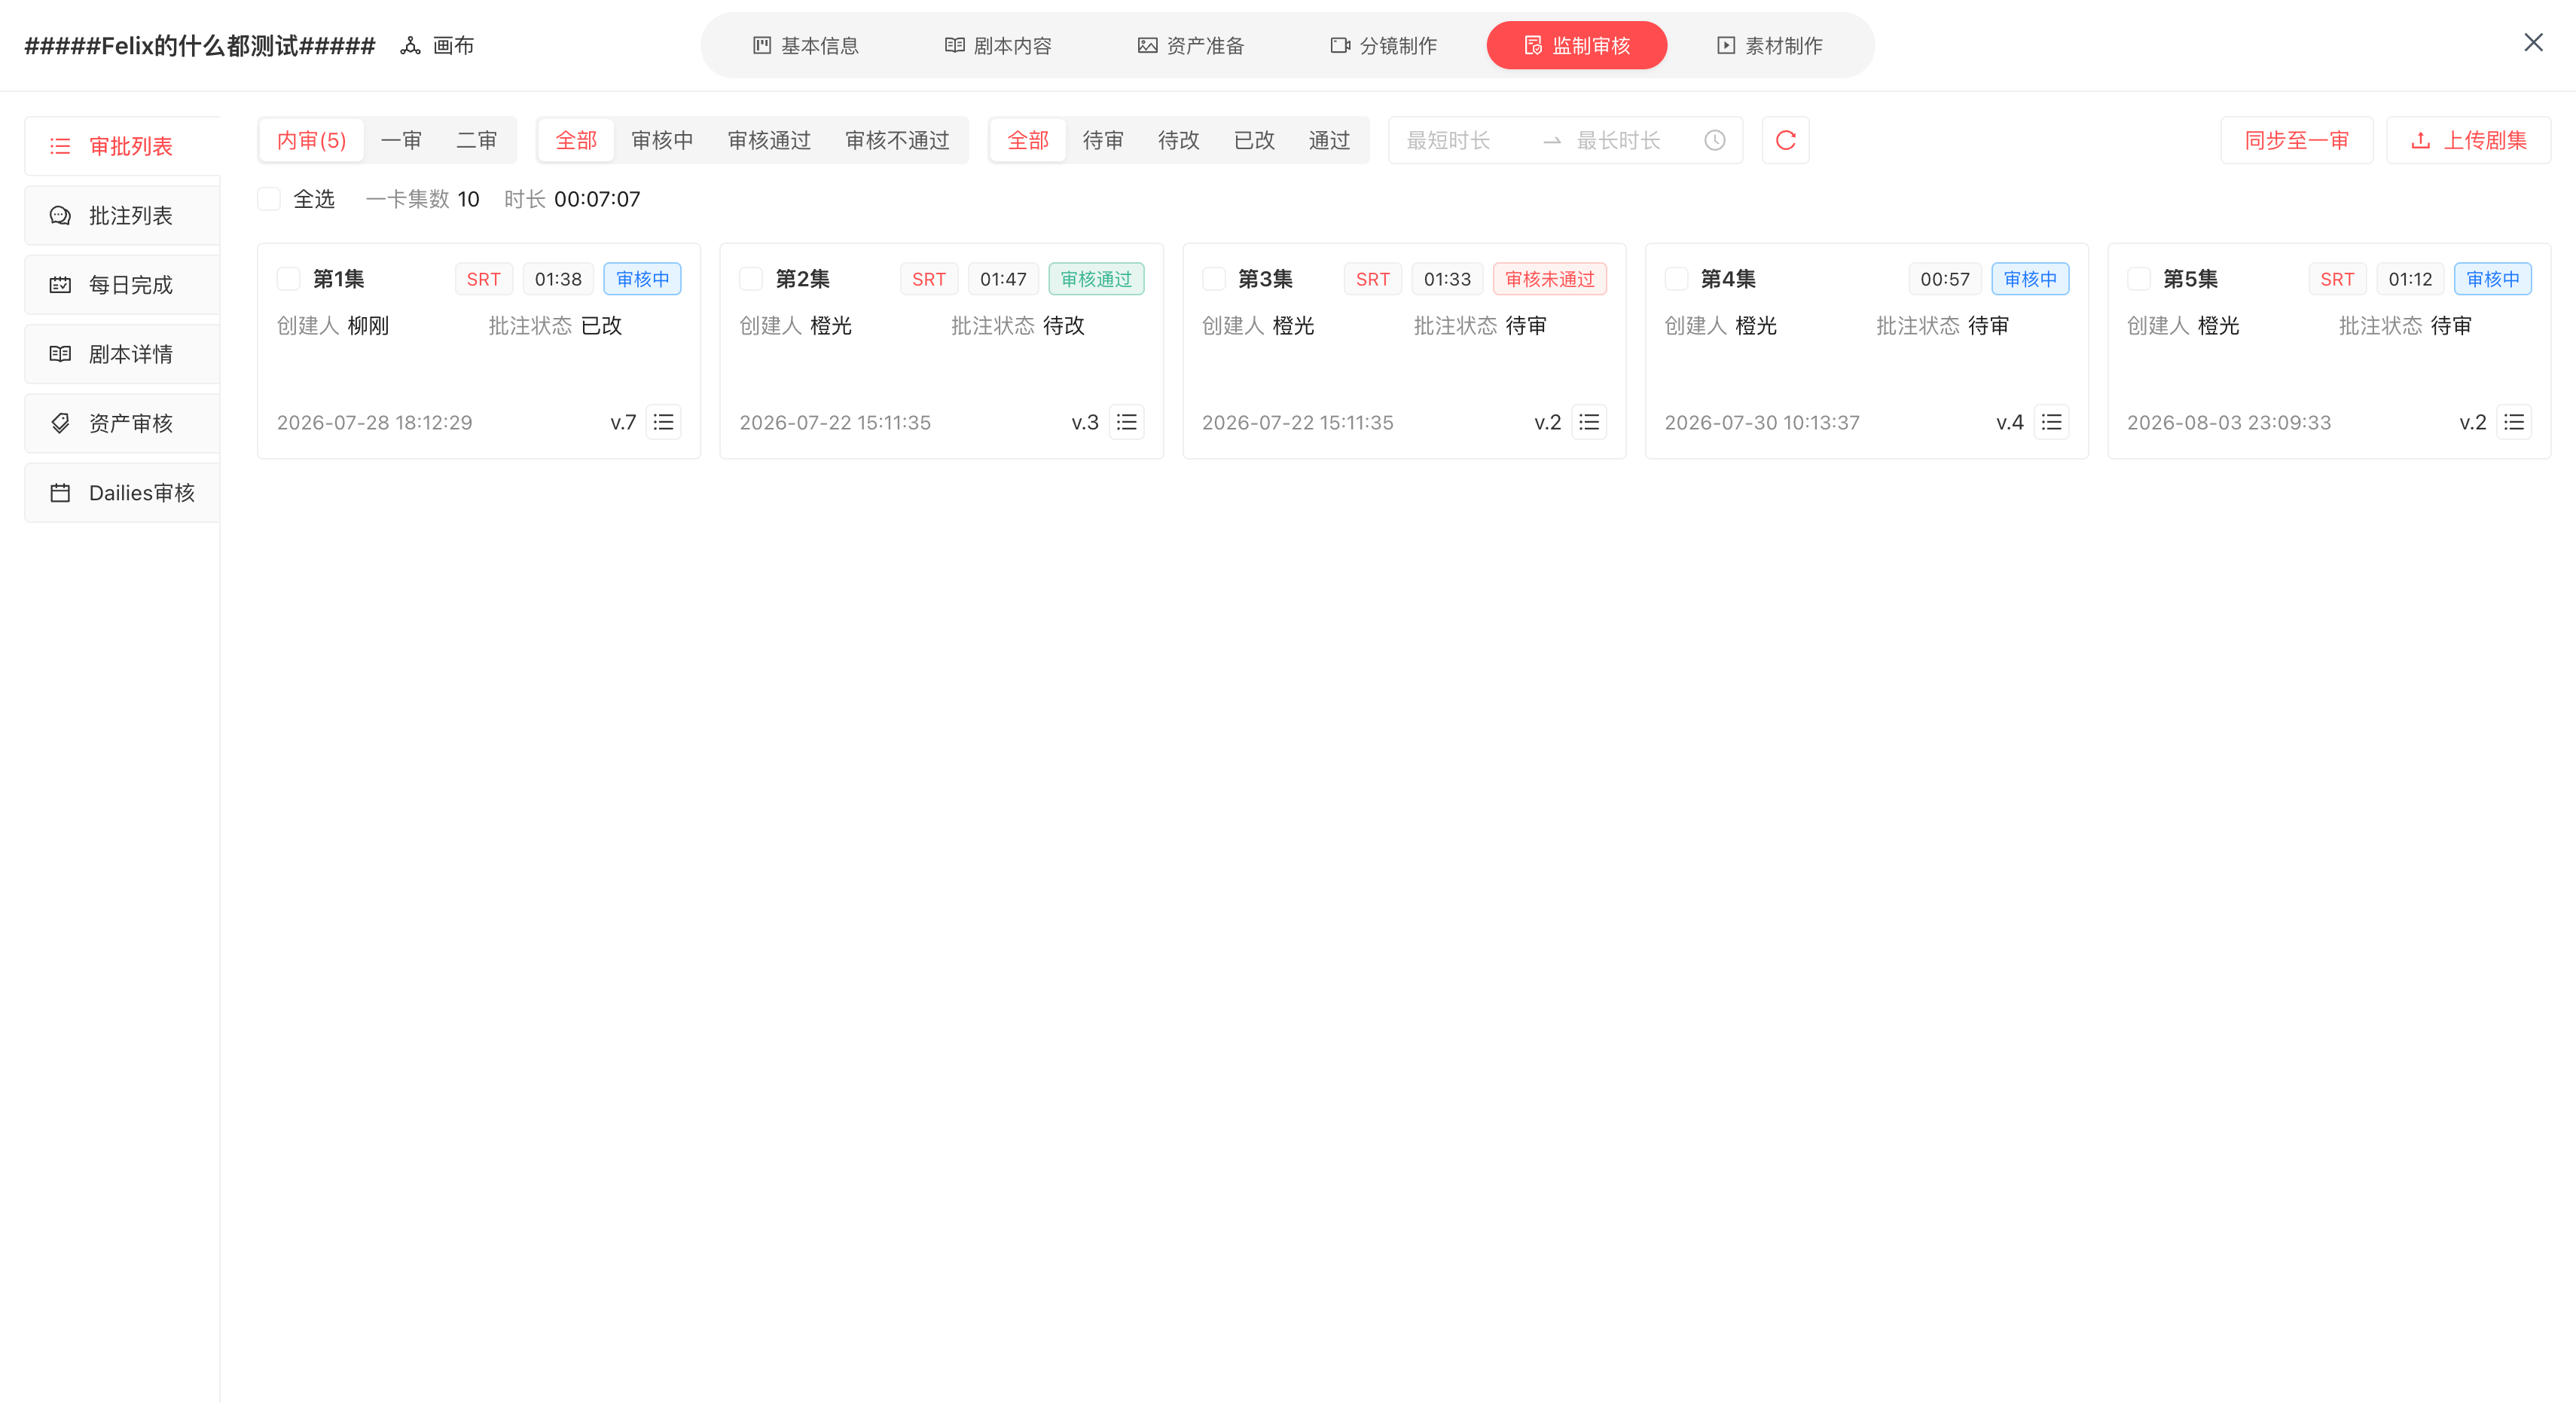
- Upload display & feature description:
- Episode card:
- Episode status: “Under Review (default), Approved, Rejected”
- Annotation status: “Pending Review (default), To Be Modified, Modified, Approved”. Annotation status does not affect episode status; it only helps reviewers track annotation progress to intuitively decide whether to approve/reject an episode
- Creator: the video uploader
- Reviewer: the assigned reviewer
- Date: latest upload date
- Version: latest video version
- Total duration: automatically sums the durations of all latest episode videos, saving manual work
- One-card episode: determined after final editing; synced from Basic Info once filled in
- Filters: by review level, episode review status, annotation status, episode duration
Batch Operations & Assignment
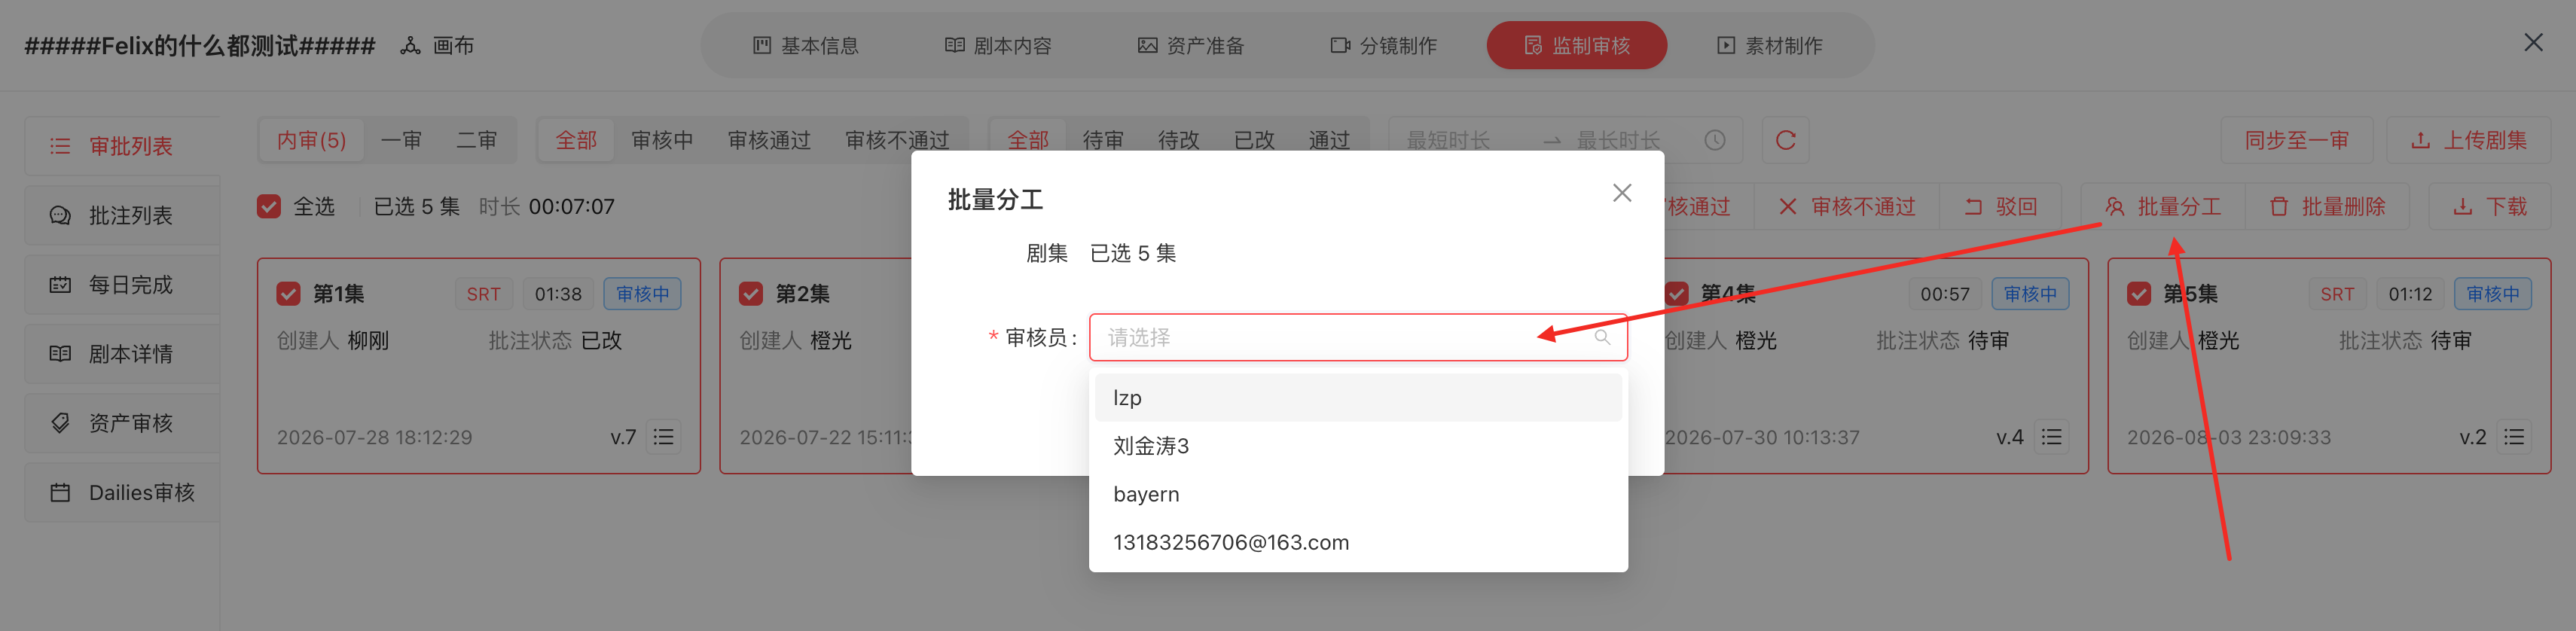
- Batch operation permissions: selecting episodes shows batch operation buttons. By default only the organization admin has batch episode operations; to grant others, authorize the “Review Lead” role in Team Management - Member Management - Role Authorization
- Approve: batch-approve episodes based on review status. Only approved episodes can be synced to the next review level; approved episodes cannot be overwritten by re-upload
- Reject: batch-reject episodes based on review status. Only rejected episodes can be synced to the next review level; rejected episodes can be overwritten by re-upload
- Return: reverts “Approved / Rejected” episodes to “Under Review” status
- Batch assignment: assign reviewers to the selected episodes
- Batch delete: deletes all versions of the selected episodes’ videos and subtitle files
- Download: download “subtitle files (with and without character names) and videos”; save subtitles
- Assignable: to assign review tasks to a member, authorize the “Format Reviewer” role in Team Management - Member Management - Role Authorization. After assignment, the reviewer’s name appears on the episode card. Episodes must be assigned before batch status operations
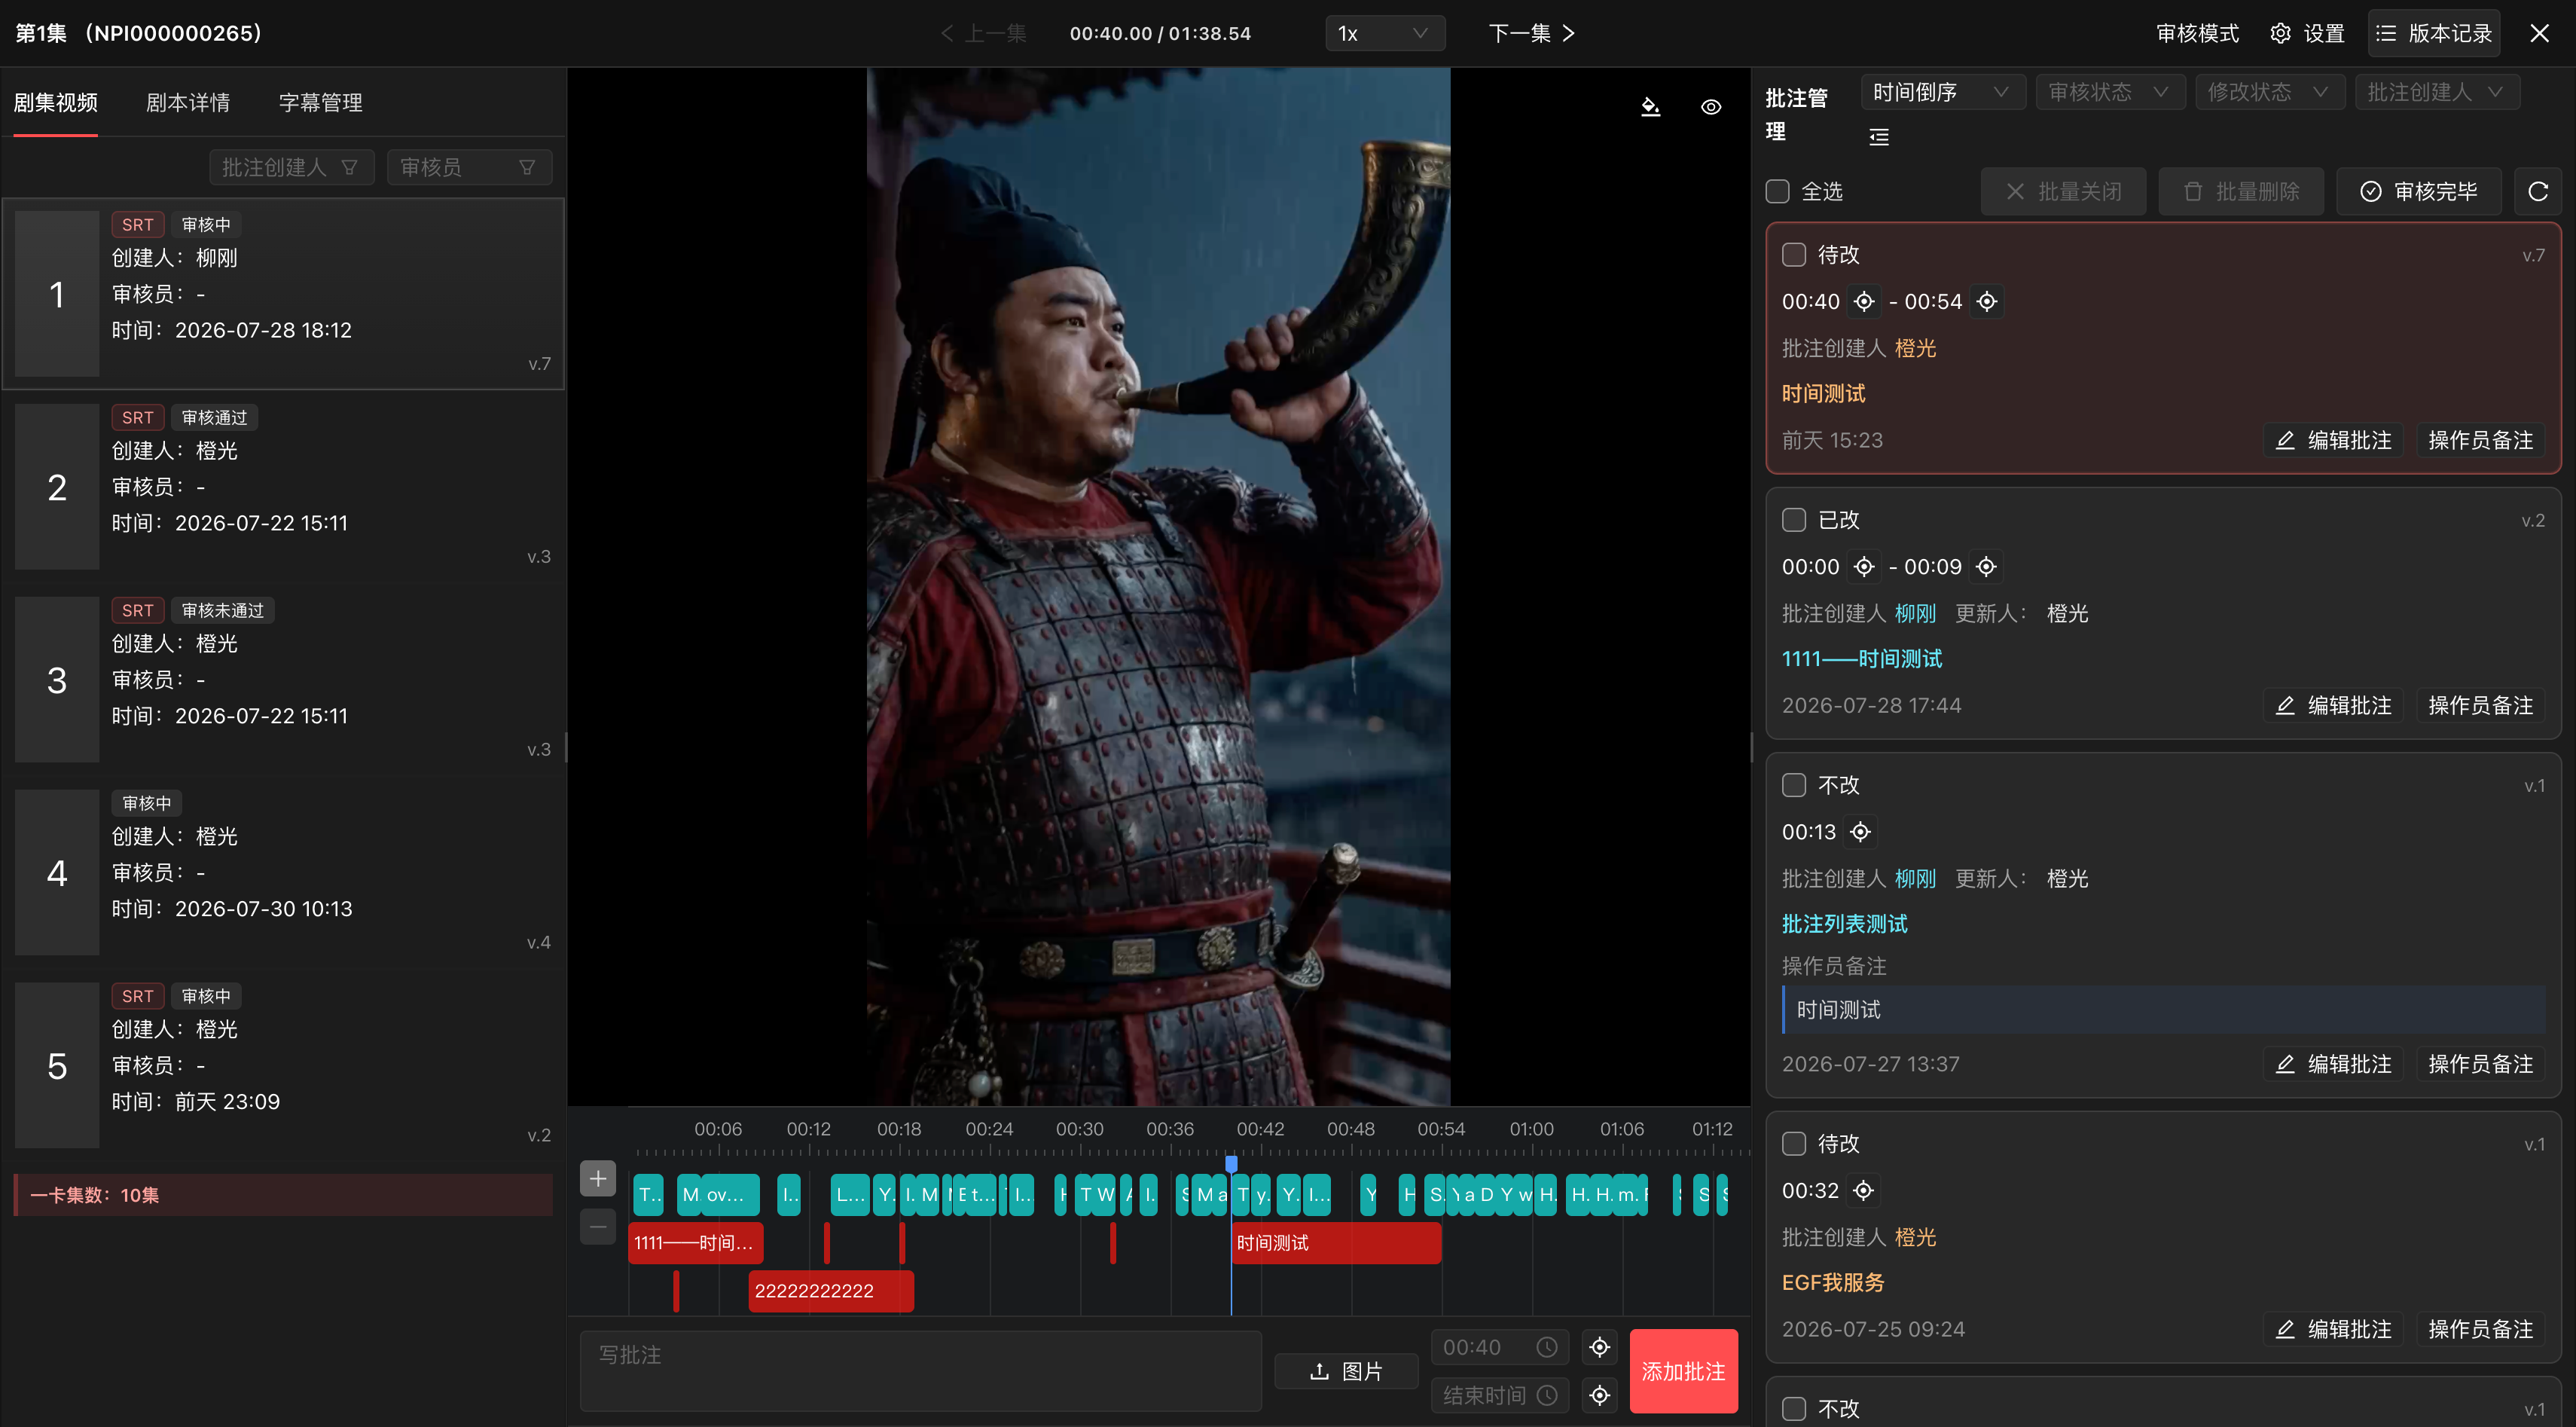
Video Review
- Video review page status: determined by the episode status
- Under Review: enters “Review Mode” — annotations and edits allowed
- Approved / Rejected: enters “View Mode” — view only, no annotation or editing
- Click the episode card to enter the episode’s review page. Core features:
- Left sidebar:
- Episode videos: switch episodes, show one-card episode cut points, filter (annotation creator, reviewer)
- Script details: synced from “Supervision Review - Script Details” uploaded episode splits
- Subtitle management: shows subtitle content from uploaded files; can modify, add and delete
- Video player area:
- Timeline & annotation area:
- The timeline shows subtitle content and annotations. Click subtitle content to locate it in the left sidebar; click annotations to locate the annotation info in the right sidebar
- Annotation input: reviewers can enter text + images, annotating at a timestamp or a time range. Ctrl+Enter saves an annotation quickly
- Right sidebar:
- Annotation info cards:
- Default newest-first display; modification status is “To Be Modified”
- Shows the timeline time of the annotation — single timestamp or time range
- Edit annotation: reviewers can edit annotation info and review status (“modify again”, “close”). Generally only your own annotations; Review Leads and admins have broader permission
- Operator notes: usually production team members edit the “modification status” (To Be Modified / Modified / Not Modified) with notes; Review Leads and admins have permission, and the updater’s name is recorded
- Filter annotations: by “annotation order, review status, modification status, annotation creator”, etc.
- Operation bar:
- Batch close: only closes the status of selected annotations; visible via review-status “Closed” filter
- Batch delete: physical deletion, cannot be recovered
- Review complete: review the episode’s status — approve or reject
- Top bar:
- Previous/next episode switching and video playback progress
- Settings: video playback settings
- Version history: same function as the episode card’s version record on the previous page
Sync to First/Second Review
- Internal review: shows a 「Sync to First Review」 button. Clicking it validates whether any episodes are approved; approved episodes are automatically synced to first review, and their status returns to “Under Review”
- First review: shows a 「Sync to Second Review」 button. Clicking it validates whether any episodes are approved; approved episodes are automatically synced to second review, and their status returns to “Under Review”
8.2 Annotation List
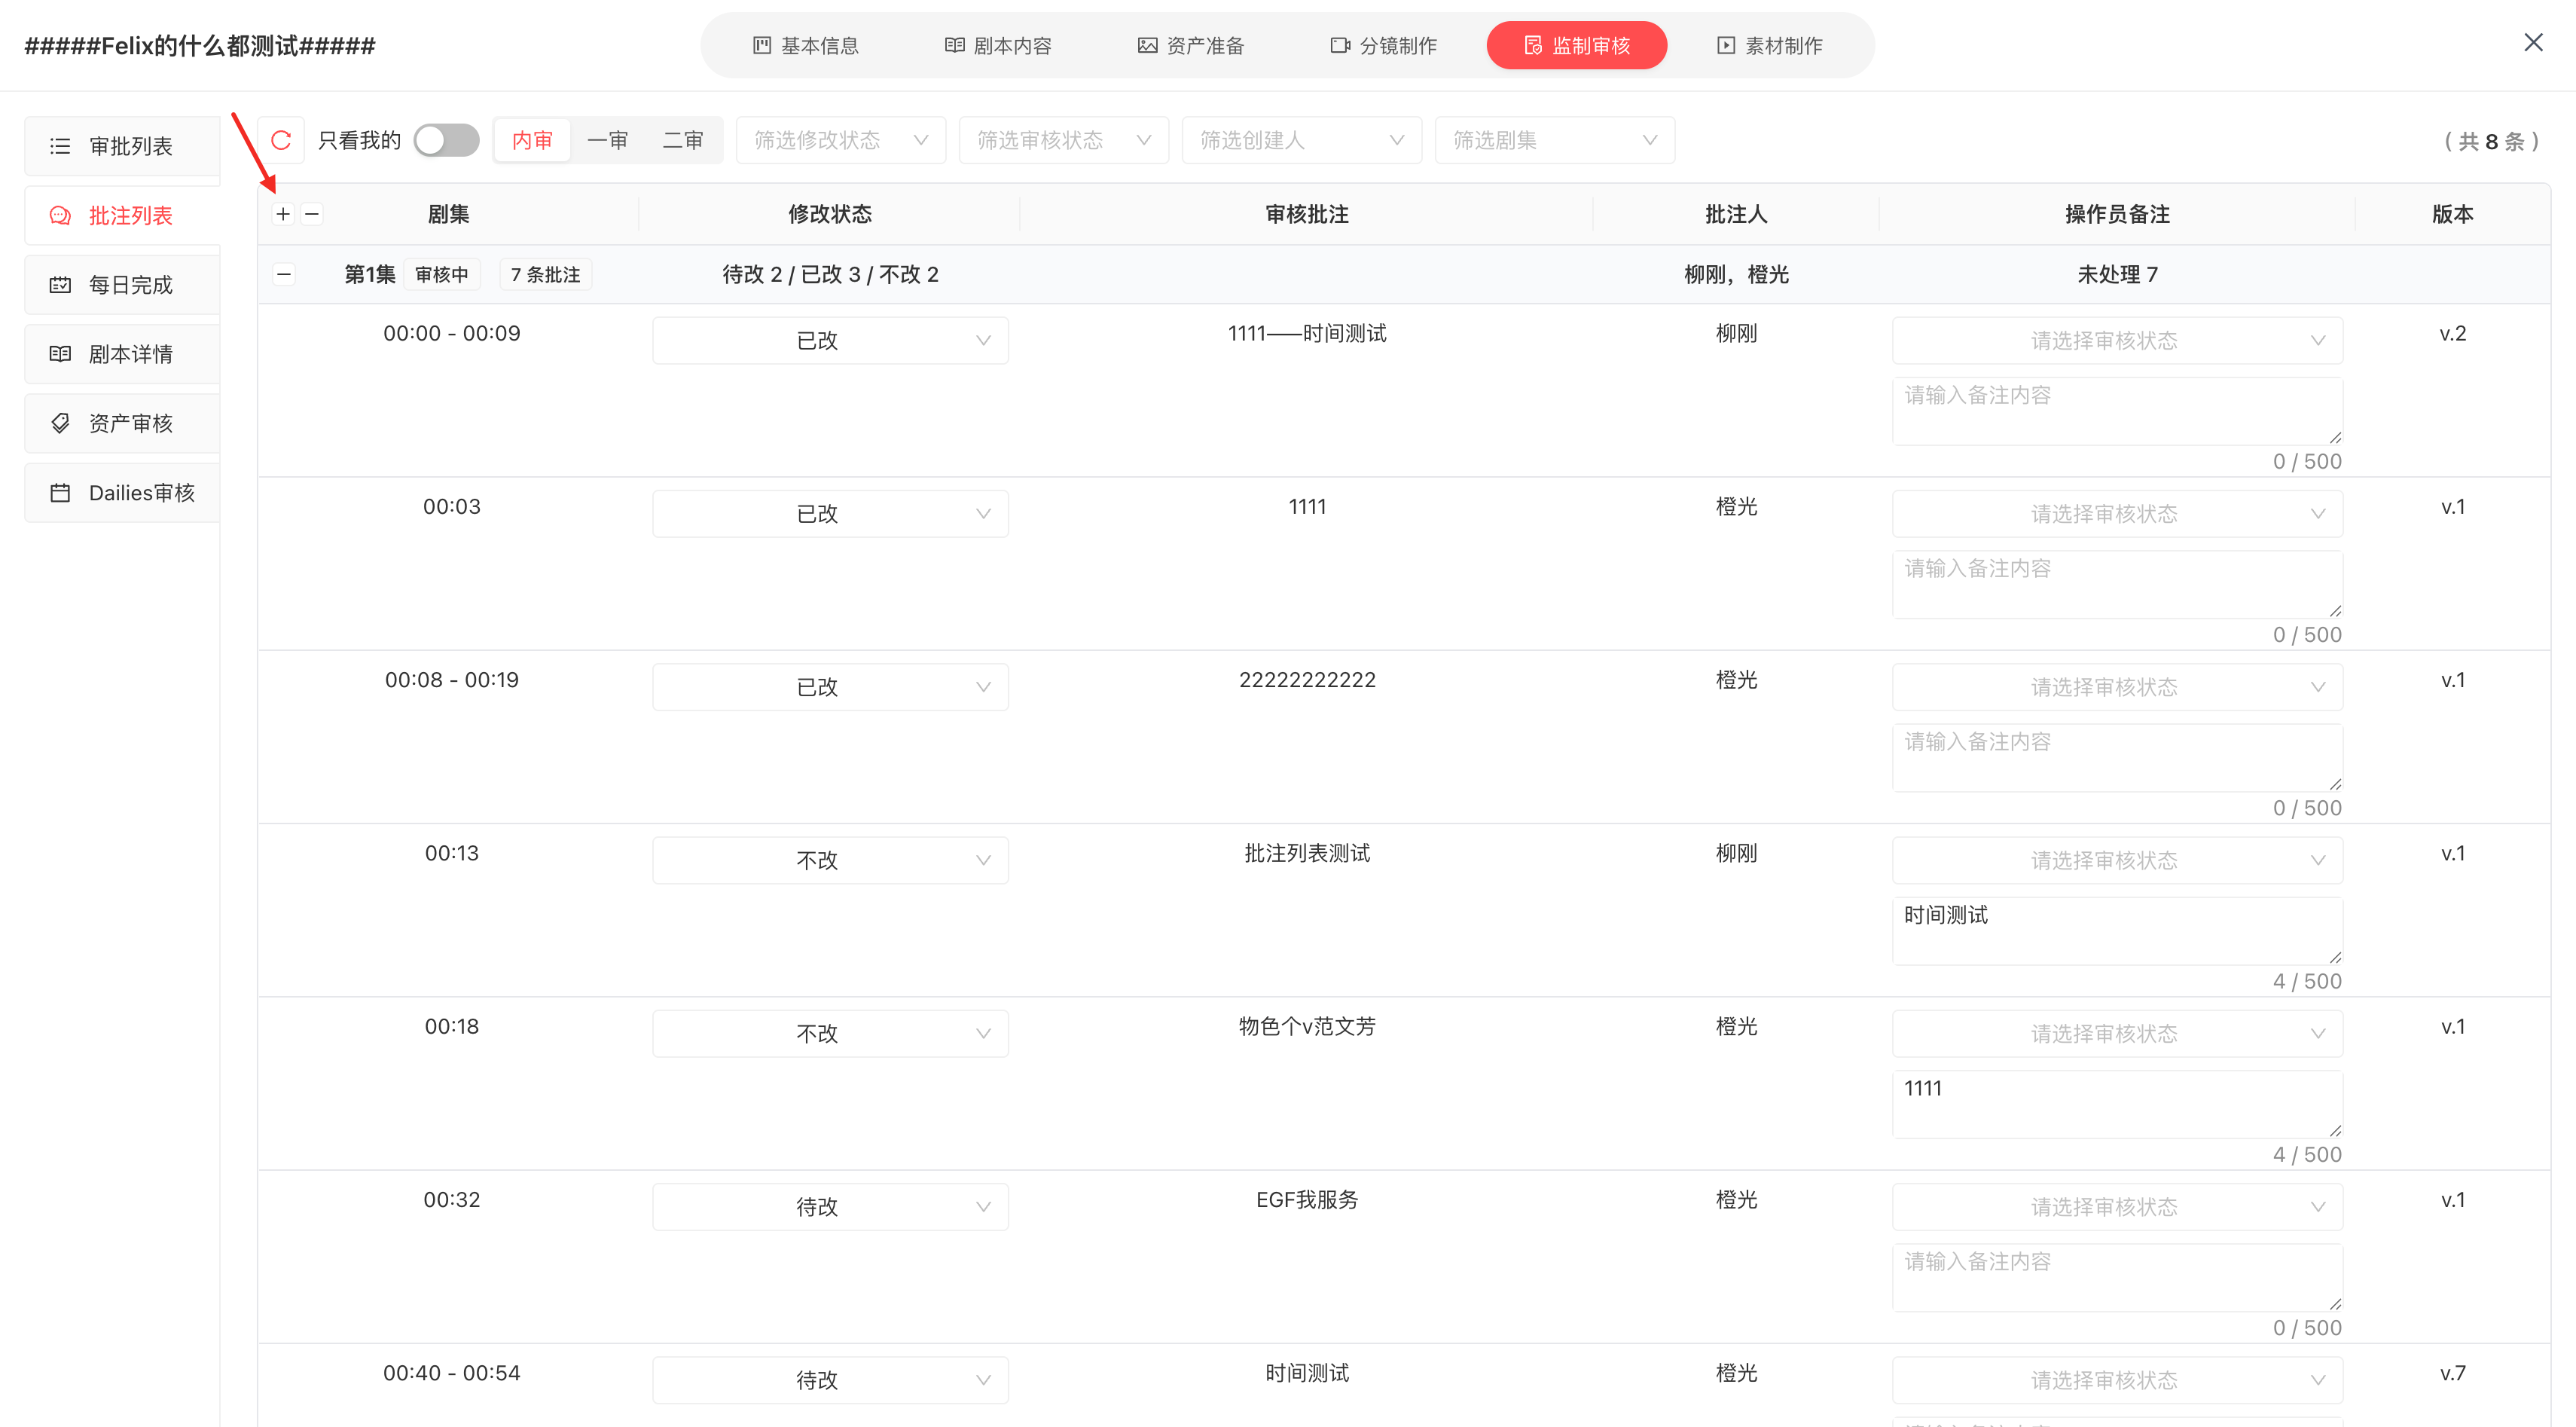
One-line summary: syncs annotation content from every episode’s video review, allowing quick status updates of annotations in the video review page
- Shows annotations from each review level: internal review, first review, second review
- Filter annotations: “Only Mine, Modification Status, Review Status, Annotation Creator, Episode Number”
- Expand & collapse: the latest episode’s annotations are expanded by default; one-click expand/collapse
- Edit permissions:
- Edit “modification status”: generally only your own; “Review Lead, AI Short Drama - Post-production, Admin” have permission
- Edit “review status”: generally only your own; “Review Lead, Admin” have permission
8.3 Daily Completion
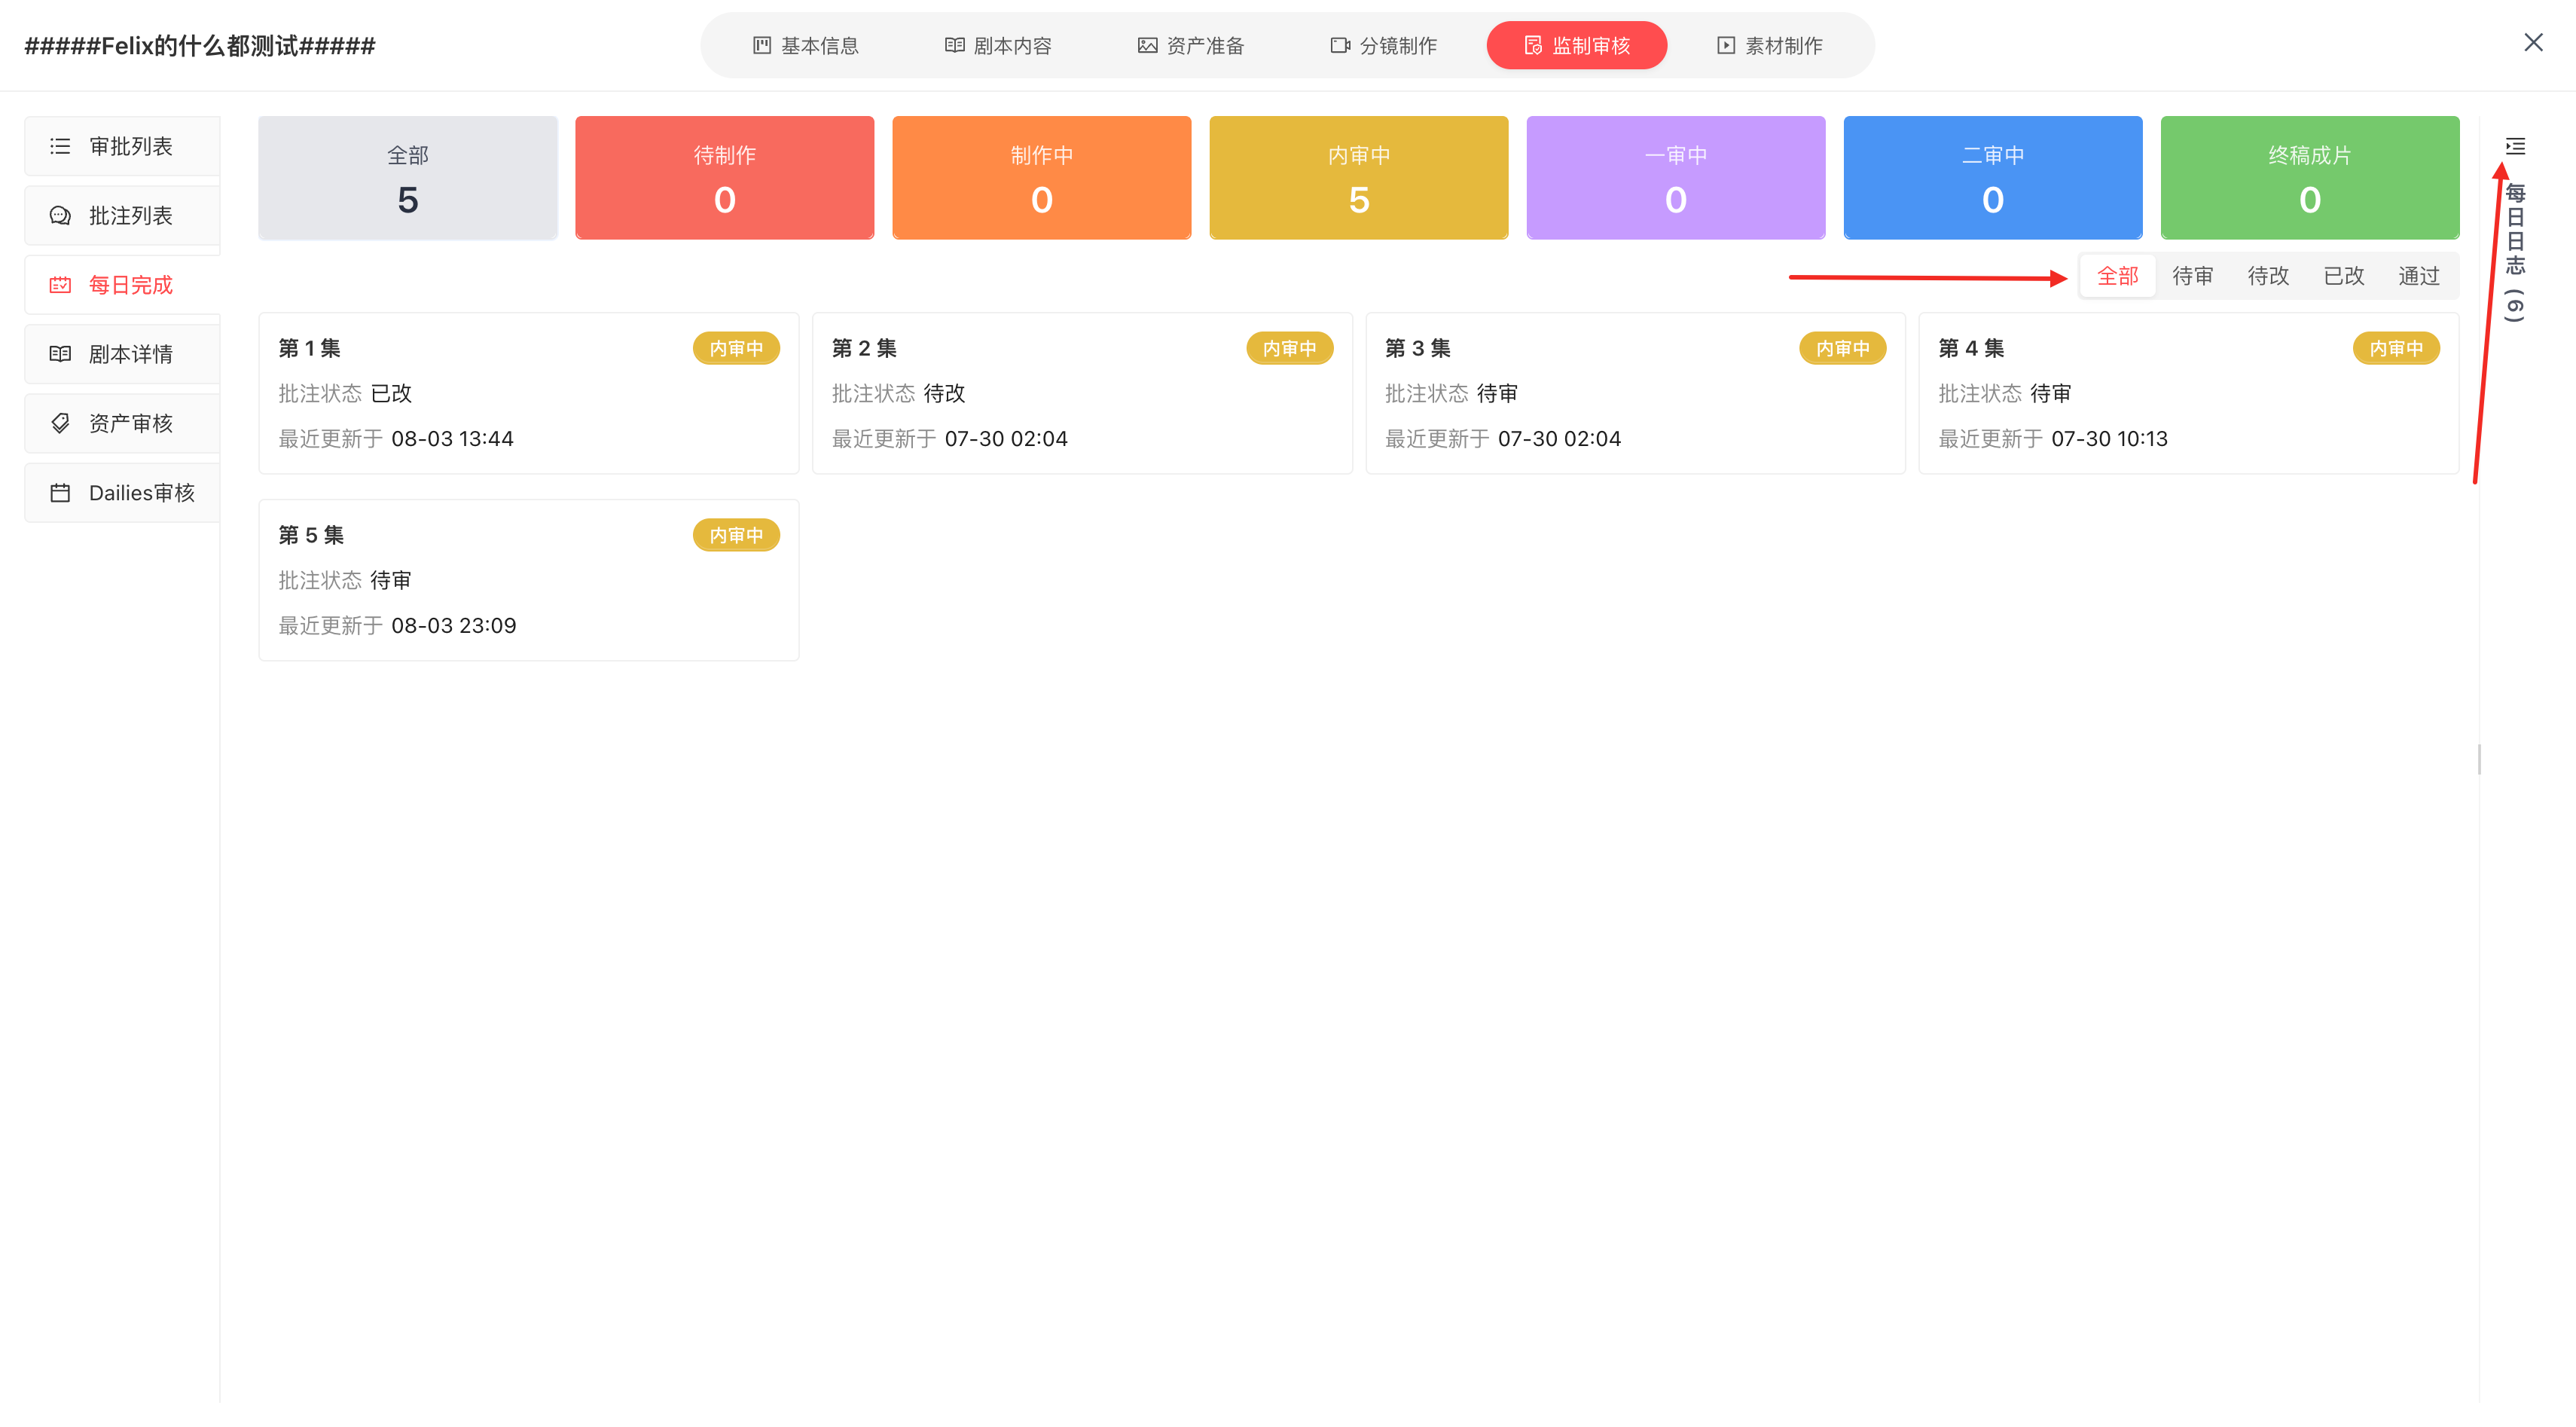
One-line summary: a daily episode completion status table recording the full lifecycle of every episode from production to final delivered video, giving project leads a quick overview of production progress and status
- Major statuses:
- To Be Produced: episode hasn’t entered video generation
- In Production: episode has entered video generation
- Internal Review: episode video uploaded to internal review
- First Review: episode synced from internal review to first review
- Second Review: episode synced from first review to second review, in “Pending Review or Rejected” state
- Final Delivered: episode is in second review with “Approved” status
- Annotation status:
- Only shown in the major statuses “Internal Review, First Review, Second Review, Final Delivered”
- Annotation status filter: filter episodes by “Pending Review / To Be Modified / Modified / Approved” annotation status under the current major status
- Daily log: records daily episode status changes for tracing historical production status
8.4 Script Details
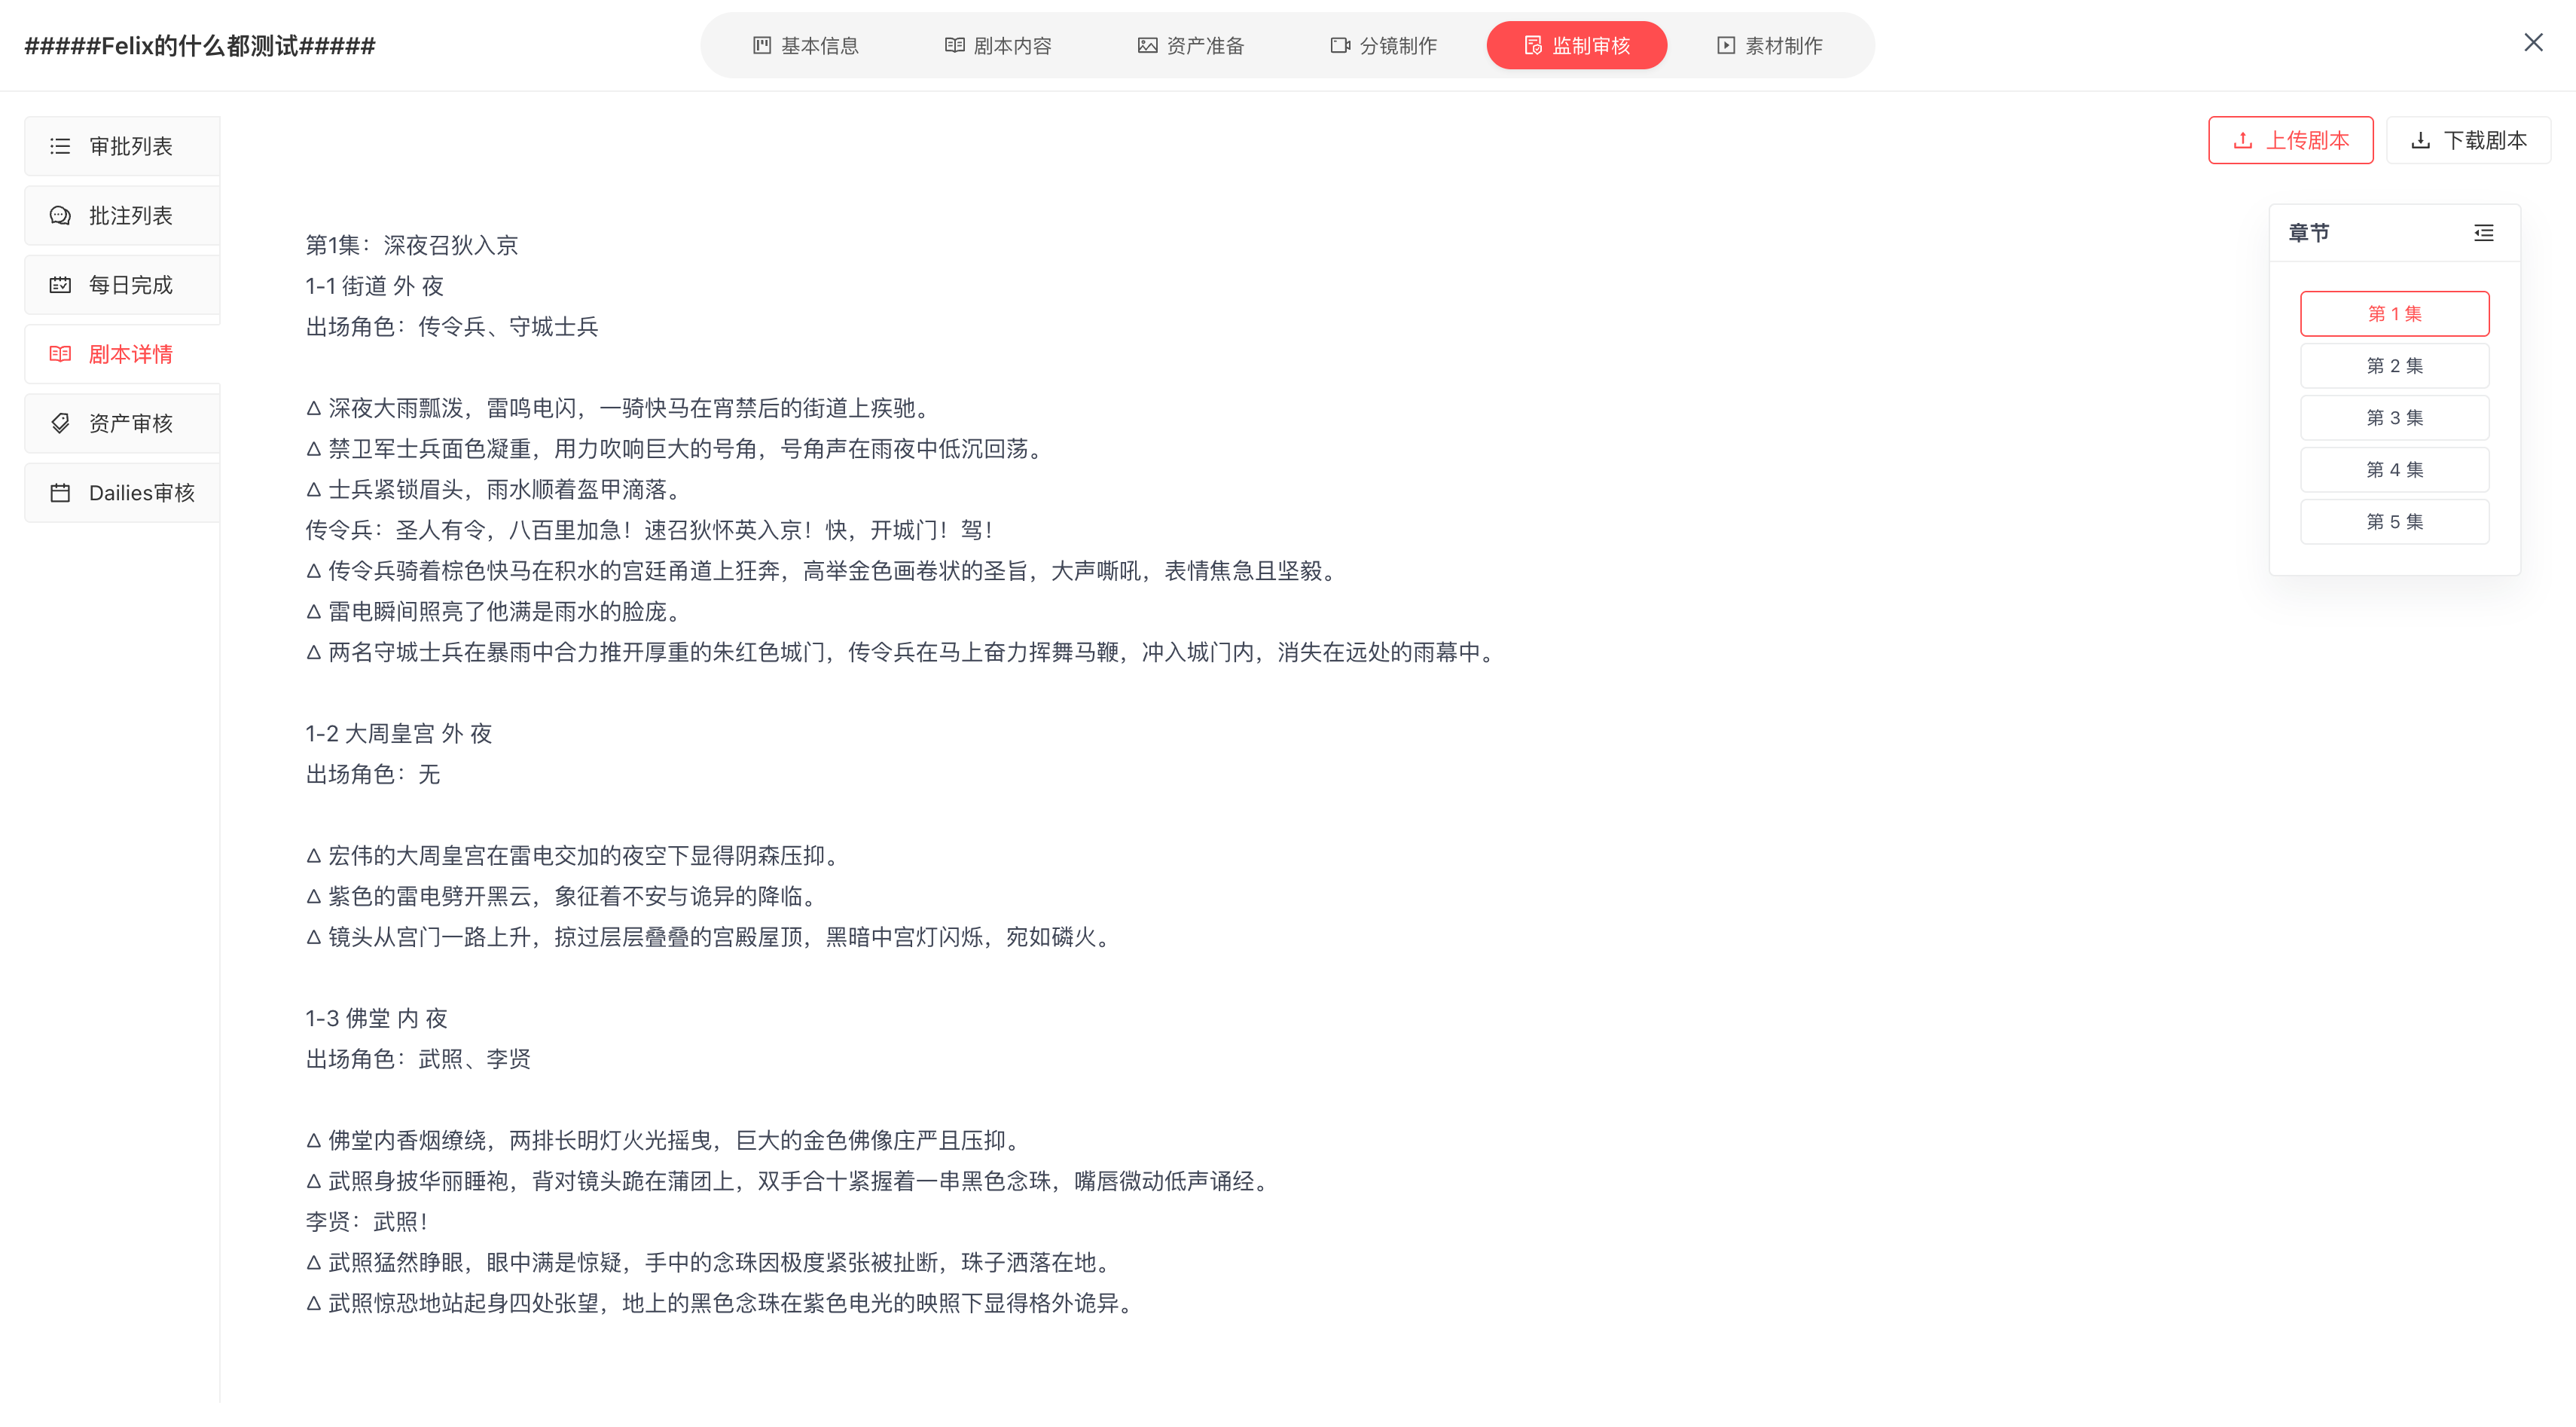
- This module requires uploading the script modified during production
- After upload, the script is split into episodes and synced to “Video Review” page - left sidebar - Script Details
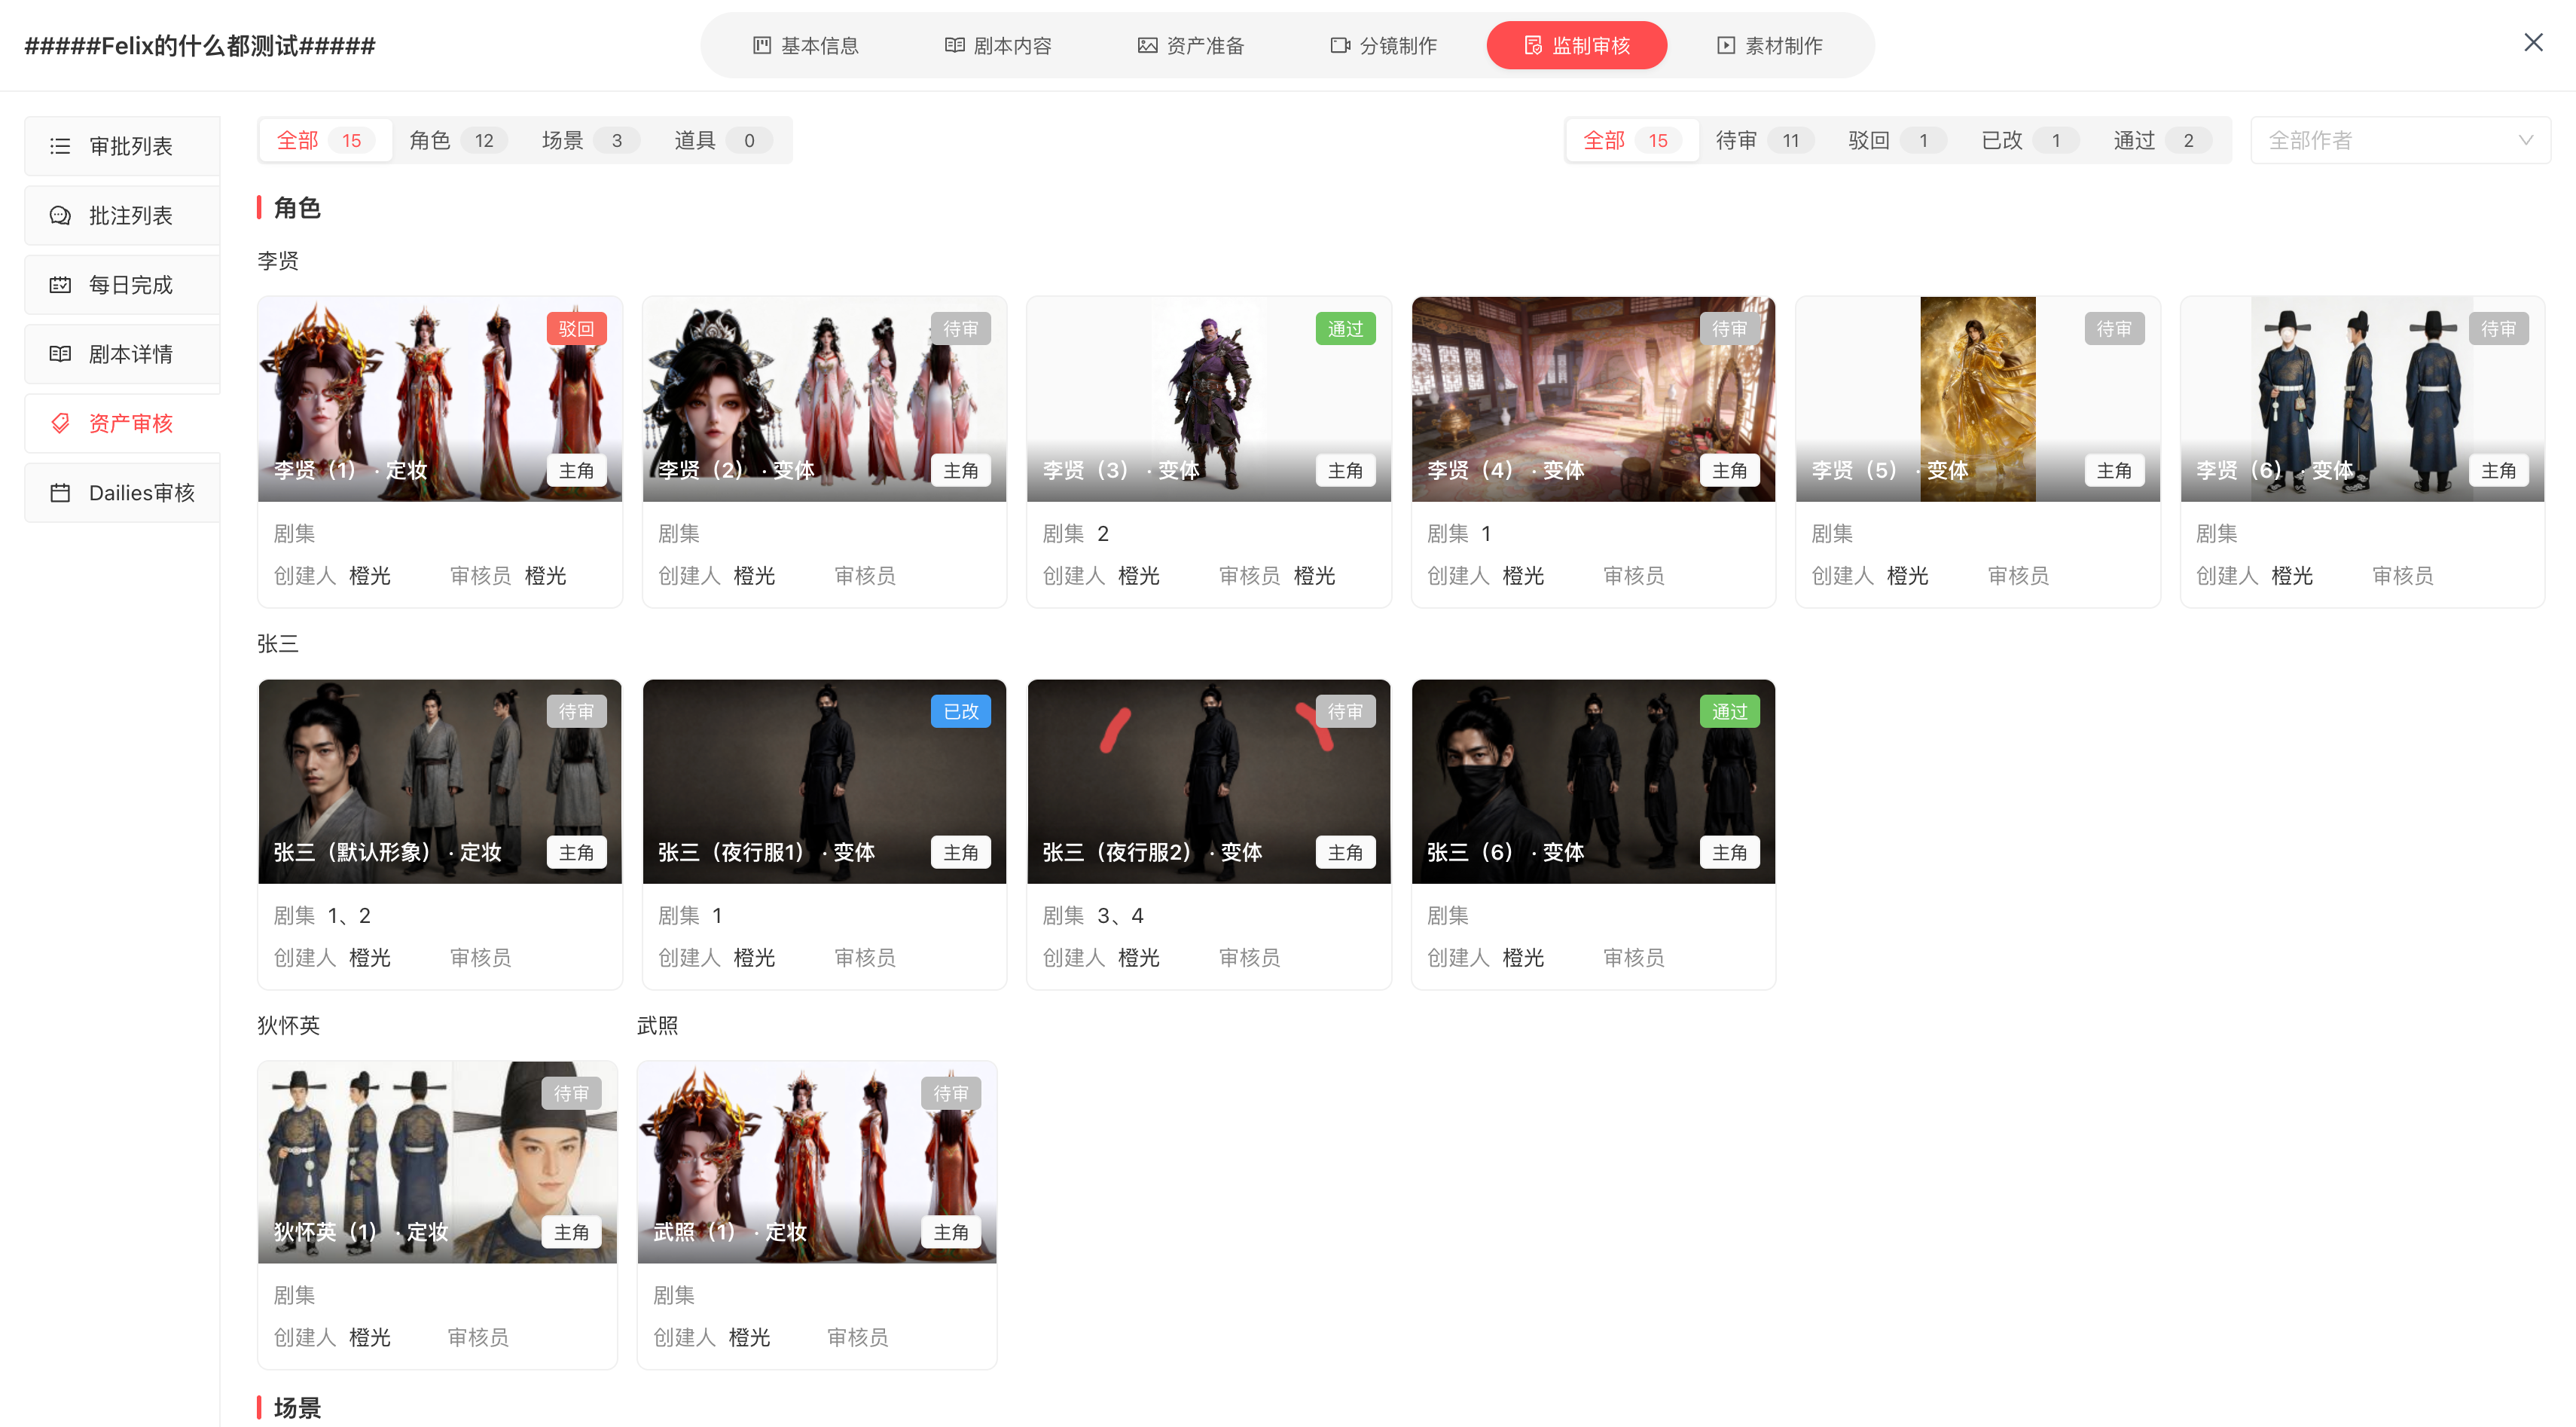
8.5 Asset Review
One-line summary: this module syncs “Material Preparation” - “Character, Scene, Prop” - “Final Design / Approved, Variants” asset images for supervision roles to approve
- Asset sync: only syncs “Material Preparation” - “Character, Scene, Prop” - “Final Design / Approved, Variants” asset images
- Sorting: by “Character, Scene, Prop” asset subject; within a subject, by “Final Design / Approved, Variants”
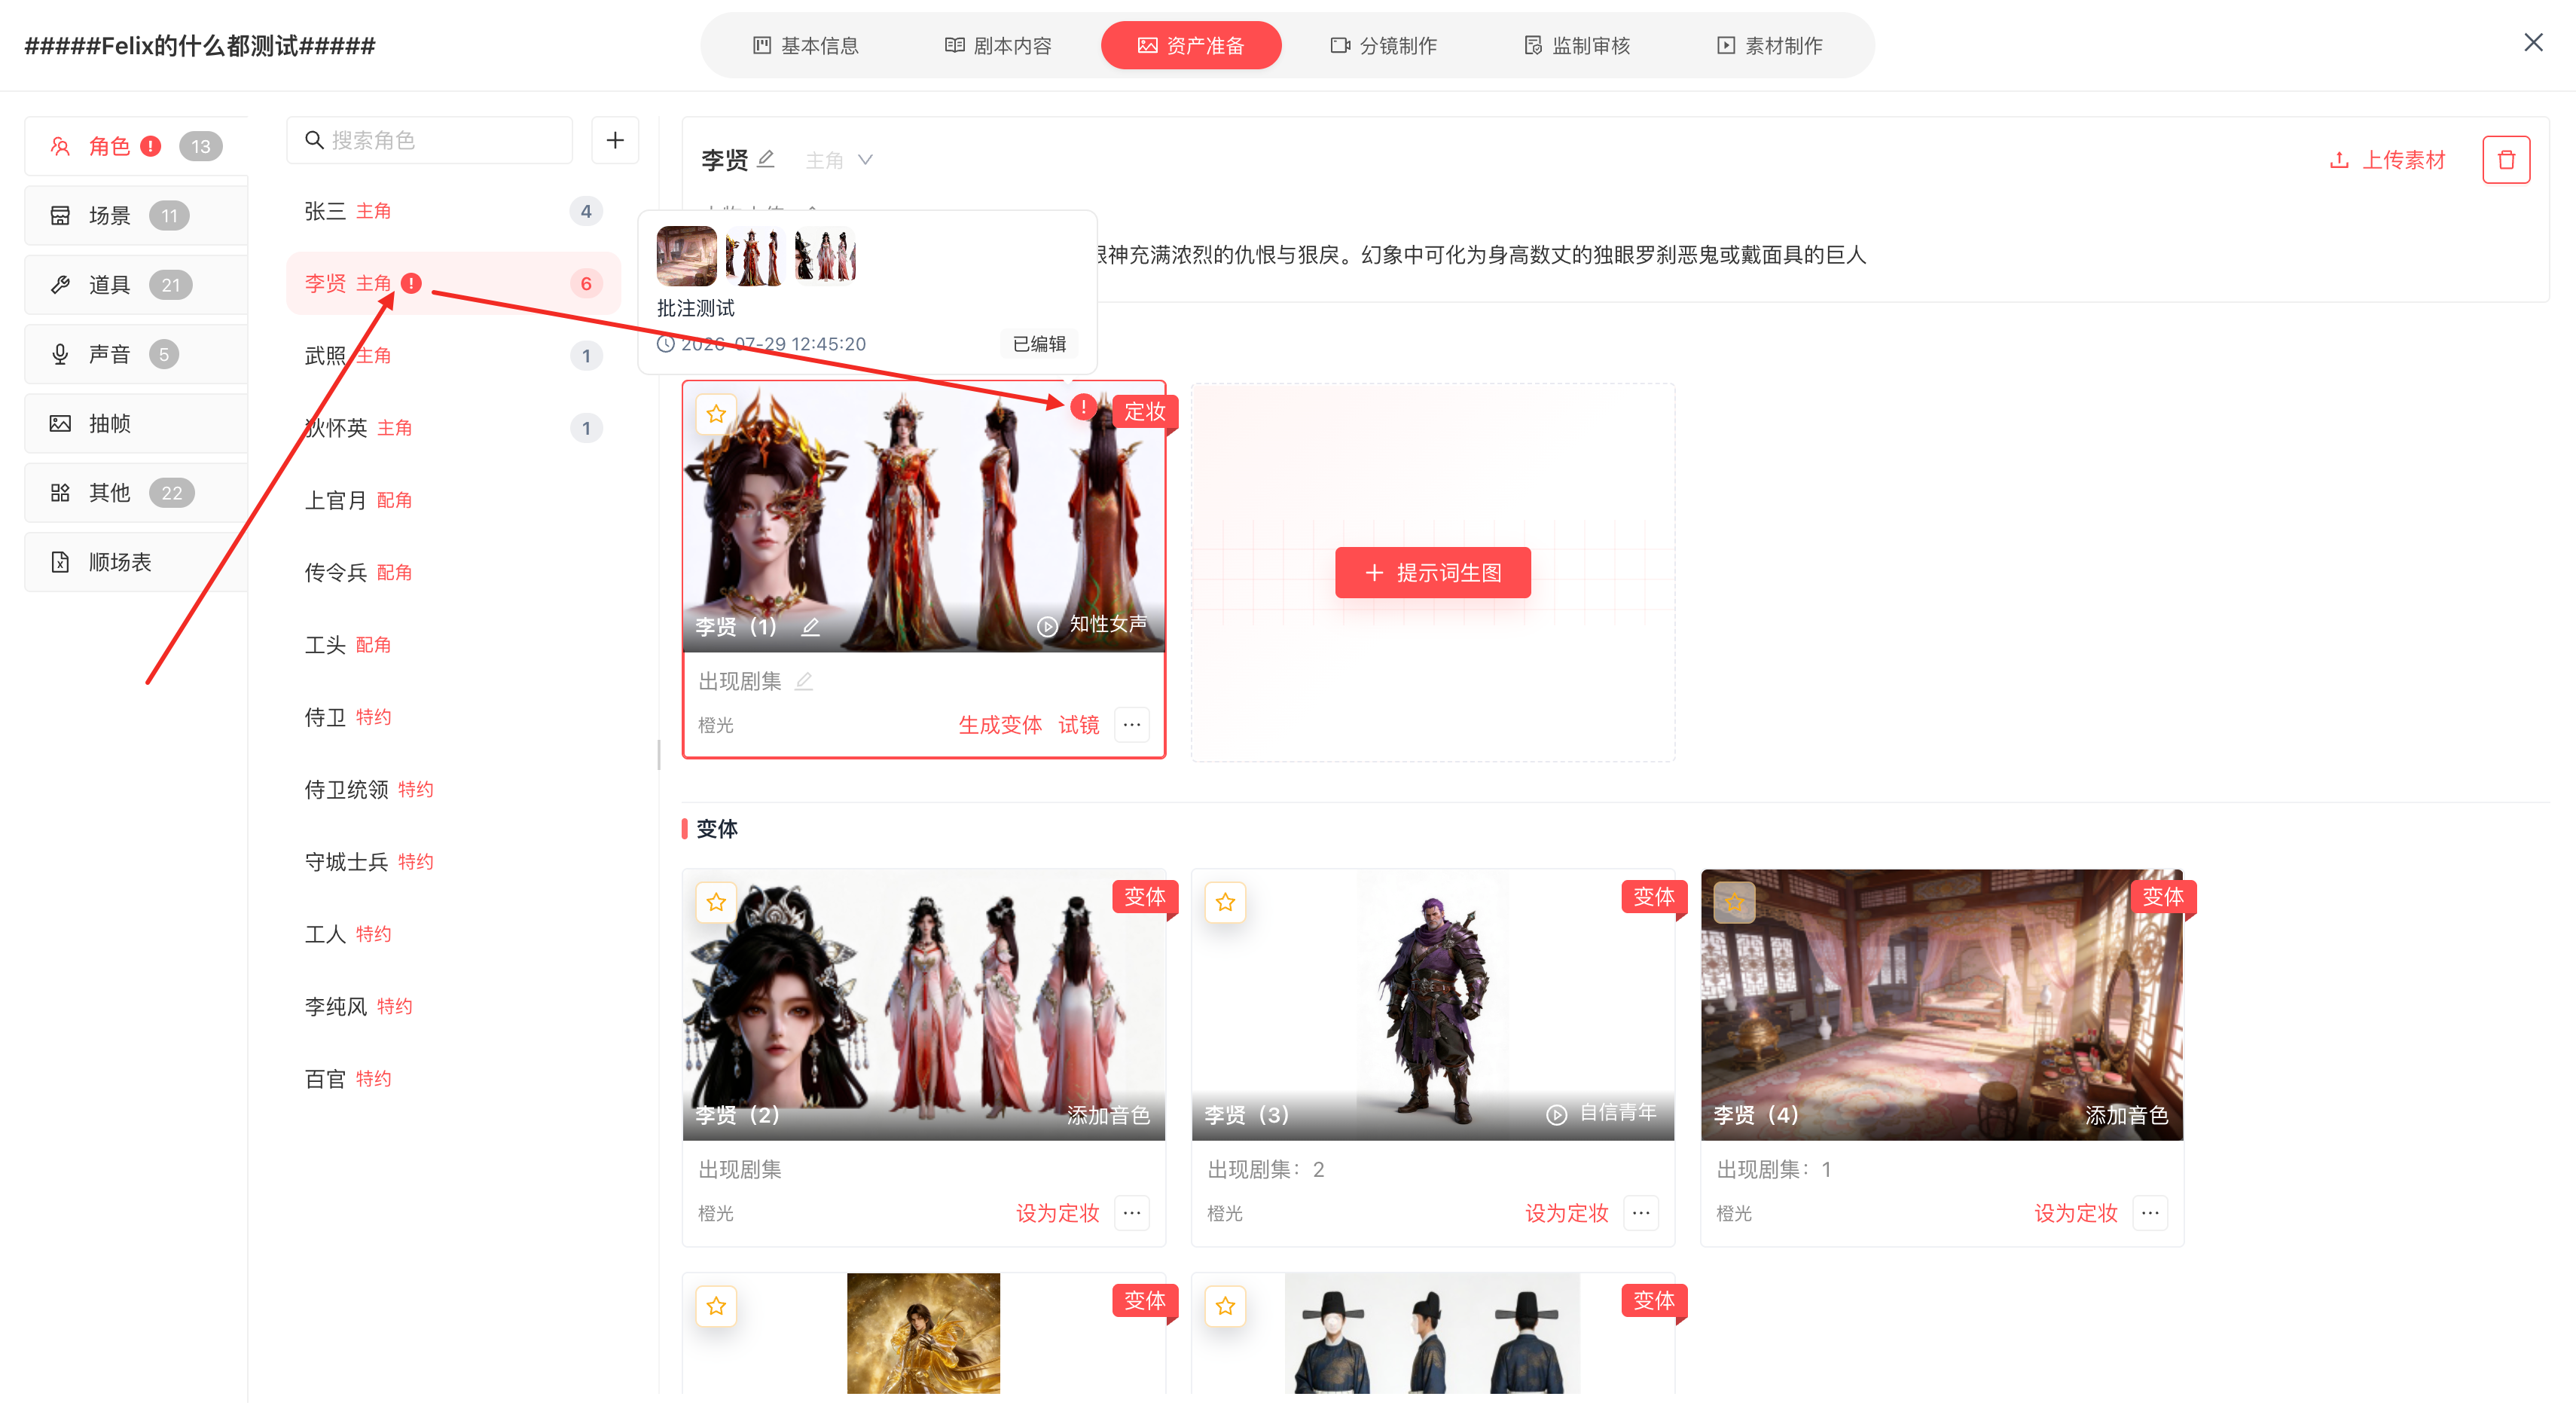
- Asset card - click to open the review dialog. Asset states:
- Pending: 「Reject, Approve」 buttons highlighted. Clicking 「Reject」 requires filling in annotation content — text + up to 3 images. The latest rejection annotation syncs to “Material Preparation - Asset List - specific asset image”, and producers can hover to view the supervisor’s suggestion; 「Approve」 is highlighted — it saves whether or not annotations exist (annotations are also saved if present)
- Rejected: only 「Approve」 highlighted
- Approved: only 「Reject」 highlighted
- Filters: by asset category, review status, asset author
8.6 Dailies Review
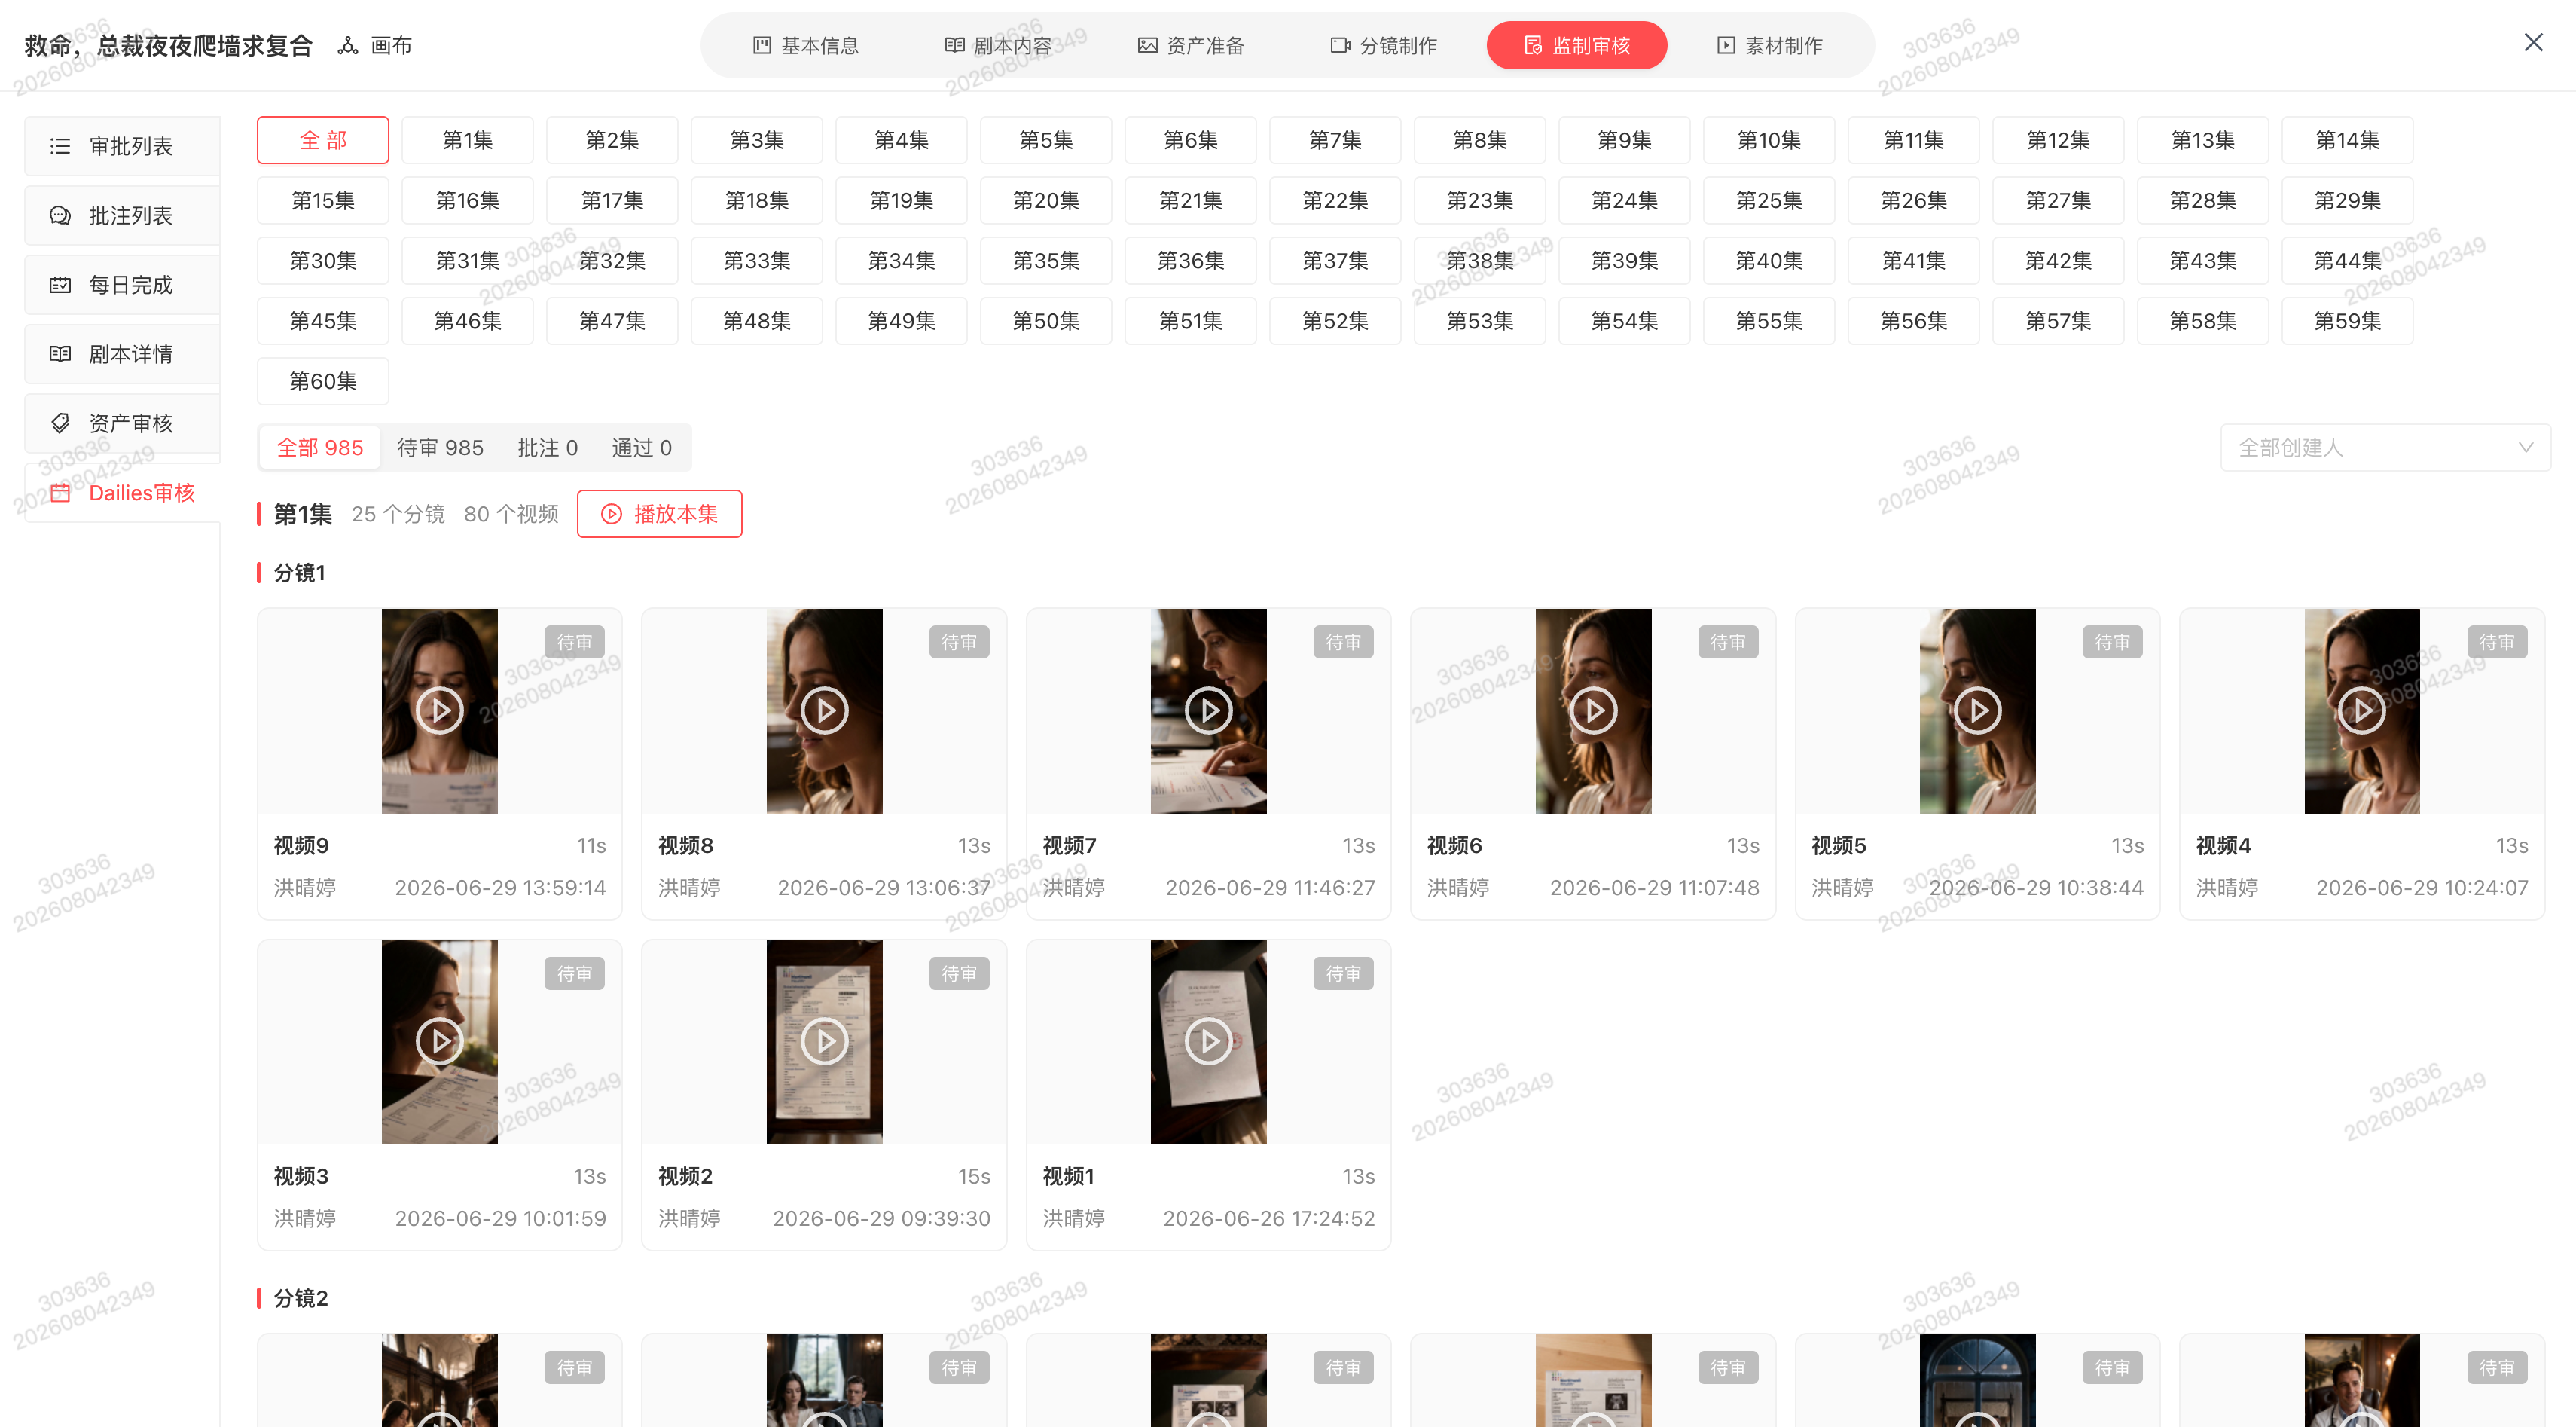
One-line summary: syncs videos generated by storyboard production so supervisors can watch daily sample videos and add suggestions — a front-loaded review process that helps the production team avoid risks early. This feature has no hard requirement for the production team to follow supervisor annotations; use per collaboration needs
- Video sync: only successfully generated videos are synced; only episodes with successful videos are shown
- Display & sorting:
- Shows all by default; filter by episode
- Sorting: by “episode - storyboard - video generation” in reverse order; videos sorted by generation time descending
- Video naming: named “Video 1, 2, 3…” in generation-time ascending order
- Play & review
- Episode continuous play: clicking the 「Play This Episode」 button on each episode pulls the latest video of every storyboard under that episode and plays them continuously for episode preview. Switch between storyboards/episodes; annotate the currently playing video with text + up to 3 images. The “Annotate” button only works when annotation content exists; clicking “Approve” works with or without annotations (annotations are also saved if present). For supervisor re-check only
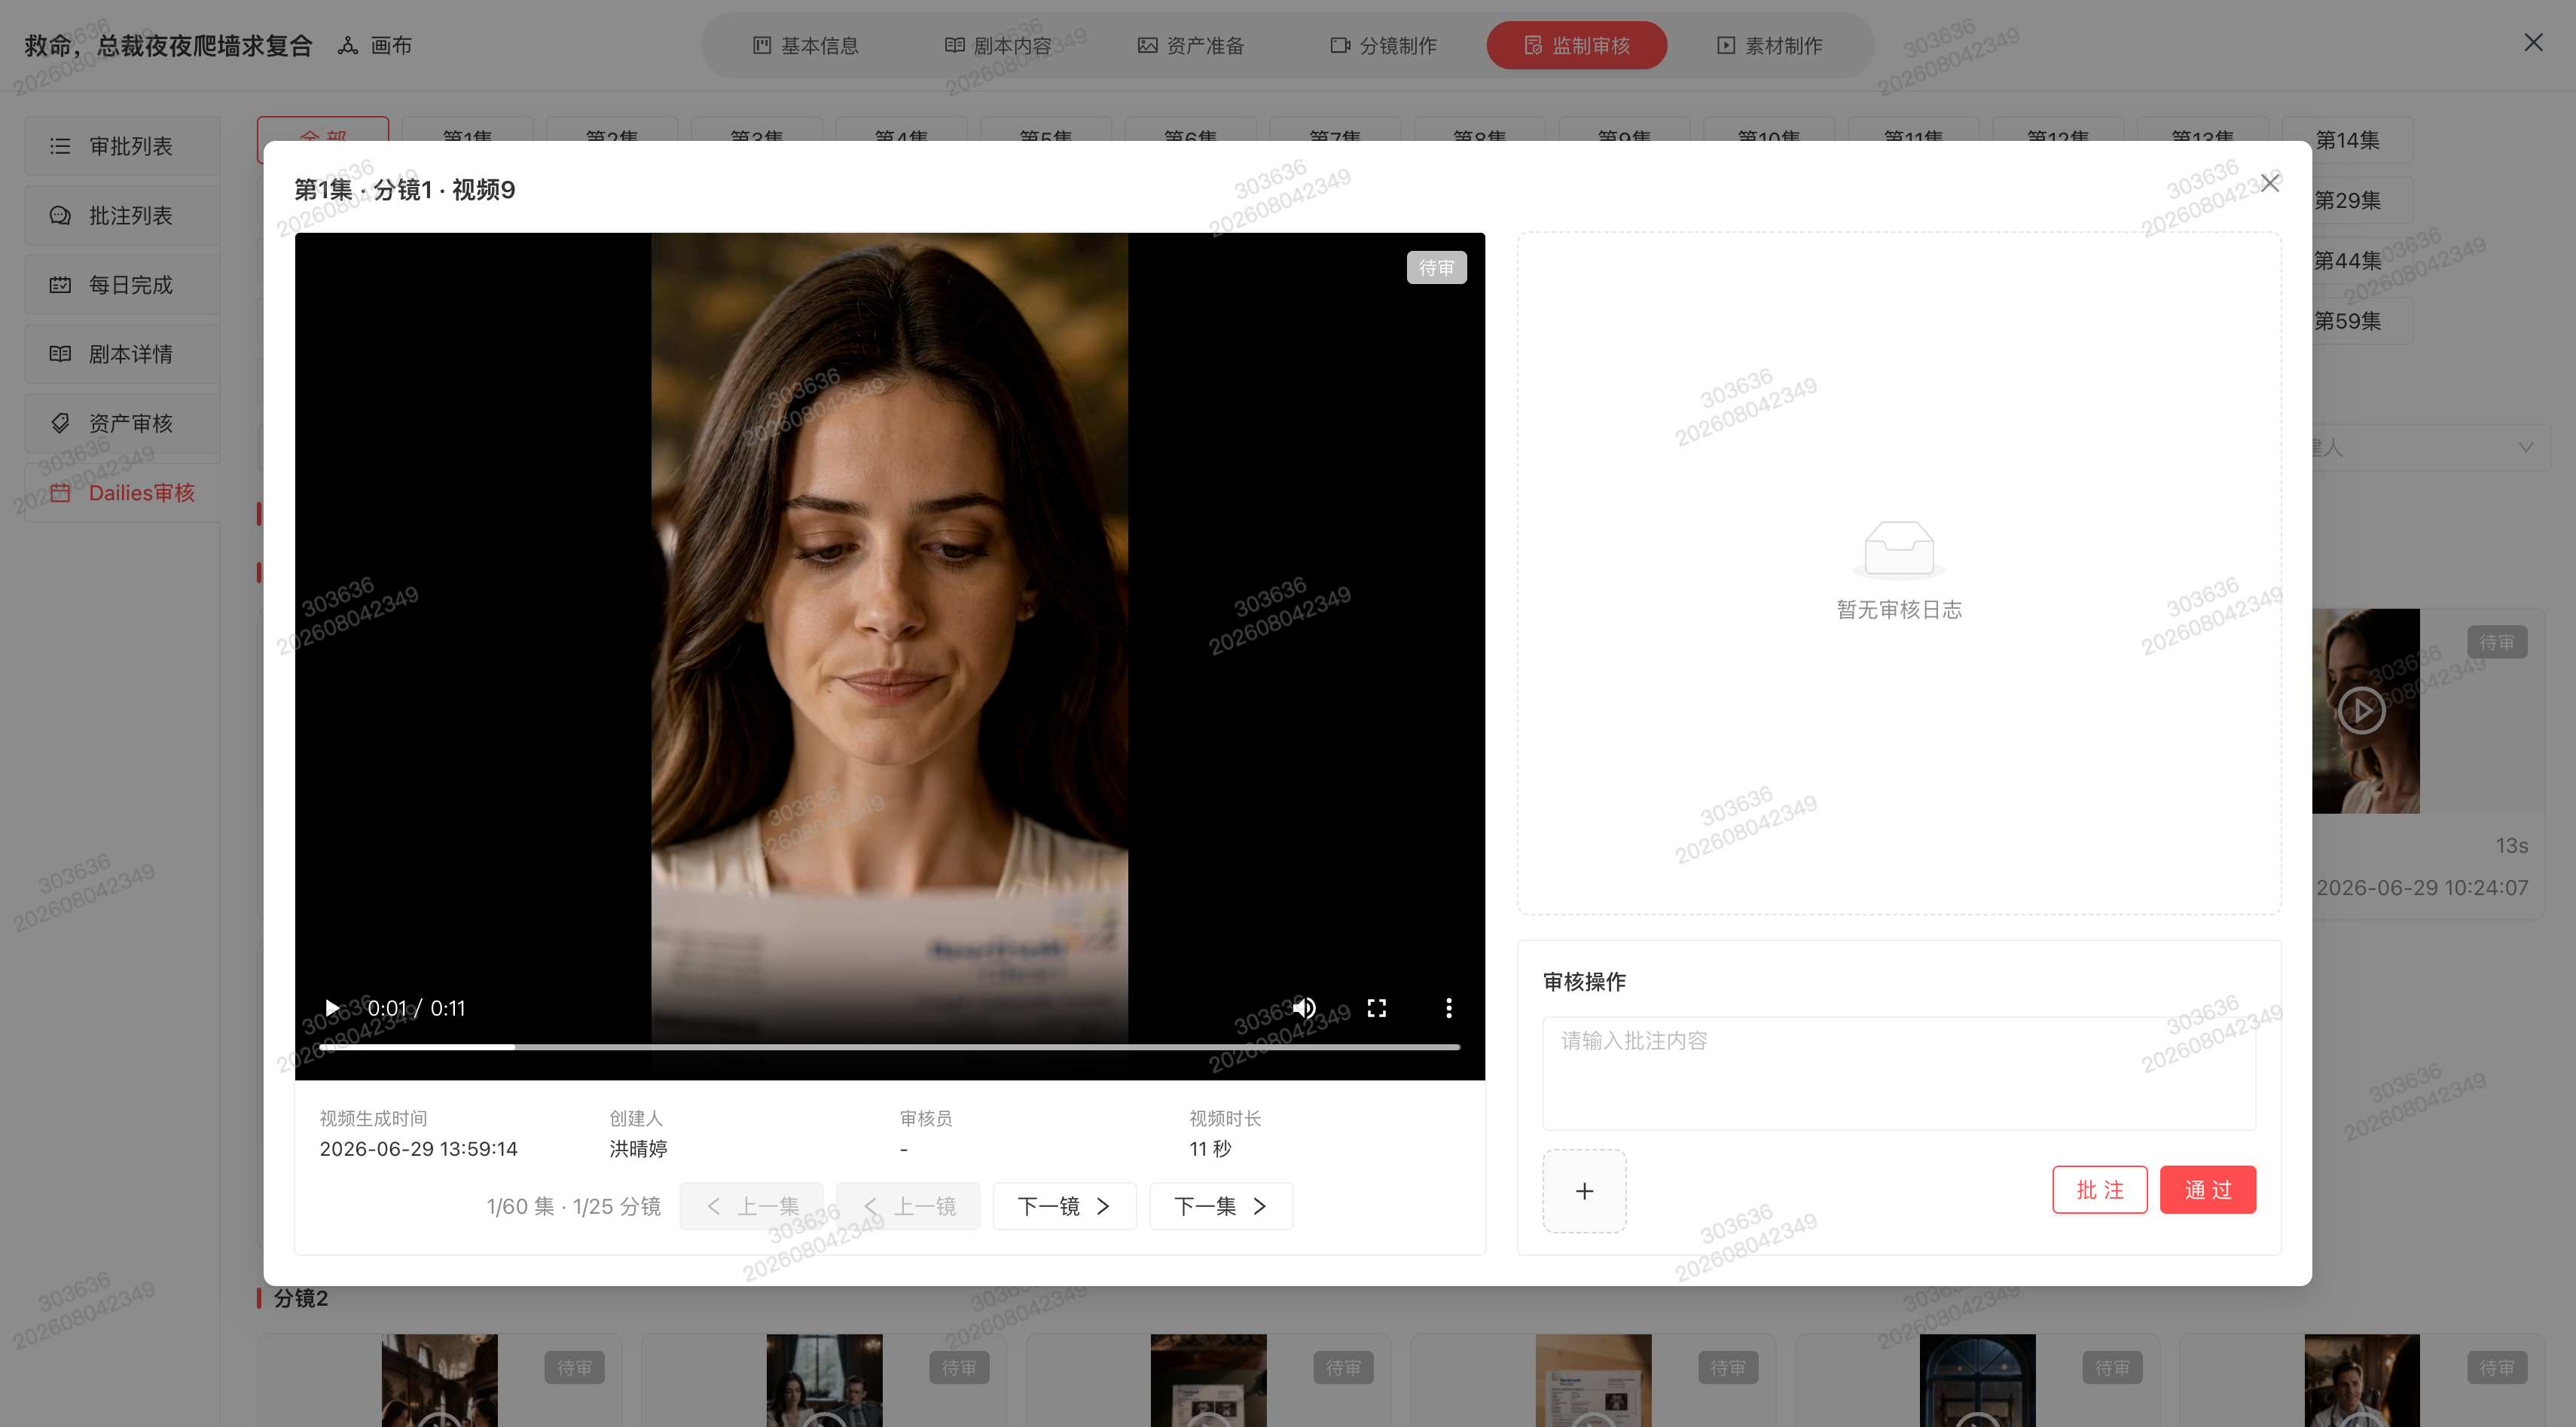
b. Storyboard continuous play: click a video card to open the video review dialog; pulls all videos under the current filter, supports switching between items, videos within the same storyboard, across storyboards, and across episodes; annotate the currently playing video with text + up to 3 images. “Annotate” requires annotation content; “Approve” works with or without. For supervisor re-check only
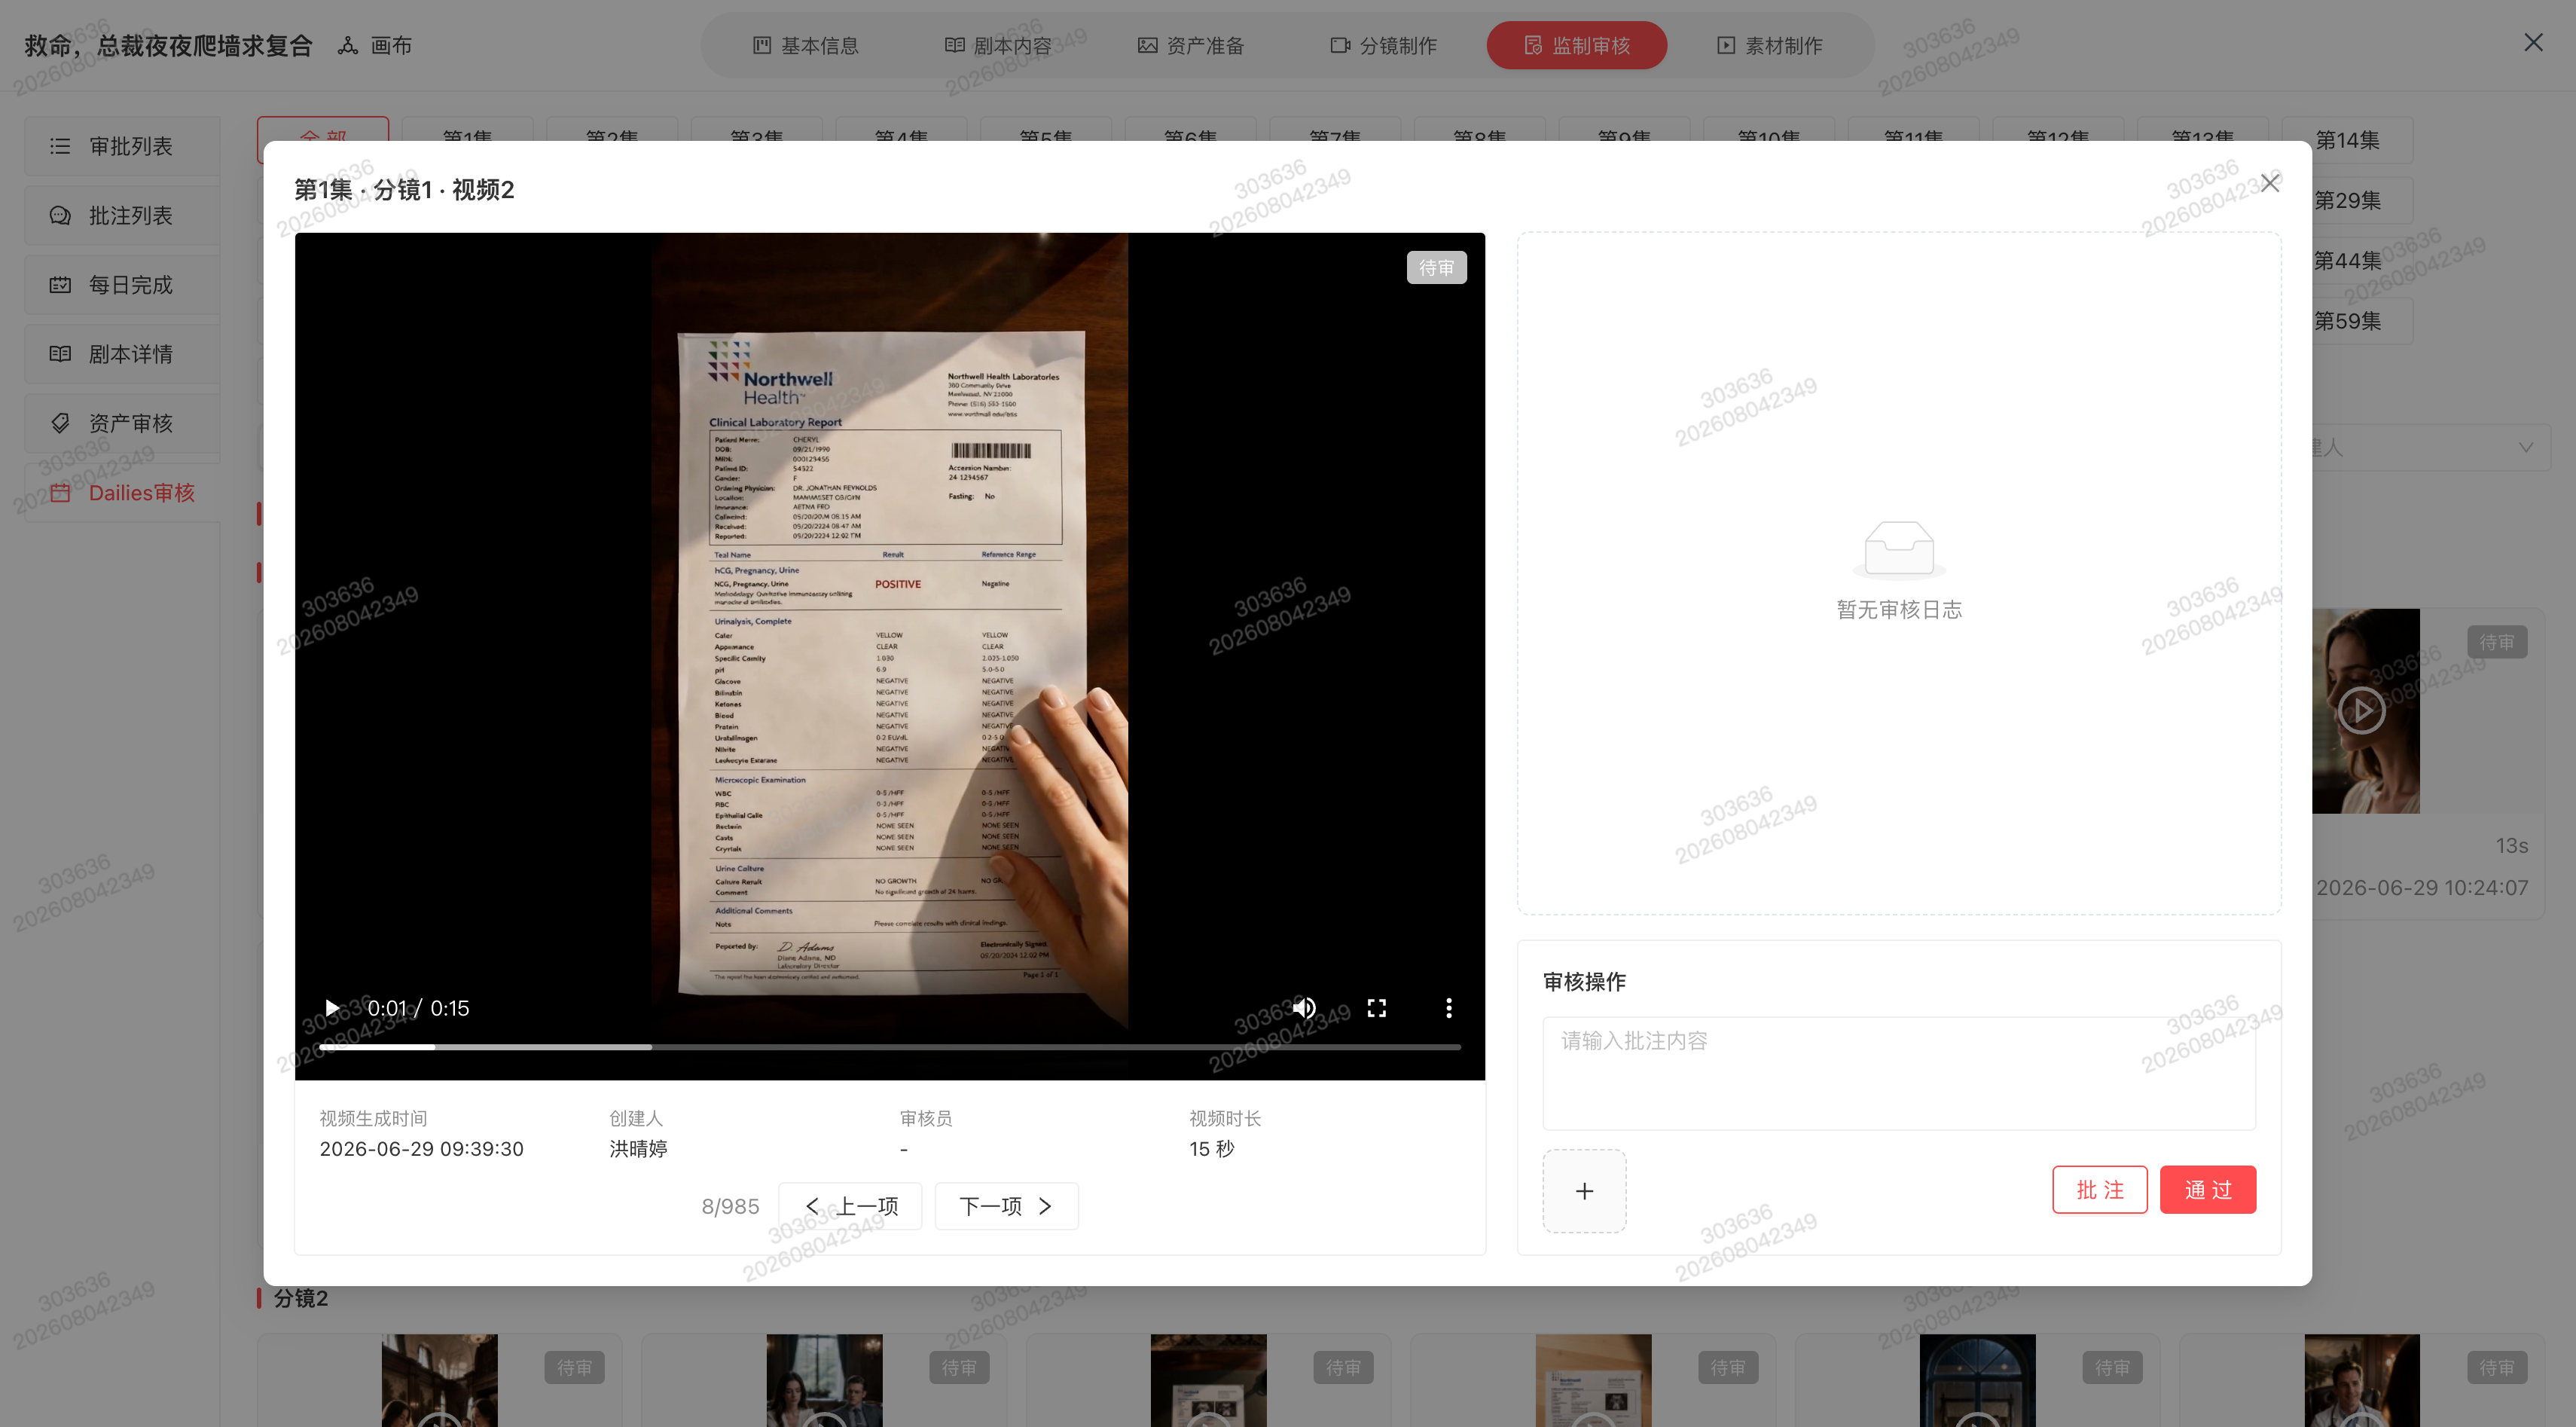
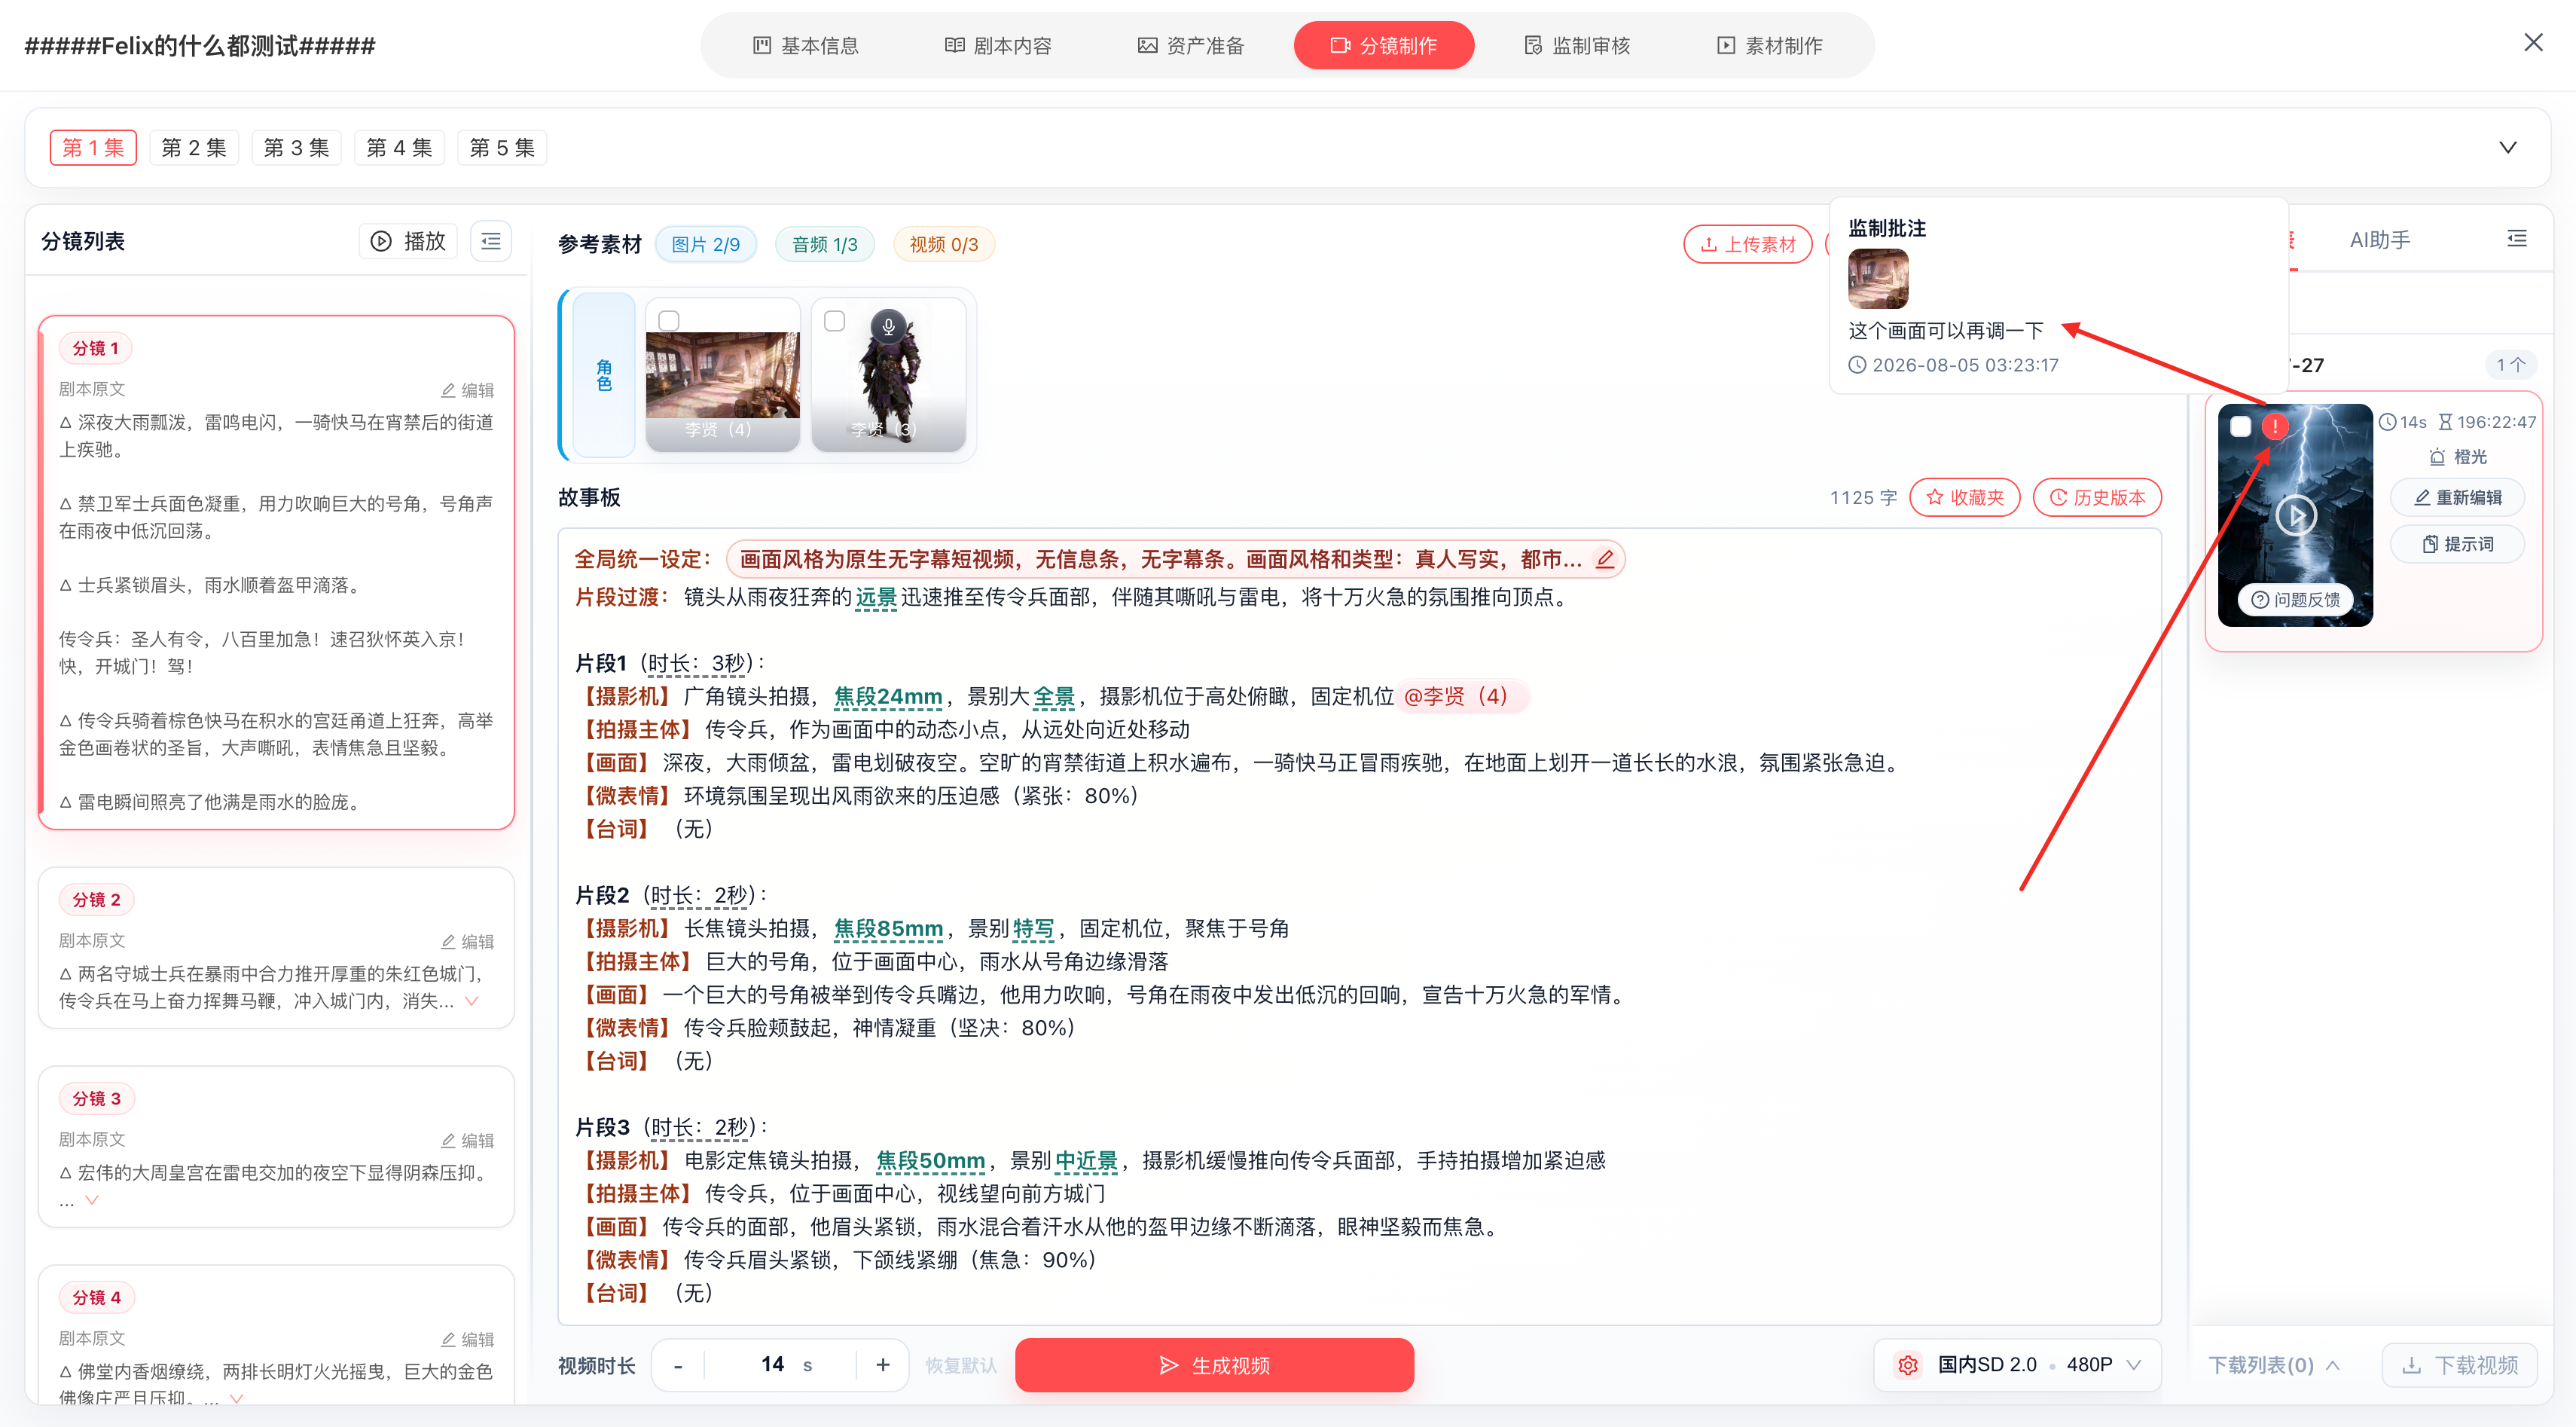
c. Annotations shown on videos: annotation info is reflected back onto the corresponding videos in “Storyboard Production”, shown on hover. Use per collaboration needs
IX. Team & Collaboration
9.1 Add Team Members
- Click Team Management > Member Accounts > Create Employee Account to add a new team member
- Preset 「Production」 permission; can associate multiple as needed
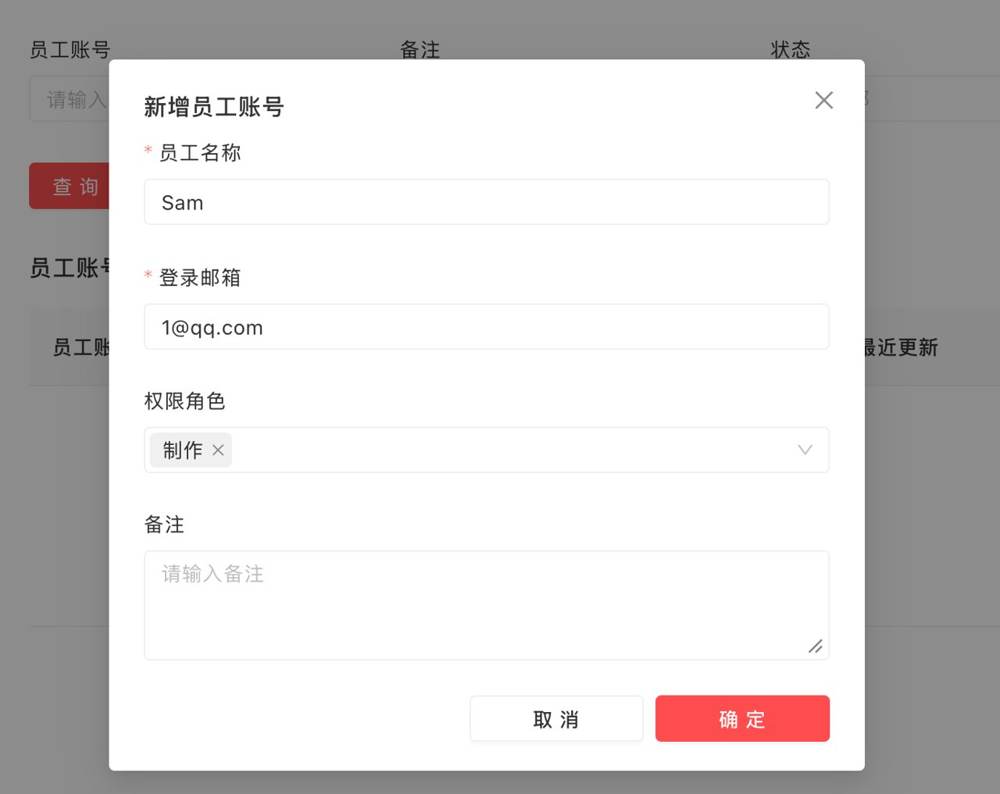
💡 Permission assignment advice: producers should only be assigned 「Production」 permission; reviewers assigned 「Review」 permission. Avoid one person having multiple permissions leading to mistakes (e.g., a reviewer accidentally modifying materials).
9.2 Invite Collaboration
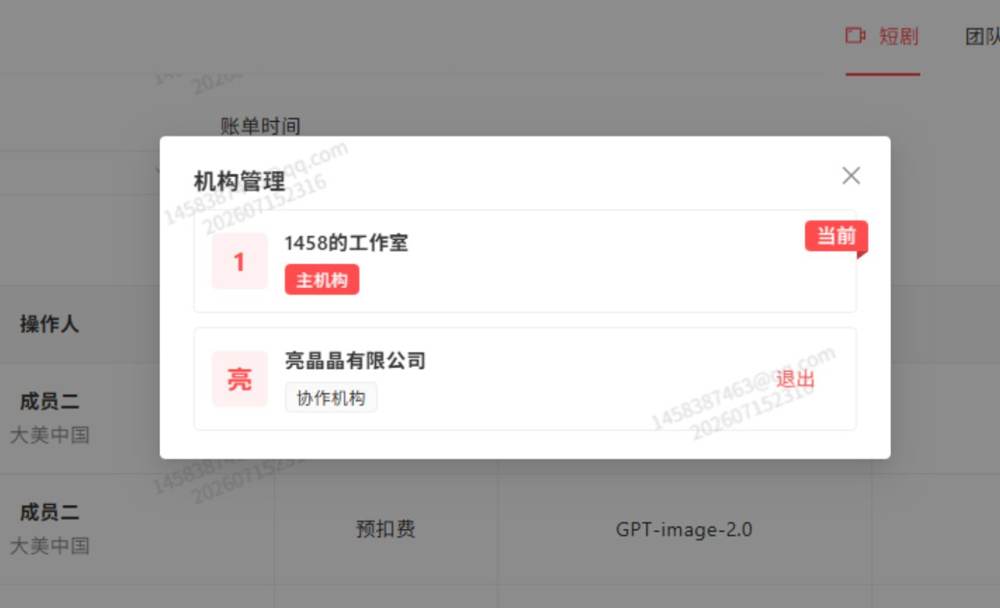
Mochuang adds a collaboration mechanism — users can be invited by multiple organizations to join collaboration.
9.3 Preset Role Library
Mochuang adds preset roles (platform-level role templates): during team collaboration, you can directly reuse saved role settings, avoiding repeated character design. They are cross-project shared role templates, different from the concrete roles in the current project (e.g., female/male lead) — preset roles are reusable assets accumulated for the team, while this show’s roles are specific characters in the current work.
X. Top-up & Management
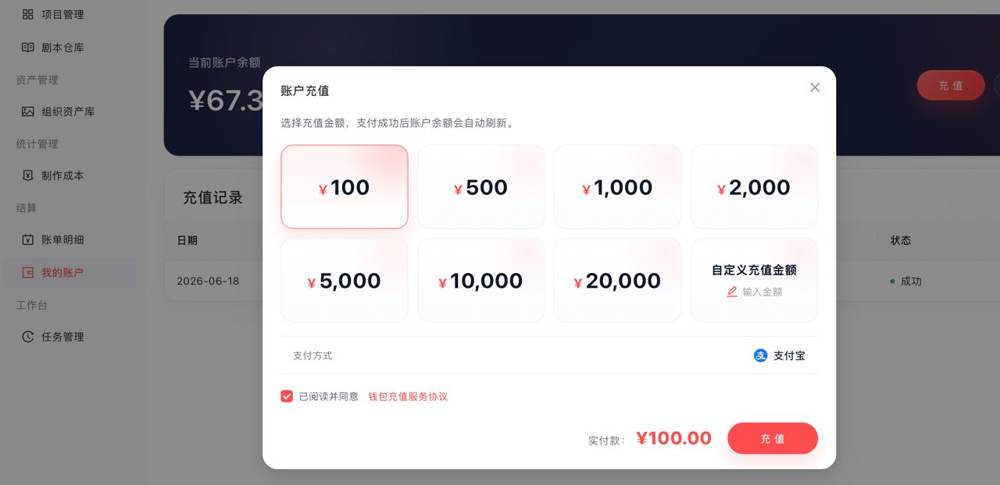
10.1 Online Top-up
My Account > Top Up to recharge online and replenish computing power anytime.
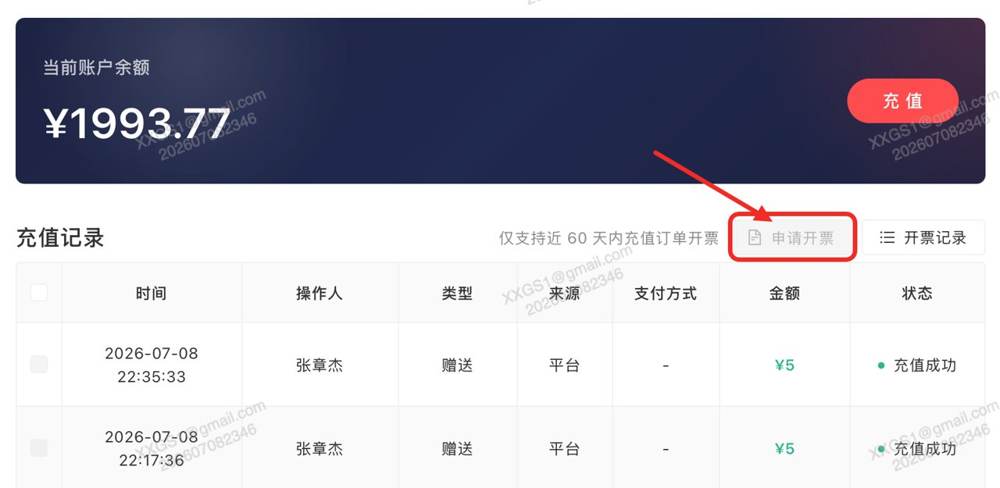
- Mochuang adds an invoice application feature
10.2 Billing Details
Query detailed consumption through the billing details.
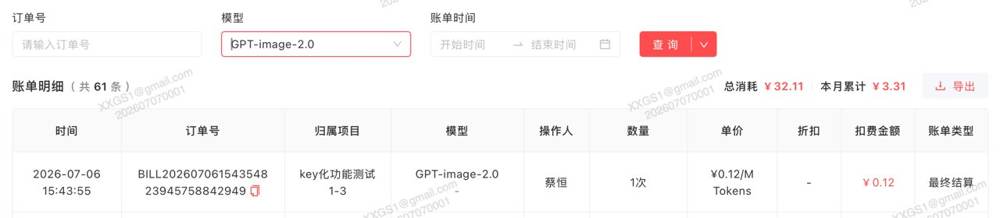
- Organization and project cost report names standardized, readability optimized
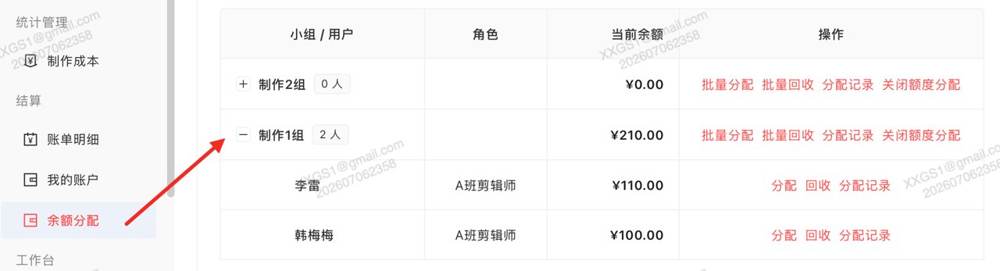
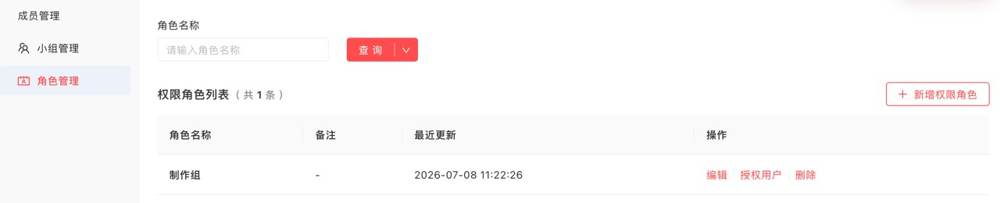
10.3 Balance Allocation
Allocate internal computing power through balance allocation and recycling.
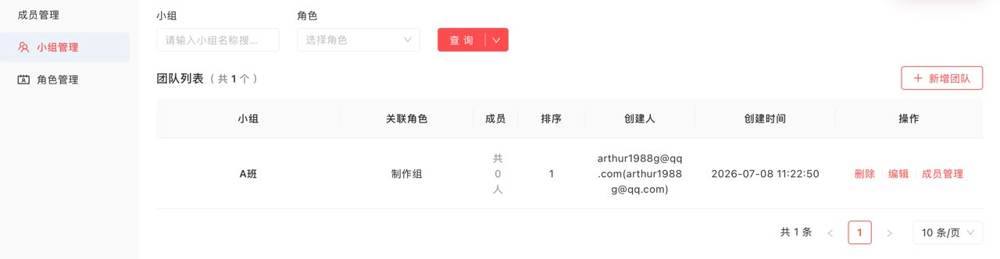
Preparation 1: create roles first; creating a group inherits the role’s permissions (skip if already created)
Preparation 2: create a group and add members first, to enable batch balance allocation (skip if already created)